Chapter 6: Using the Web Interface
140
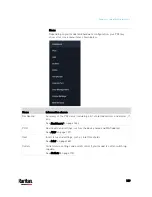
Menu
Information shown
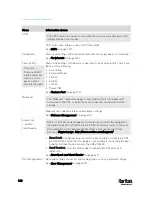
OCPs
The OCPs menu item appears only when there are overcurrent protectors
implemented on your model.
OCP status and settings, such as OCP thresholds.
See
OCPs
(on page 191).
Peripherals Status
and
settings of Raritan environmental sensor packages, if connected.
See
Peripherals
(on page 200).
Feature Port
The name
'Feature Port(s)'
will be replaced
with one of the
device names
listed to the right
Status and settings of the device connected to the Feature port(s), which can
be one of the following.
Asset Strip
External Beeper
LHX 20
SHX 30
LHX 40
Power CIM
See
Feature Port
(on page 219).
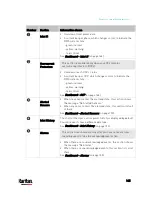
Webcams
The 'Webcams' menu item appears only when there is any webcam(s)
connected to the PX3, or when there are snapshots saved onto the PX3
already.
Webcam live snapshots/video and webcam settings.
See
Webcam Management
(on page 413).
SmartLock
-- and/or --
Card Readers
Either or both menu items appear only when you connect the equipment
included in a Raritan's SmartLock kit to PX3. For details, refer to the user
documentation accompanying the SmartLock kit or download it from
Raritan's
Support page
(
SmartLock: Configures and controls the door handles connected to PX3
via DX2-DH2C2. Note that this page is not available if connecting the door
handles to other Raritan sensors than DX2-DH2C2.
Card Readers: Lists the card readers connected to PX3 directly or
indirectly.
See
SmartLock and Card Reader
User Management
Data and settings of user accounts and groups, such as password change.
See
User Management
(on page 237).
Содержание PX3-3000 series
Страница 5: ......
Страница 18: ...Contents xviii Index 841...
Страница 66: ...Chapter 3 Initial Installation and Configuration 42 Number Device role Master device Slave 1 Slave 2 Slave 3...
Страница 93: ...Chapter 4 Connecting External Equipment Optional 69...
Страница 787: ...Appendix J RADIUS Configuration Illustration 763 Note If your PX3 uses PAP then select PAP...
Страница 788: ...Appendix J RADIUS Configuration Illustration 764 10 Select Standard to the left of the dialog and then click Add...
Страница 789: ...Appendix J RADIUS Configuration Illustration 765 11 Select Filter Id from the list of attributes and click Add...
Страница 792: ...Appendix J RADIUS Configuration Illustration 768 14 The new attribute is added Click OK...
Страница 793: ...Appendix J RADIUS Configuration Illustration 769 15 Click Next to continue...
Страница 823: ...Appendix K Additional PX3 Information 799...
Страница 853: ...Appendix L Integration 829 3 Click OK...


