


678
If a TFTP server is available, you can use it and appropriate configuration
files to perform any or all of the following tasks for a large number of
PX3 devices in the same network.
Initial deployment
Configuration changes
Firmware upgrade
Downloading diagnostic data
This feature is drastically useful if you have hundreds or even thousands
of PX3 devices to configure or upgrade.
Warning: The feature of bulk configuration or firmware upgrade via
DHCP/TFTP only works on standalone PX3 devices directly connected
to the network. This feature does NOT work for slave devices in the
USB-cascading configuration.
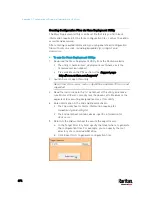
Tip: For the other alternative, see
Configuration or Firmware Upgrade
with a USB Drive
(on page 664).
In This Chapter
Bulk Configuration/Upgrade Procedure................................................. 678
TFTP Requirements ................................................................................ 679
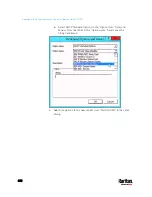
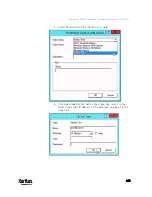
DHCP IPv4 Configuration in Windows..................................................... 680
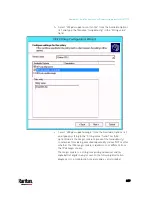
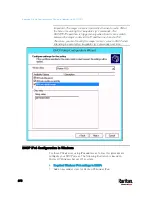
DHCP IPv6 Configuration in Windows..................................................... 690
DHCP IPv4 Configuration in Linux .......................................................... 697
DHCP IPv6 Configuration in Linux .......................................................... 699
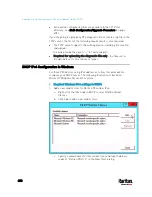
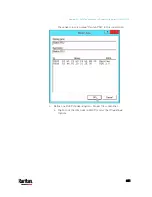
Bulk Configuration/Upgrade Procedure
The DHCP/TFTP feature is supported as of release 3.1.0 so make sure
that all PX3 devices which you want to configure or upgrade are running
firmware version 3.1.0 or later.
Steps of using DHCP/TFTP for bulk configuration/upgrade:
1.
Create configuration files specific to your PX3 models and firmware
versions. See
Configuration Files
(on page 666) or contact Raritan
Technical Support to properly prepare some or all of the following
files:
fwupdate.cfg (always required)
Appendix D Bulk Configuration or Firmware
Upgrade via DHCP/TFTP
Содержание PX3-3000 series
Страница 5: ......
Страница 18: ...Contents xviii Index 841...
Страница 66: ...Chapter 3 Initial Installation and Configuration 42 Number Device role Master device Slave 1 Slave 2 Slave 3...
Страница 93: ...Chapter 4 Connecting External Equipment Optional 69...
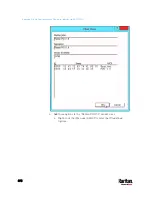
Страница 787: ...Appendix J RADIUS Configuration Illustration 763 Note If your PX3 uses PAP then select PAP...
Страница 788: ...Appendix J RADIUS Configuration Illustration 764 10 Select Standard to the left of the dialog and then click Add...
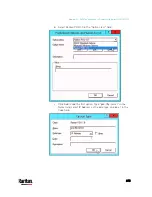
Страница 789: ...Appendix J RADIUS Configuration Illustration 765 11 Select Filter Id from the list of attributes and click Add...
Страница 792: ...Appendix J RADIUS Configuration Illustration 768 14 The new attribute is added Click OK...
Страница 793: ...Appendix J RADIUS Configuration Illustration 769 15 Click Next to continue...
Страница 823: ...Appendix K Additional PX3 Information 799...
Страница 853: ...Appendix L Integration 829 3 Click OK...


