Chapter 6: Using the Web Interface
341
To start a new line in the text box, press Enter.
Note: In case you need to type any square brackets "[" and "]" in the
custom message for non-placeholder words, always add a backslash
in front of the square bracket. That is, \[ or \]. Otherwise, the
message sent will not display the square brackets.
Send Sensor Report
You may set the PX3 so that it automatically reports the latest readings
or states of one or multiple sensors by sending a message or email or
simply recording the report in a log. These sensors can be either internal
or environmental sensors as listed below.
Inlet sensors, including RMS current, RMS voltage, active power,
apparent power, power factor and active energy.
Outlet sensors, including RMS current, RMS voltage, active power,
apparent power, power factor, active energy and outlet state (for
outlet-switching capable PDUs only).
Overcurrent protector sensors, including RMS current and tripping
state.
Peripheral device sensors, which can be any Raritan environmental
sensor packages connected to the PX3, such as temperature or
humidity sensors.
An example of this action is available in the section titled
Send Sensor
Report Example
(on page 353).
Operation:
1.
Choose Device Settings > Event Rules >
.
2.
Select "Send sensor report" from the Action list.
3.
In the Destination Actions section, select the method(s) to report
sensor readings or states. The number of available methods varies,
depending on how many messaging actions have been created.
The messaging action types include:
Log event message
Syslog message
Send email
Send SMS message
a.
If no messaging actions are available, create them now. See
Available Actions
(on page 332).
b.
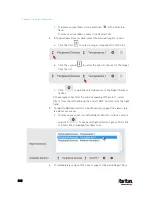
To select any methods, select them one by one in the Available
field.
To add all available methods, simply click Select All.
Содержание PX3-3000 series
Страница 5: ......
Страница 18: ...Contents xviii Index 841...
Страница 66: ...Chapter 3 Initial Installation and Configuration 42 Number Device role Master device Slave 1 Slave 2 Slave 3...
Страница 93: ...Chapter 4 Connecting External Equipment Optional 69...
Страница 787: ...Appendix J RADIUS Configuration Illustration 763 Note If your PX3 uses PAP then select PAP...
Страница 788: ...Appendix J RADIUS Configuration Illustration 764 10 Select Standard to the left of the dialog and then click Add...
Страница 789: ...Appendix J RADIUS Configuration Illustration 765 11 Select Filter Id from the list of attributes and click Add...
Страница 792: ...Appendix J RADIUS Configuration Illustration 768 14 The new attribute is added Click OK...
Страница 793: ...Appendix J RADIUS Configuration Illustration 769 15 Click Next to continue...
Страница 823: ...Appendix K Additional PX3 Information 799...
Страница 853: ...Appendix L Integration 829 3 Click OK...


