


Chapter 8: Using the Command Line Interface
620
Power Control Operations
This section applies to outlet-switching capable models only.
Outlets on the PX3 device can be turned on or off or power cycled
through the CLI.
Besides, you can cancel the power-on process while the PX3 is powering
on ALL outlets.
You must perform this operation in the
administrator mode. See
Different CLI Modes and Prompts
(on page 447).
Turning On the Outlet(s)
This section applies to outlet-switching capable models only.
This command turns on one or multiple outlets.
#
power outlets <numbers> on
To quicken the operation, you can add the parameter "/y" to the end of
the command, which confirms the operation.
#
power outlets <numbers> on
/y
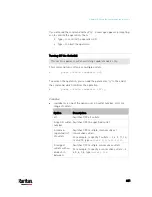
Variables:
<numbers> is one of the options:
all, an outlet number, a list or a
range of outlets.
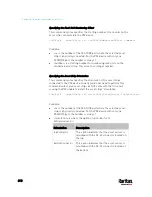
Option
Description
all
Switches ON all outlets.
A specific outlet
number
Switches ON the specified outlet.
A comma-
separated list
of outlets
Switches ON multiple, inconsecutive or
consecutive outlets.
For example, to specify 7 outlets -- 2, 4, 9, 11, 12,
13 and 15, type
outlets 2,4,9,11-13,15
.
A range of
outlets with an
en dash in
between
Switches ON multiple, consecutive outlets.
For example, to specify 6 consecutive outlets -- 3,
4, 5, 6, 7, 8, type
outlets 3-8
.
Содержание PX3-3000 series
Страница 5: ......
Страница 18: ...Contents xviii Index 841...
Страница 66: ...Chapter 3 Initial Installation and Configuration 42 Number Device role Master device Slave 1 Slave 2 Slave 3...
Страница 93: ...Chapter 4 Connecting External Equipment Optional 69...
Страница 787: ...Appendix J RADIUS Configuration Illustration 763 Note If your PX3 uses PAP then select PAP...
Страница 788: ...Appendix J RADIUS Configuration Illustration 764 10 Select Standard to the left of the dialog and then click Add...
Страница 789: ...Appendix J RADIUS Configuration Illustration 765 11 Select Filter Id from the list of attributes and click Add...
Страница 792: ...Appendix J RADIUS Configuration Illustration 768 14 The new attribute is added Click OK...
Страница 793: ...Appendix J RADIUS Configuration Illustration 769 15 Click Next to continue...
Страница 823: ...Appendix K Additional PX3 Information 799...
Страница 853: ...Appendix L Integration 829 3 Click OK...


