Chapter 5: Introduction to PDU Components
90
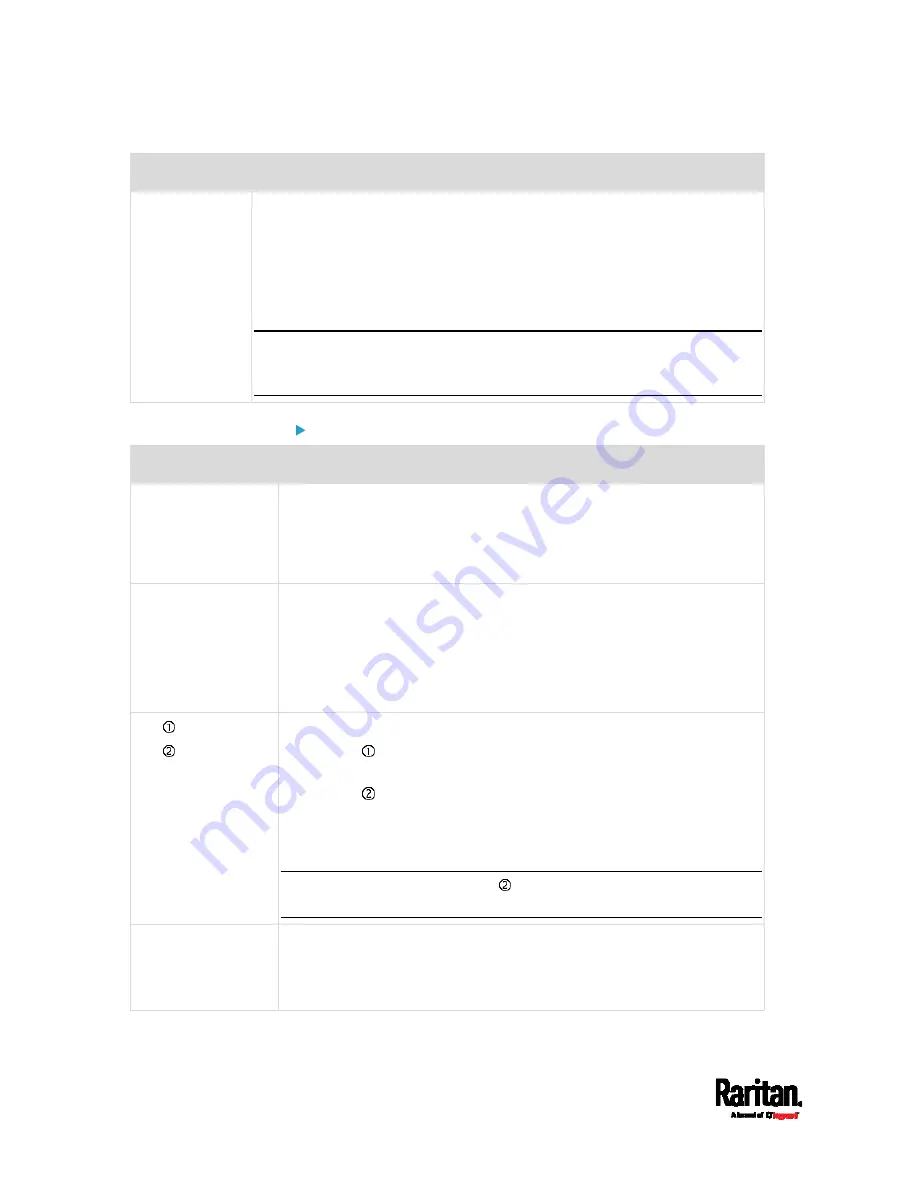
Port
Used for...
ETHERNET
Connecting the PX3 to your company's network via a standard network
patch cable (Cat5e/6). This connection is necessary to administer or access
the PX3 remotely.
There are two small LEDs adjacent to the port:
Green indicates a physical link and activity.
Yellow indicates communications at 10/100 BaseT speeds.
Note: Connection to this port is not required if wireless connection is
preferred, or if the PX3 is a slave device in the USB-cascading
configuration. See
Cascading PX3 via USB
(on page 38).
PX3-iX7 models:
Port
Used for
USB-A,
USB-B,
FEATURE,
SENSOR
Same functions as above.
CONSOLE/MODEM
(RJ-45)
Same function as the one on PX3 models. See above.
Note that the CONSOLE/MODEM port on the iX7
™
PDU is an RJ-45
connector instead of a DB9 connector. Therefore, use a third-party
RJ-45 to DB9 adapter/cable to connect iX7
™
to the computer. See
RJ45-to-DB9 Cable Requirements for Computer Connections (for
iX7
™
Only)
(on page 34).
ETH 10/100/1000,
ETH 10/100
iX7
™
has two Ethernet ports.
ETH 10/100/1000 (marked in
green) supports up to 1000 Mbps.
This is "ETH1".
ETH 10/100 (marked in
white) supports up to 100 Mbps. This is
"ETH2".
You can use either Ethernet port for network connection or cascading.
See
Extended Cascading with PX3-iX7 Models
(on page 41).
Note: The yellow LED of the ETH 10/100 port has NO function so it will
not be lit regardless of the communication status.
EXPANSION
Connecting to the EXPANSION port of another iX7
™
so that the power
supply to either iX7
™
controller will continue whenever power failure
occurs on the inlet of one iX7
™
PDU. See
Power-Sharing Restrictions
and Connection (for iX7
™
Only)
(on page 47).
Содержание PX3-3000 series
Страница 5: ......
Страница 18: ...Contents xviii Index 841...
Страница 66: ...Chapter 3 Initial Installation and Configuration 42 Number Device role Master device Slave 1 Slave 2 Slave 3...
Страница 93: ...Chapter 4 Connecting External Equipment Optional 69...
Страница 787: ...Appendix J RADIUS Configuration Illustration 763 Note If your PX3 uses PAP then select PAP...
Страница 788: ...Appendix J RADIUS Configuration Illustration 764 10 Select Standard to the left of the dialog and then click Add...
Страница 789: ...Appendix J RADIUS Configuration Illustration 765 11 Select Filter Id from the list of attributes and click Add...
Страница 792: ...Appendix J RADIUS Configuration Illustration 768 14 The new attribute is added Click OK...
Страница 793: ...Appendix J RADIUS Configuration Illustration 769 15 Click Next to continue...
Страница 823: ...Appendix K Additional PX3 Information 799...
Страница 853: ...Appendix L Integration 829 3 Click OK...


