


Appendix G: Old PX3 Character LCD Display
733
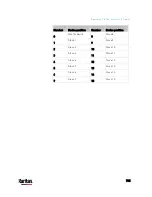
Section
Example information
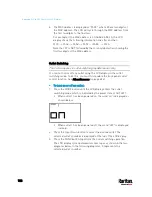
"1" refers to the asset strip connected to the first
FEATURE port.
This symbol
indicates that you can switch between
diverse rack units now by pressing the Up or Down
button.
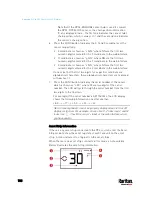
"30" indicates that the selected target is the 30th rack
unit.
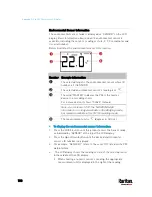
The word "MASTER" indicates the PX3 is the master
device in a cascading chain.
For a slave device, it shows "SLAVE" instead.
Note: As of release 3.3.10, the "MASTER/SLAVE"
information is no longer available in the Bridging mode,
but remains available in the Port Forwarding mode.
"ASSET" means that the LCD display enters the Asset
Strip mode.
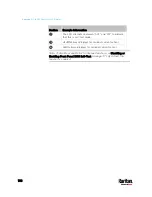
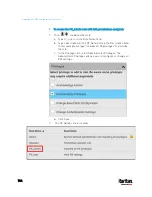
To display the asset management information:
1.
Press the MODE button until the PX3 enters the Asset Strip mode, as
indicated by "ASSET" to the right of the LCD.
2.
By default the PX3 selects the asset strip connected to the first
FEATURE port so it shows "1" at the top. Because the PX3 has only
one FEATURE port, "1" is the only option.
3.
Press the FUNC button. When a blinking double-arrow symbol
appears to the left of the LCD display, press the Up or Down button
to select the desired rack unit on the asset strip. The rack unit
number appears in the middle of the LCD display.
Note: Press and hold the Up or Down button for at least two (2)
seconds to quickly move through several items at once.
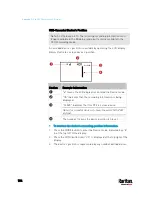
If the word "ALARM" appears below the rack unit number, it
means no asset tag is physically connected to that rack unit.
If the word "ALARM" does NOT appear, it means a connected
asset tag is detected on the rack unit.
Содержание PX3-3000 series
Страница 5: ......
Страница 18: ...Contents xviii Index 841...
Страница 66: ...Chapter 3 Initial Installation and Configuration 42 Number Device role Master device Slave 1 Slave 2 Slave 3...
Страница 93: ...Chapter 4 Connecting External Equipment Optional 69...
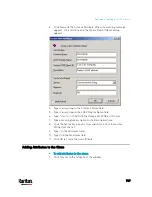
Страница 787: ...Appendix J RADIUS Configuration Illustration 763 Note If your PX3 uses PAP then select PAP...
Страница 788: ...Appendix J RADIUS Configuration Illustration 764 10 Select Standard to the left of the dialog and then click Add...
Страница 789: ...Appendix J RADIUS Configuration Illustration 765 11 Select Filter Id from the list of attributes and click Add...
Страница 792: ...Appendix J RADIUS Configuration Illustration 768 14 The new attribute is added Click OK...
Страница 793: ...Appendix J RADIUS Configuration Illustration 769 15 Click Next to continue...
Страница 823: ...Appendix K Additional PX3 Information 799...
Страница 853: ...Appendix L Integration 829 3 Click OK...


