


Appendix K: Additional PX3 Information
801
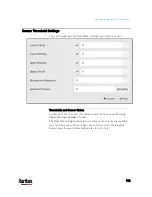
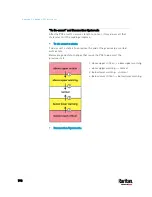
Assumption:
Upper Warning threshold is enabled.
Upper Warning = 20 (degrees Celsius)
Deassertion Hysteresis = 3 (degrees Celsius)
"Deassertion" level = 20-3 = 17 (degrees Celsius)
When the PX3 detects that a temperature sensor's reading drops below
20 degrees Celsius, moving from the "above upper warning" range to the
"normal" range, either of the following may occur:
If the temperature falls between 20 and 17 degrees Celsius, the PX3
does NOT perform the "deassertion" action.
If the temperature drops to 17 degrees Celsius or lower, the PX3
performs the "deassertion" action to announce the end of the "above
upper warning" state.
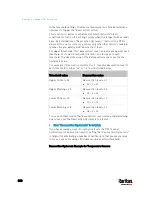
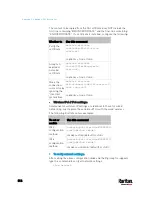
Default Voltage and Current Thresholds
The following are factory-default voltage and current thresholds applied
to a Raritan power product. There are no default values set for
lower
current thresholds because lower thresholds are not useful.
Availability of diverse thresholds depends on the capability of the model
you purchased.
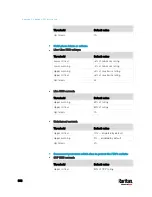
Single-phase inlets or outlets:
RMS voltage:
Threshold
Default value
Lower critical
-6% of minimum rating
Lower warning
-3% of minimum rating
Upper warning
+3% of maximum rating
Upper critical
+6% of maximum rating
Hysteresis 2V
RMS current:
Threshold
Default value
Upper warning
65% of rating
Upper critical
80% of rating
Содержание PX3-3000 series
Страница 5: ......
Страница 18: ...Contents xviii Index 841...
Страница 66: ...Chapter 3 Initial Installation and Configuration 42 Number Device role Master device Slave 1 Slave 2 Slave 3...
Страница 93: ...Chapter 4 Connecting External Equipment Optional 69...
Страница 787: ...Appendix J RADIUS Configuration Illustration 763 Note If your PX3 uses PAP then select PAP...
Страница 788: ...Appendix J RADIUS Configuration Illustration 764 10 Select Standard to the left of the dialog and then click Add...
Страница 789: ...Appendix J RADIUS Configuration Illustration 765 11 Select Filter Id from the list of attributes and click Add...
Страница 792: ...Appendix J RADIUS Configuration Illustration 768 14 The new attribute is added Click OK...
Страница 793: ...Appendix J RADIUS Configuration Illustration 769 15 Click Next to continue...
Страница 823: ...Appendix K Additional PX3 Information 799...
Страница 853: ...Appendix L Integration 829 3 Click OK...


