Appendix K: Additional PX3 Information
813
5.
If prompted to change the default password, change or ignore it.
To change it, follow onscreen instructions to type your new
password.
To ignore it, simply press Enter.
6.
The # prompt appears.
7.
Type
config
and press Enter.
8.
To configure network settings, type appropriate commands and
press Enter. Refer to the following commands list. CLI commands
are case sensitive.
9.
After finishing the network settings, type
apply
to save changes. To
abort, type
cancel
.
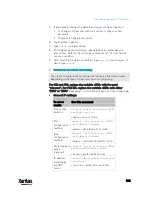
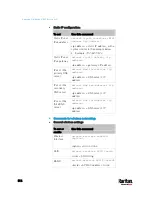
Commands for wired networking:
The <ipvX> variable in the following commands is either
ipv4 or ipv6,
depending on the type of IP protocol you are configuring.
For PX2 and PX3, replace the variable <ETH> with the word
"ethernet". For PX3-iX7, replace the variable <ETH> with either
'ETH1' or 'ETH2', depending on which Ethernet port you are configuring.
General IP settings:
To set or
enable
Use this command
IPv4 or IPv6
protocol
network <ipvX> interface <ETH>
enabled <option>
<option> =
true, or false
IPv4
configuration
method
network ipv4 interface <ETH>
configMethod <mode>
<mode> =
dhcp (default) or static
IPv6
configuration
method
network ipv6 interface <ETH>
configMethod <mode>
<mode> =
automatic (default) or static
Preferred host
name
(optional)
network <ipvX> interface <ETH>
preferredHostName <name>
<name> = preferred host name
IP address
returned by
the DNS
server
network dns resolverPreference
<resolver>
<resolver> =
preferV4 or preferV6
Содержание PX3-3000 series
Страница 5: ......
Страница 18: ...Contents xviii Index 841...
Страница 66: ...Chapter 3 Initial Installation and Configuration 42 Number Device role Master device Slave 1 Slave 2 Slave 3...
Страница 93: ...Chapter 4 Connecting External Equipment Optional 69...
Страница 787: ...Appendix J RADIUS Configuration Illustration 763 Note If your PX3 uses PAP then select PAP...
Страница 788: ...Appendix J RADIUS Configuration Illustration 764 10 Select Standard to the left of the dialog and then click Add...
Страница 789: ...Appendix J RADIUS Configuration Illustration 765 11 Select Filter Id from the list of attributes and click Add...
Страница 792: ...Appendix J RADIUS Configuration Illustration 768 14 The new attribute is added Click OK...
Страница 793: ...Appendix J RADIUS Configuration Illustration 769 15 Click Next to continue...
Страница 823: ...Appendix K Additional PX3 Information 799...
Страница 853: ...Appendix L Integration 829 3 Click OK...


