Chapter 6: Using the Web Interface
429
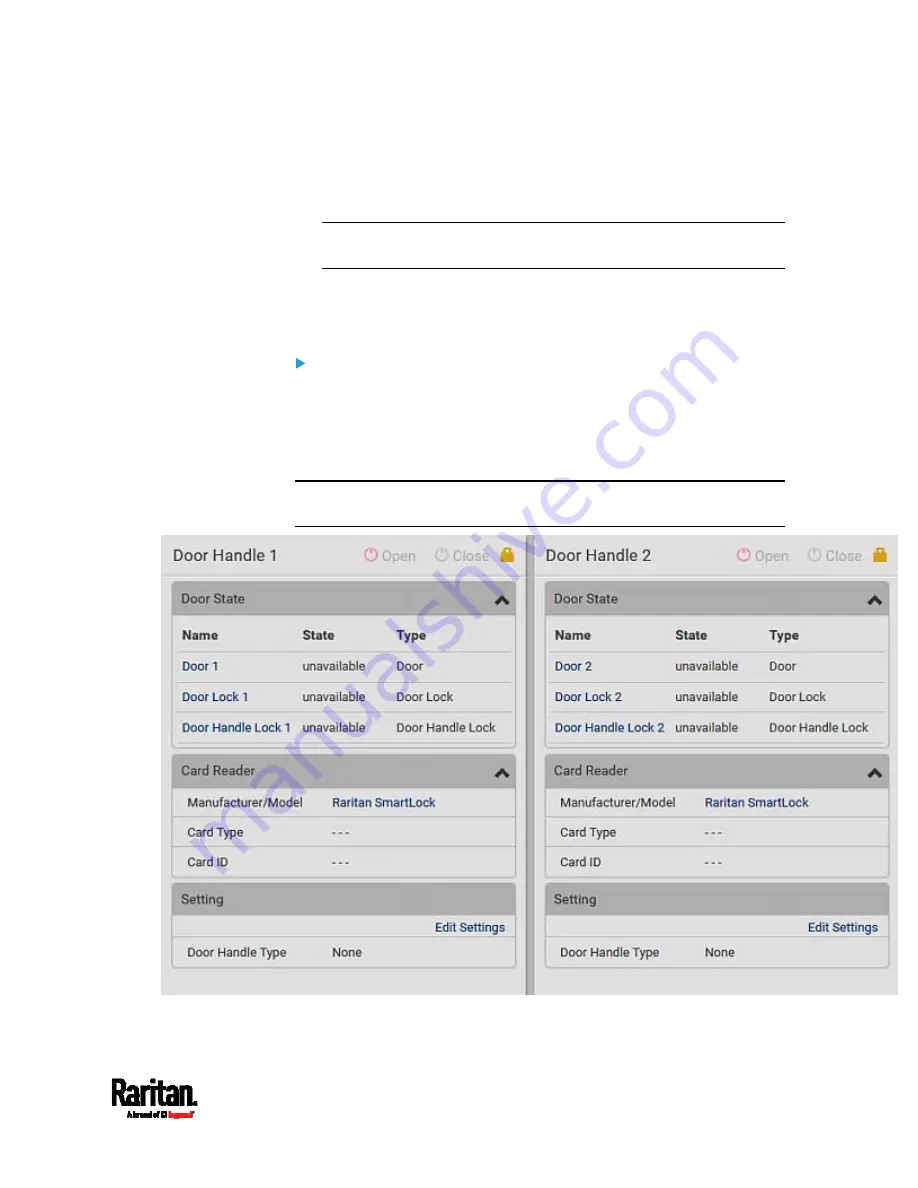
You can click the desired DX2-DH2C2 to open its details page, and then
do the following.
View the status of the cabinet door and card reader.
Note: Data of "external" USB card readers is NOT shown on the
SmartLock page. It is shown on the Card Readers page instead.
Configure the door handles connected to DX2-DH2C2. You must set
this because PX3 cannot detect the types of connected door handles.
Control the door handles connected to DX2-DH2C2.
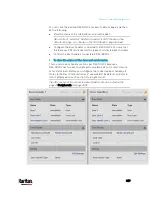
To view the status of the door and card reader:
There are two door handle sections per DX2-DH2C2 because a
DX2-DH2C2 has two door handle ports and two pairs of contact closure
sensor terminals. Before you configure the connected door handle, all
states in the Door State section are "unavailable" by default, and a lock
icon is displayed on each section's top-right corner.
Tip: All sensors of the connected door handles are also listed on the
page of
Peripherals
(on page 200).
Содержание PX3-3000 series
Страница 5: ......
Страница 18: ...Contents xviii Index 841...
Страница 66: ...Chapter 3 Initial Installation and Configuration 42 Number Device role Master device Slave 1 Slave 2 Slave 3...
Страница 93: ...Chapter 4 Connecting External Equipment Optional 69...
Страница 787: ...Appendix J RADIUS Configuration Illustration 763 Note If your PX3 uses PAP then select PAP...
Страница 788: ...Appendix J RADIUS Configuration Illustration 764 10 Select Standard to the left of the dialog and then click Add...
Страница 789: ...Appendix J RADIUS Configuration Illustration 765 11 Select Filter Id from the list of attributes and click Add...
Страница 792: ...Appendix J RADIUS Configuration Illustration 768 14 The new attribute is added Click OK...
Страница 793: ...Appendix J RADIUS Configuration Illustration 769 15 Click Next to continue...
Страница 823: ...Appendix K Additional PX3 Information 799...
Страница 853: ...Appendix L Integration 829 3 Click OK...


