Appendix C: Configuration or Firmware Upgrade with a USB Drive
672
Special configuration keys:
There are 3 special configuration keys that are prefixed with
magic:
.
A special key that sets a user account's password without
knowing the firmware's internal encryption/hashing algorithms
is implemented as of release 2.2.13.
Example:
magic:users[1].cleartext_password=joshua
Two special keys that set the SNMPv3 passphrases without
knowing the firmware's internal encryption/hashing algorithms
are implemented as of release 2.4.0.
Examples:
magic:users[1].snmp_v3.auth_phrase=swordfish
magic:users[1].snmp_v3.priv_phrase=opensesame
To configure device-specific settings:
1.
Make sure the device list configuration file "devices.csv" is available
in the PDU2. See
devices.csv
(on page 673)
2.
In the "config.txt" file, refer each device-specific configuration key to
a specific column in the "devices.csv" file. The syntax is:
${column}
,
where "column" is a column number.
Examples:
net.interfaces[eth0].ipv4.static.addr_cidr.addr=${4
}
pdu.name=${16}
Note: For firmware version 3.3.0 or older, the syntax for static ip
address is different from version 3.3.10 or later. It should be:
network.interfaces[eth0].ipaddr=${column}.
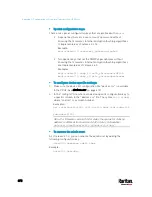
To rename the admin user:
As of release 3.1.0, you can rename the admin user by adding the
following configuration key:
users[0].name=new admin name
Example:
users[0].name=May
Содержание PX3-3000 series
Страница 5: ......
Страница 18: ...Contents xviii Index 841...
Страница 66: ...Chapter 3 Initial Installation and Configuration 42 Number Device role Master device Slave 1 Slave 2 Slave 3...
Страница 93: ...Chapter 4 Connecting External Equipment Optional 69...
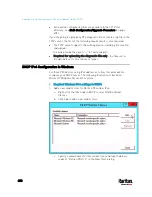
Страница 787: ...Appendix J RADIUS Configuration Illustration 763 Note If your PX3 uses PAP then select PAP...
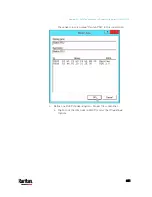
Страница 788: ...Appendix J RADIUS Configuration Illustration 764 10 Select Standard to the left of the dialog and then click Add...
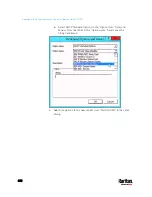
Страница 789: ...Appendix J RADIUS Configuration Illustration 765 11 Select Filter Id from the list of attributes and click Add...
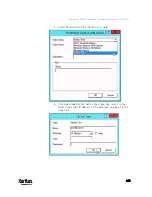
Страница 792: ...Appendix J RADIUS Configuration Illustration 768 14 The new attribute is added Click OK...
Страница 793: ...Appendix J RADIUS Configuration Illustration 769 15 Click Next to continue...
Страница 823: ...Appendix K Additional PX3 Information 799...
Страница 853: ...Appendix L Integration 829 3 Click OK...

