


Chapter 6: Using the Web Interface
177
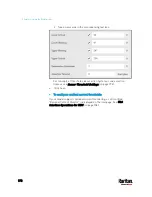
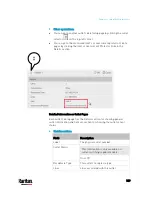
RMS current (A)
Active power (W)
Power factor
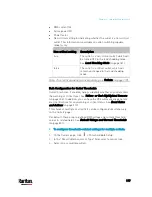
Non-critical setting for indicating whether the outlet is a non-critical
outlet. This information is available on outlet-switching capable
models only.
Non-critical setting
Description
true
The outlet is a non-critical outlet, which will
be turned OFF in the load shedding mode.
See
Load Shedding Mode
(on page 181).
false
The outlet is a critical outlet, which will
remain unchanged in the load shedding
mode.
Note: To set critical and non-critical outlets, go to
Outlets
(on page 173).
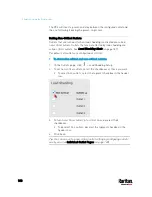
Bulk Configuration for Outlet Thresholds
Outlet thresholds, if enabled, help you identify whether any outlet enters
the warning or critical level. See
Yellow- or Red-Highlighted Sensors
(on page 206). In addition, you can have the PX3 automatically generate
alert notifications for any warning or critical status. See
Event Rules
and Actions
(on page 312).
Thresholds of multiple or all outlets can be configured simultaneously
on the Outlets page.
Per default, there are pre-defined RMS voltage and current threshold
values in related fields. See
Default Voltage and Current Thresholds
(on page 801).
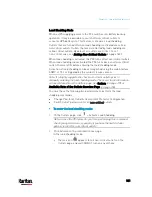
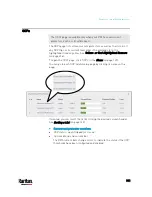
To configure thresholds-related settings for multiple outlets:
1.
On the Outlets page, click
> Threshold Bulk Setup.
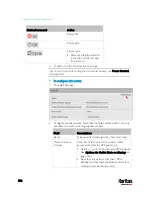
2.
In the "Show Outlet Sensors of Type" field, select a sensor type.
3.
Select one or multiple outlets.
Содержание PX3-3000 series
Страница 5: ......
Страница 18: ...Contents xviii Index 841...
Страница 66: ...Chapter 3 Initial Installation and Configuration 42 Number Device role Master device Slave 1 Slave 2 Slave 3...
Страница 93: ...Chapter 4 Connecting External Equipment Optional 69...
Страница 787: ...Appendix J RADIUS Configuration Illustration 763 Note If your PX3 uses PAP then select PAP...
Страница 788: ...Appendix J RADIUS Configuration Illustration 764 10 Select Standard to the left of the dialog and then click Add...
Страница 789: ...Appendix J RADIUS Configuration Illustration 765 11 Select Filter Id from the list of attributes and click Add...
Страница 792: ...Appendix J RADIUS Configuration Illustration 768 14 The new attribute is added Click OK...
Страница 793: ...Appendix J RADIUS Configuration Illustration 769 15 Click Next to continue...
Страница 823: ...Appendix K Additional PX3 Information 799...
Страница 853: ...Appendix L Integration 829 3 Click OK...


