


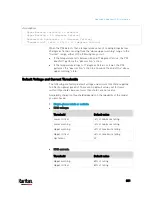


Appendix K: Additional PX3 Information
790
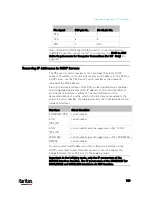
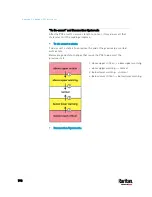
Reserving IP in Windows
To reserve the IP address of any network interface in the Windows DHCP
server, you must convert that interface's client identifier into
hexadecimal ASCII codes.
For each interface's client identifier, see
Reserving IP Addresses in
DHCP Servers
(on page 789).
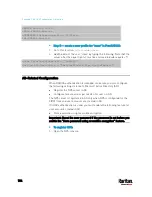
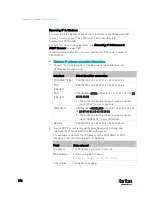
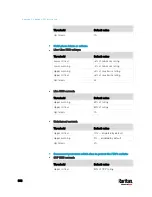
In the following illustration, it is assumed that the PX3 serial number is
PEG1A00003.
Windows IP address reservation illustration:
1.
Convert the client identifier of the desired network interface into
ASCII codes (
hexadecimal).
Interface
Client identifier conversion
ETHERNET (PX3)
PEG1A00003 = 50 45 47 31 41 30 30 30 30 33
ETH1
(PX3-iX7)
PEG1A00003 = 50 45 47 31 41 30 30 30 30 33
ETH2
(PX3-iX7)
PEG1A00003-ETH2 = 50 45 47 31 41 30 30 30 30 33 2D
45 54 48 32
The suffix comprising the dash symbol and the
word "ETH2" is also converted.
WIRELESS PEG1A00003-WIRELESS = 50 45 47 31 41 30 30 30 30
33 2D 57 49 52 45 4C 45 53 53
The suffix comprising the dash symbol and the
word "WIRELESS" is also converted.
BRIDGE
PEG1A00003 = 50 45 47 31 41 30 30 30 30 33
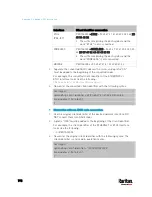
2.
In your DHCP server, bring up the New Reservation dialog, and
separate the converted ASCII codes with spaces.
For example, to reserve the IP address of the ETHERNET or ETH1
interface, enter the following data in the dialog.
Field
Data entered
IP address
The IP address you want to reserve.
MAC address
The following ASCII codes.
50 45 47 31 41 30 30 30 30 33
Other fields
Configure as needed.
Содержание PX3-3000 series
Страница 5: ......
Страница 18: ...Contents xviii Index 841...
Страница 66: ...Chapter 3 Initial Installation and Configuration 42 Number Device role Master device Slave 1 Slave 2 Slave 3...
Страница 93: ...Chapter 4 Connecting External Equipment Optional 69...
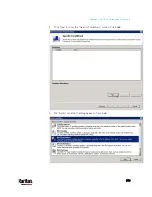
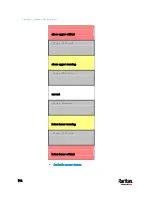
Страница 787: ...Appendix J RADIUS Configuration Illustration 763 Note If your PX3 uses PAP then select PAP...
Страница 788: ...Appendix J RADIUS Configuration Illustration 764 10 Select Standard to the left of the dialog and then click Add...
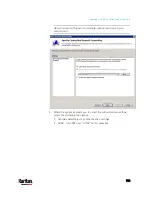
Страница 789: ...Appendix J RADIUS Configuration Illustration 765 11 Select Filter Id from the list of attributes and click Add...
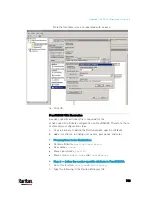
Страница 792: ...Appendix J RADIUS Configuration Illustration 768 14 The new attribute is added Click OK...
Страница 793: ...Appendix J RADIUS Configuration Illustration 769 15 Click Next to continue...
Страница 823: ...Appendix K Additional PX3 Information 799...
Страница 853: ...Appendix L Integration 829 3 Click OK...


