Appendix K: Additional PX3 Information
824
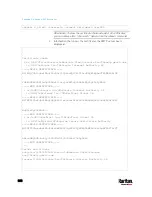
Content copying must include the lines of "BEGIN CERTIFICATE"
and "END CERTIFICATE".
2.
Save that file as a
.pem, .crt or .cer file. In this example, it is named
as "my-root.pem."
3.
Upload the file "my-root.pem" to PX3 for using the GMAIL SMTP
service.
Note: If your SMTP server requires the upload of a certificate file
comprising multiple certificates, make sure the order of these
certificates is correct in the file. See
What is a Certificate Chain
(on
page 818).
IMPORTANT NOTE:
If your SMTP server provides a full certificate chain, you should be
suspicious whether any attacker fakes the certificate chain and doubt
whether the root certificate on that server is authentic. It is STRONGLY
recommended to download the root certificate from an authentic source,
which is usually the root CA's website, rather than from the server you
want to connect.
Browsing through the Online Help
The PX3 Online Help is accessible over the Internet.
To use online help, Active Content must be enabled in your browser.
Consult your browser help for information on enabling the feature.
To use the PX3 online help:
1.
Click Online Documentation. See
Web Interface Overview
(on page
2.
The online help opens in the default web browser.
3.
To view the content of any topic, click the topic in the left pane. Then
its content is displayed in the right pane.
4.
To select a different topic, do any of the following:
To view the next topic, click the Next icon
in the toolbar.
To view the previous topic, click the Previous icon
.
To view the first topic, click the Home icon
.
5.
To expand or collapse a topic that contains sub-topics, do the
following:
To expand any topic, click the white arrow prior to the topic, or
double-click that topic. The arrow turns into a black, gradient
arrow , and sub-topics appear below the topic.
Содержание PX3-3000 series
Страница 5: ......
Страница 18: ...Contents xviii Index 841...
Страница 66: ...Chapter 3 Initial Installation and Configuration 42 Number Device role Master device Slave 1 Slave 2 Slave 3...
Страница 93: ...Chapter 4 Connecting External Equipment Optional 69...
Страница 787: ...Appendix J RADIUS Configuration Illustration 763 Note If your PX3 uses PAP then select PAP...
Страница 788: ...Appendix J RADIUS Configuration Illustration 764 10 Select Standard to the left of the dialog and then click Add...
Страница 789: ...Appendix J RADIUS Configuration Illustration 765 11 Select Filter Id from the list of attributes and click Add...
Страница 792: ...Appendix J RADIUS Configuration Illustration 768 14 The new attribute is added Click OK...
Страница 793: ...Appendix J RADIUS Configuration Illustration 769 15 Click Next to continue...
Страница 823: ...Appendix K Additional PX3 Information 799...
Страница 853: ...Appendix L Integration 829 3 Click OK...


