Chapter 6: Using the Web Interface
351
Scheduling an Action
An action can be regularly performed at a preset time interval instead of
being triggered by a specific event. For example, you can make the PX3
report the reading or state of a specific sensor regularly by scheduling
the "Send Sensor Report" action.
When scheduling an action, make sure you have a minimum of 1-minute
buffer between this action's creation and first execution time. Otherwise,
the scheduled action will NOT be performed at the specified time when
the buffer time is too short. For example, if you want an action to be
performed at 11:00 am, you should finish scheduling it at 10:59 am or
earlier.
If the needed action is not available yet, create it first. See
Available
Actions
(on page 332).
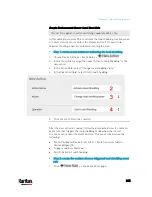
Operation:
1.
Choose Device Settings > Event Rules >
.
2.
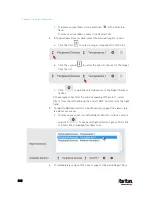
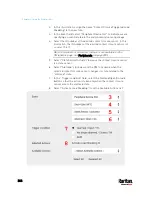
To select any action(s), select them one by one from the Available
Actions list.
To select all available actions, click Select All.
3.
To remove any action(s) from the Selected Actions field, click that
action's
.
To remove all actions, click Deselect All.
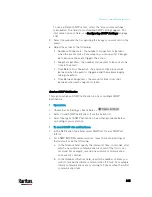
4.
Select the desired frequency in the Execution Time field, and then
specify the time interval or a specific date and time in the field(s) that
appear.
Содержание PX3-3000 series
Страница 5: ......
Страница 18: ...Contents xviii Index 841...
Страница 66: ...Chapter 3 Initial Installation and Configuration 42 Number Device role Master device Slave 1 Slave 2 Slave 3...
Страница 93: ...Chapter 4 Connecting External Equipment Optional 69...
Страница 787: ...Appendix J RADIUS Configuration Illustration 763 Note If your PX3 uses PAP then select PAP...
Страница 788: ...Appendix J RADIUS Configuration Illustration 764 10 Select Standard to the left of the dialog and then click Add...
Страница 789: ...Appendix J RADIUS Configuration Illustration 765 11 Select Filter Id from the list of attributes and click Add...
Страница 792: ...Appendix J RADIUS Configuration Illustration 768 14 The new attribute is added Click OK...
Страница 793: ...Appendix J RADIUS Configuration Illustration 769 15 Click Next to continue...
Страница 823: ...Appendix K Additional PX3 Information 799...
Страница 853: ...Appendix L Integration 829 3 Click OK...

