


Chapter 8: Using the Command Line Interface
612
Naming a Rack Unit
This command syntax assigns or changes the name of the specified rack
unit on the specified asset strip.
config:#
rackUnit <n> <rack_unit> name "<name>"
Variables:
<n> is the number of the FEATURE port where the selected asset
strip is physically connected. For the PX3 device with only one
FEATURE port, the number is always 1.
<rack_unit> is the index number of the desired rack unit. The index
number is available on the asset strip or the Asset Strip page of the
web interface.
<name> is a string comprising up to 64 ASCII printable characters.
The <name> variable must be enclosed in quotes when it contains
spaces.
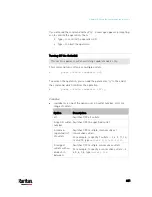
Setting the LED Operation Mode
This command syntax determines whether a specific rack unit on the
specified asset strip follows the global LED color settings.
config:#
rackUnit <n> <rack_unit> LEDOperationMode <mode>
Variables:
<n> is the number of the FEATURE port where the selected asset
strip is physically connected. For the PX3 device with only one
FEATURE port, the number is always 1.
<rack_unit> is the index number of the desired rack unit. The index
number is available on the asset strip or the Asset Strip page of the
web interface.
<mode> is one of the LED modes:
automatic or manual.
Mode
Description
automatic
This option makes the LED of the specified rack
unit follow the global LED color settings. See
Setting LED Colors for Connected Tags
(on
page 611) and
Setting LED Colors for
Disconnected Tags
(on page 611).
This is the default.
Содержание PX3-3000 series
Страница 5: ......
Страница 18: ...Contents xviii Index 841...
Страница 66: ...Chapter 3 Initial Installation and Configuration 42 Number Device role Master device Slave 1 Slave 2 Slave 3...
Страница 93: ...Chapter 4 Connecting External Equipment Optional 69...
Страница 787: ...Appendix J RADIUS Configuration Illustration 763 Note If your PX3 uses PAP then select PAP...
Страница 788: ...Appendix J RADIUS Configuration Illustration 764 10 Select Standard to the left of the dialog and then click Add...
Страница 789: ...Appendix J RADIUS Configuration Illustration 765 11 Select Filter Id from the list of attributes and click Add...
Страница 792: ...Appendix J RADIUS Configuration Illustration 768 14 The new attribute is added Click OK...
Страница 793: ...Appendix J RADIUS Configuration Illustration 769 15 Click Next to continue...
Страница 823: ...Appendix K Additional PX3 Information 799...
Страница 853: ...Appendix L Integration 829 3 Click OK...


