Chapter 2: Rackmount, Inlet and Outlet Connections
19
2.
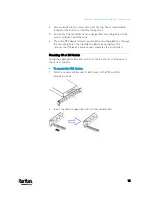
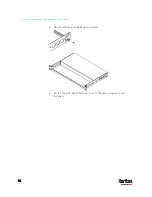
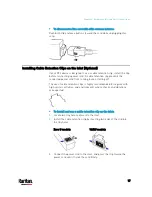
Install the cable retention clip by inserting two ends of the clip into
the tiny holes.
3.
Plug the power cord into the outlet, and press the clip toward the
power cord until it holds the cord firmly. The clip's central part
holding the plug should face downwards toward the ground, like an
inverted "U". This allows gravity to keep the clip in place.
4.
Repeat the same steps to install clips and power cords on the other
outlets.
Locking Outlets and Cords
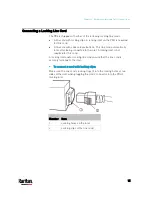
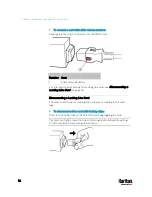
In addition to the cable retention clips, Raritan also provides other
approaches to secure the connection of the power cords from your IT
equipment to the Raritan PDUs, including:
SecureLock
™
outlets and cords
Button-type locking outlets
Note that NOT all Raritan PDUs are implemented with any of the above
locking outlets.
Содержание PX3-3000 series
Страница 5: ......
Страница 18: ...Contents xviii Index 841...
Страница 66: ...Chapter 3 Initial Installation and Configuration 42 Number Device role Master device Slave 1 Slave 2 Slave 3...
Страница 93: ...Chapter 4 Connecting External Equipment Optional 69...
Страница 787: ...Appendix J RADIUS Configuration Illustration 763 Note If your PX3 uses PAP then select PAP...
Страница 788: ...Appendix J RADIUS Configuration Illustration 764 10 Select Standard to the left of the dialog and then click Add...
Страница 789: ...Appendix J RADIUS Configuration Illustration 765 11 Select Filter Id from the list of attributes and click Add...
Страница 792: ...Appendix J RADIUS Configuration Illustration 768 14 The new attribute is added Click OK...
Страница 793: ...Appendix J RADIUS Configuration Illustration 769 15 Click Next to continue...
Страница 823: ...Appendix K Additional PX3 Information 799...
Страница 853: ...Appendix L Integration 829 3 Click OK...


