


Chapter 6: Using the Web Interface
421
saved on the PX3 locally. If needed, download important snapshots
before rebooting the device.
To view saved snapshots:
1.
Choose Webcams >
. The Snapshots page
opens.
2.
Click the snapshot you want to view from the list.
Tip: The date and time shown on the PX3 web interface are
automatically converted to your computer's time zone. To avoid any
time confusion, you can apply the same time zone settings as those
of PX3 to your computer.
3.
The selected snapshot as well as its information, such as captured
time and resolution, is displayed on the same page.
4.
If the latest saved snapshot is not listed yet, click
.
To manually delete any snapshots:
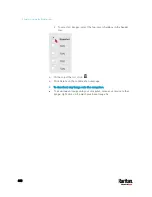
1.
Click
to make checkboxes appear.
2.
Select the checkboxes of the images you want to remove.
Содержание PX3-3000 series
Страница 5: ......
Страница 18: ...Contents xviii Index 841...
Страница 66: ...Chapter 3 Initial Installation and Configuration 42 Number Device role Master device Slave 1 Slave 2 Slave 3...
Страница 93: ...Chapter 4 Connecting External Equipment Optional 69...
Страница 787: ...Appendix J RADIUS Configuration Illustration 763 Note If your PX3 uses PAP then select PAP...
Страница 788: ...Appendix J RADIUS Configuration Illustration 764 10 Select Standard to the left of the dialog and then click Add...
Страница 789: ...Appendix J RADIUS Configuration Illustration 765 11 Select Filter Id from the list of attributes and click Add...
Страница 792: ...Appendix J RADIUS Configuration Illustration 768 14 The new attribute is added Click OK...
Страница 793: ...Appendix J RADIUS Configuration Illustration 769 15 Click Next to continue...
Страница 823: ...Appendix K Additional PX3 Information 799...
Страница 853: ...Appendix L Integration 829 3 Click OK...


