


Chapter 6: Using the Web Interface
302
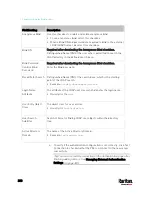
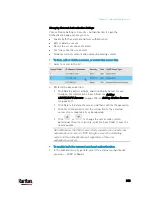
Field/setting
Description
Type of RADIUS
Authentication
Select an authentication protocol.
PAP (Password Authentication Protocol)
CHAP (Challenge Handshake Authentication Protocol)
MS-CHAPv2 (Microsoft Challenge Handshake Authentication
Protocol)
CHAP is generally considered more secure because the user name
and password are encrypted, while in PAP they are transmitted in the
clear.
MS-CHAPv2 provides stronger security than the above two. Selecting
this option will support both MS-CHAPv1 and MS-CHAPv2.
Authentication Port,
Accounting Port
The default are standard ports -- 1812 and 1813.
To use non-standard ports, type a new port number.
Timeout
This sets the maximum amount of time to establish contact with the
Radius server before timing out.
Type the timeout period in seconds.
Retries
Type the number of retries.
Shared Secret,
Confirm Shared
Secret
The shared secret is necessary to protect communication with the
Radius server.
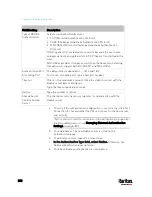
4.
To verify if the authentication configuration is set correctly, click Test
Connection to check whether the PX3 can connect to the new server
successfully.
Tip: You can also test the connection on the Authentication page after
finishing adding servers. See
Managing External Authentication
Settings
(on page 303).
5.
Click Add Server. The new Radius server is listed on the
Authentication page.
6.
To add more servers, repeat the same steps.
7.
In the Authentication Type field, select Radius. Otherwise, the
Radius authentication does not work.
8.
Click Save. Radius authentication is now in place.
Содержание PX3-3000 series
Страница 5: ......
Страница 18: ...Contents xviii Index 841...
Страница 66: ...Chapter 3 Initial Installation and Configuration 42 Number Device role Master device Slave 1 Slave 2 Slave 3...
Страница 93: ...Chapter 4 Connecting External Equipment Optional 69...
Страница 787: ...Appendix J RADIUS Configuration Illustration 763 Note If your PX3 uses PAP then select PAP...
Страница 788: ...Appendix J RADIUS Configuration Illustration 764 10 Select Standard to the left of the dialog and then click Add...
Страница 789: ...Appendix J RADIUS Configuration Illustration 765 11 Select Filter Id from the list of attributes and click Add...
Страница 792: ...Appendix J RADIUS Configuration Illustration 768 14 The new attribute is added Click OK...
Страница 793: ...Appendix J RADIUS Configuration Illustration 769 15 Click Next to continue...
Страница 823: ...Appendix K Additional PX3 Information 799...
Страница 853: ...Appendix L Integration 829 3 Click OK...


