


Chapter 2: Rackmount, Inlet and Outlet Connections
12
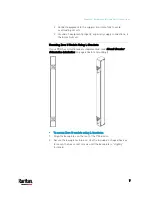
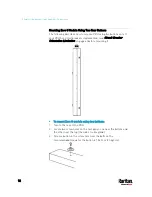
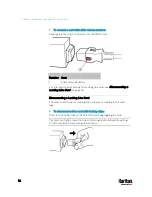
Mounting Zero U Models Using Two Rear Buttons
The following describes how to mount a PDU using two buttons only. If
your PDU has circuit breakers implemented, read
Circuit Breaker
Orientation Limitation
(on page 6) before mounting it.
To mount Zero U models using two buttons:
1.
Turn to the rear of the PDU.
2.
Locate two screw holes on the rear panel: one near the bottom and
the other near the top (the side of cable gland).
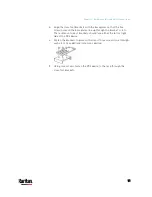
3.
Screw a button in the screw hole near the bottom. The
recommended torque for the button is 1.96 N·m (20 kgf·cm).
Содержание PX3-3000 series
Страница 5: ......
Страница 18: ...Contents xviii Index 841...
Страница 66: ...Chapter 3 Initial Installation and Configuration 42 Number Device role Master device Slave 1 Slave 2 Slave 3...
Страница 93: ...Chapter 4 Connecting External Equipment Optional 69...
Страница 787: ...Appendix J RADIUS Configuration Illustration 763 Note If your PX3 uses PAP then select PAP...
Страница 788: ...Appendix J RADIUS Configuration Illustration 764 10 Select Standard to the left of the dialog and then click Add...
Страница 789: ...Appendix J RADIUS Configuration Illustration 765 11 Select Filter Id from the list of attributes and click Add...
Страница 792: ...Appendix J RADIUS Configuration Illustration 768 14 The new attribute is added Click OK...
Страница 793: ...Appendix J RADIUS Configuration Illustration 769 15 Click Next to continue...
Страница 823: ...Appendix K Additional PX3 Information 799...
Страница 853: ...Appendix L Integration 829 3 Click OK...


