


Appendix J: RADIUS Configuration Illustration
772
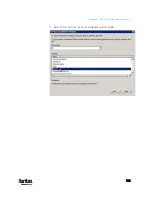
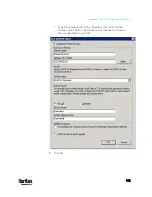
Step A: Add Your PX3 as a RADIUS Client
The RADIUS implementation on a PX3 follows the standard RADIUS
Internet Engineering Task Force (IETF) specification so you must select
"RADIUS Standard" as its vendor name when configuring the NPS
server.
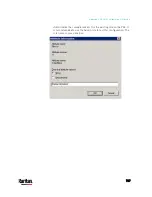
Presumptions in the illustration:
IP address of your PX3 =
192.168.56.29
RADIUS authentication port specified for PX3:
1812
RADIUS accounting port specified for PX3:
1813
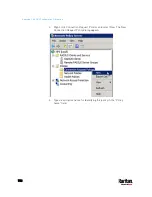
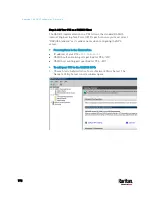
To add your PX3 to the RADIUS NPS:
1.
Choose Start > Administrative Tools > Network Policy Server. The
Network Policy Server console window opens.
Содержание PX3-3000 series
Страница 5: ......
Страница 18: ...Contents xviii Index 841...
Страница 66: ...Chapter 3 Initial Installation and Configuration 42 Number Device role Master device Slave 1 Slave 2 Slave 3...
Страница 93: ...Chapter 4 Connecting External Equipment Optional 69...
Страница 787: ...Appendix J RADIUS Configuration Illustration 763 Note If your PX3 uses PAP then select PAP...
Страница 788: ...Appendix J RADIUS Configuration Illustration 764 10 Select Standard to the left of the dialog and then click Add...
Страница 789: ...Appendix J RADIUS Configuration Illustration 765 11 Select Filter Id from the list of attributes and click Add...
Страница 792: ...Appendix J RADIUS Configuration Illustration 768 14 The new attribute is added Click OK...
Страница 793: ...Appendix J RADIUS Configuration Illustration 769 15 Click Next to continue...
Страница 823: ...Appendix K Additional PX3 Information 799...
Страница 853: ...Appendix L Integration 829 3 Click OK...


