Chapter 2: Rackmount, Inlet and Outlet Connections
20
SecureLock™ Outlets and Cords
SecureLock
™
is an innovative mechanism designed by Raritan, which
securely holds C14 or C20 plugs that are plugged into Raritan PDUs in
place. This method requires the following two components:
Raritan PDU with SecureLock
™
outlets, which have a latch slot inside
either side of the outlet.
SecureLock
™
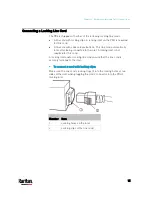
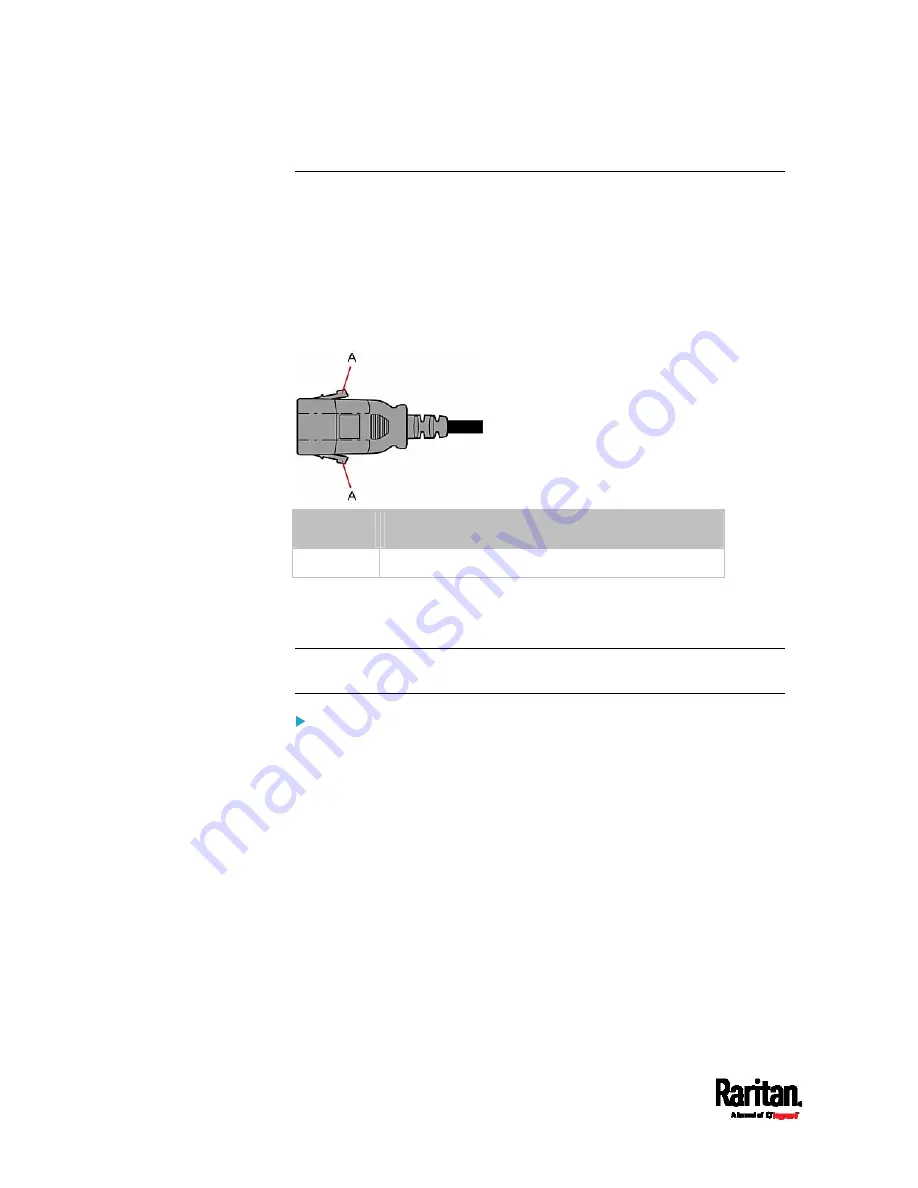
cords, which is a power cord with a locking latch on
each side of its plug. The following diagram illustrates such a plug.
Item
Description
A
Latches on the SecureLock
™
cord's plug
Only specific PDUs are implemented with the SecureLock
™
mechanism.
If your PDU does not have this design, do NOT use the SecureLock
™
cords
with it.
Tip: The SecureLock
™
outlets can accept regular power cords for power
distribution but the SecureLock
™
mechanism does not take effect.
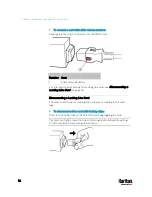
To lock a power cord using the SecureLock
™
mechanism:
1.
Verify that the SecureLock
™
cord you purchased meets your needs.
The cords' female socket matches the power socket type (C14 or
C20) on your IT equipment.
The cord's male plug matches the outlet type (C13 or C19) on
your PDU.
2.
Connect the SecureLock
™
cord between the IT equipment and your
PDU.
Plug the female socket end of the cord into the power socket of
the desired IT equipment.
Plug the male plug end of the cord into the appropriate
SecureLock
™
outlet on the PDU. Push the plug toward the outlet
until you hear the click, which indicates the plug's latches are
snapped into the latch slots of the outlet.
Содержание PX3-3000 series
Страница 5: ......
Страница 18: ...Contents xviii Index 841...
Страница 66: ...Chapter 3 Initial Installation and Configuration 42 Number Device role Master device Slave 1 Slave 2 Slave 3...
Страница 93: ...Chapter 4 Connecting External Equipment Optional 69...
Страница 787: ...Appendix J RADIUS Configuration Illustration 763 Note If your PX3 uses PAP then select PAP...
Страница 788: ...Appendix J RADIUS Configuration Illustration 764 10 Select Standard to the left of the dialog and then click Add...
Страница 789: ...Appendix J RADIUS Configuration Illustration 765 11 Select Filter Id from the list of attributes and click Add...
Страница 792: ...Appendix J RADIUS Configuration Illustration 768 14 The new attribute is added Click OK...
Страница 793: ...Appendix J RADIUS Configuration Illustration 769 15 Click Next to continue...
Страница 823: ...Appendix K Additional PX3 Information 799...
Страница 853: ...Appendix L Integration 829 3 Click OK...


