Chapter 8: Using the Command Line Interface
460
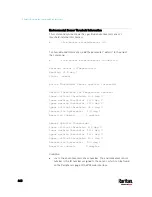
* The environmental sensor number is the ID number assigned to the
sensor, which can be found on the Peripherals page of the PX3 web
interface.
Displayed information:
Without the parameter "details," only the sensor ID, sensor type and
reading are displayed.
Note: A state sensor displays the sensor state instead of the reading.
With the parameter "details," more information is displayed in
addition to the ID number and sensor reading, such as the serial
number, sensor position, and X, Y, and Z coordinates.
Note: DPX sensor packages do not provide chain position information.
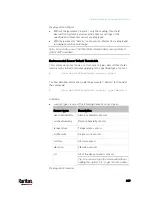
Environmental Sensor Package Information
Different from the "
show externalsensors
" commands, which show
the reading, status and configuration of an individual environmental
sensor, the following command shows the information of all connected
environmental sensor packages, each of which may contain more than
one sensor or actuator.
#
show peripheralDevicePackages
Information similar to the following is displayed. An environmental
sensor package is a peripheral device package.
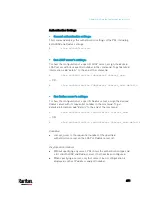
Peripheral Device Package 1
Serial Number:
AEI7A00022
Package Type:
DPX-T1H1
Position:
Port
1
Package State:
operational
Firmware Version: Not available
Peripheral Device Package 2
Serial Number:
AEI7A00021
Package Type:
DPX-T3H1
Position:
Port
1
Package State:
operational
Firmware Version: Not available
Содержание PX3-3000 series
Страница 5: ......
Страница 18: ...Contents xviii Index 841...
Страница 66: ...Chapter 3 Initial Installation and Configuration 42 Number Device role Master device Slave 1 Slave 2 Slave 3...
Страница 93: ...Chapter 4 Connecting External Equipment Optional 69...
Страница 787: ...Appendix J RADIUS Configuration Illustration 763 Note If your PX3 uses PAP then select PAP...
Страница 788: ...Appendix J RADIUS Configuration Illustration 764 10 Select Standard to the left of the dialog and then click Add...
Страница 789: ...Appendix J RADIUS Configuration Illustration 765 11 Select Filter Id from the list of attributes and click Add...
Страница 792: ...Appendix J RADIUS Configuration Illustration 768 14 The new attribute is added Click OK...
Страница 793: ...Appendix J RADIUS Configuration Illustration 769 15 Click Next to continue...
Страница 823: ...Appendix K Additional PX3 Information 799...
Страница 853: ...Appendix L Integration 829 3 Click OK...


