Chapter 6: Using the Web Interface
248
Setting Default Measurement Units
Default measurement units are applied to all PX3 user interfaces across
all users, including users accessing the PX3 via external authentication
servers. For a list of affected user interfaces, see
User Interfaces
Showing Default Units
(on page 248). The front panel display also shows
the default measurement units.
Note: The preferred measurement units set by any individual user or by
the administrator on a per-user basis will override the default units in
the web interface and command line interface. See
Setting Your
Preferred Measurement Units
(on page 247) or
Creating Users
(on
page 238).
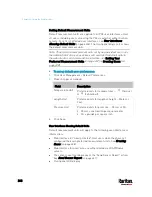
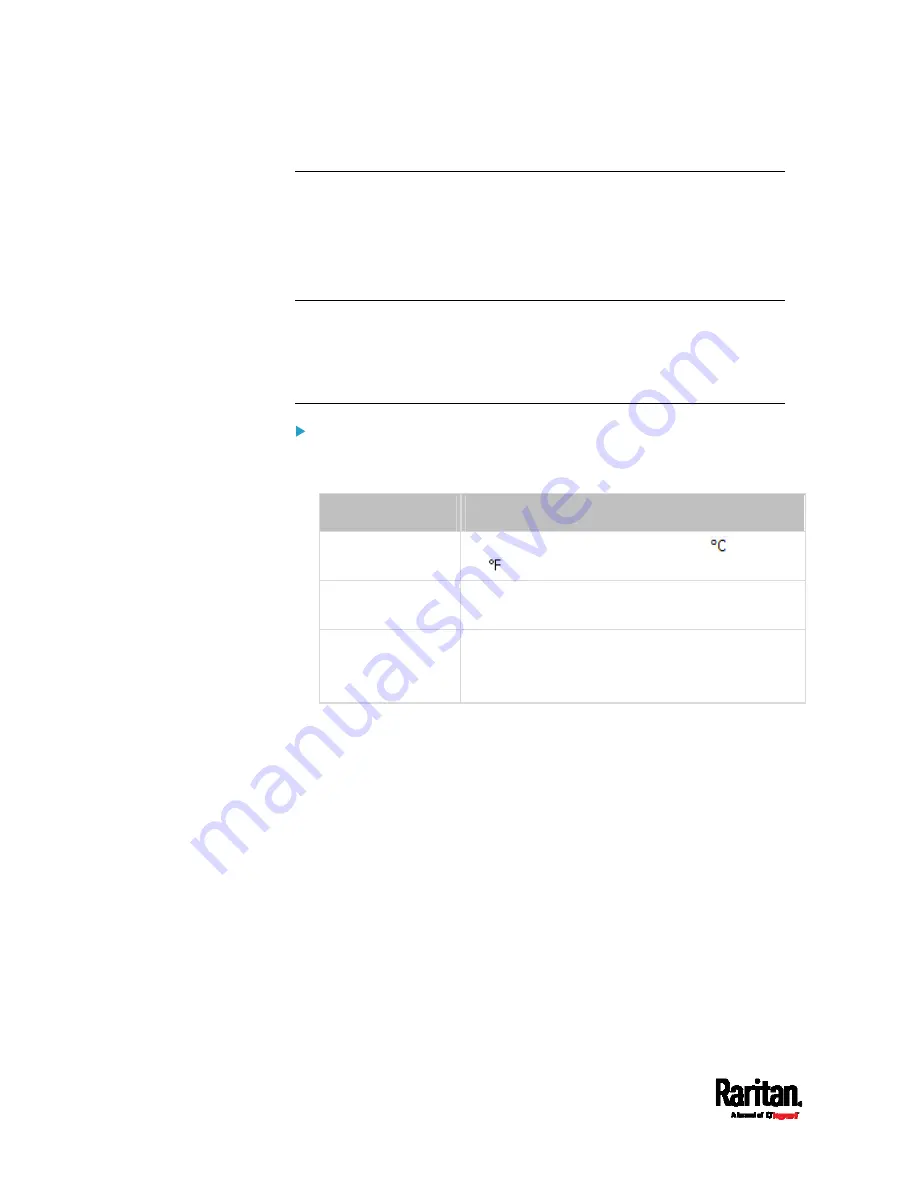
To set up default user preferences:
1.
Click User Management > Default Preferences.
2.
Make changes as needed.
Field
Description
Temperature Unit
Preferred units for temperatures --
(Celsius)
or
(Fahrenheit).
Length Unit
Preferred units for length or height -- Meter or
Feet.
Pressure Unit
Preferred units for pressure -- Pascal or Psi.
Pascal = one newton per square meter
Psi = pounds per square inch
3.
Click Save.
User Interfaces Showing Default Units
Default measurement units will apply to the following user interfaces or
information:
Web interface for "newly-created" local users when they have not
configured their own preferred measurement units. See
Creating
Users
(on page 238).
Web interface for users who are authenticated via LDAP/Radius
servers.
The sensor report sent because of the "Send Sensor Report" action.
See
Send Sensor Report
(on page 341).
Front panel LCD display.
Содержание PX3-3000 series
Страница 5: ......
Страница 18: ...Contents xviii Index 841...
Страница 66: ...Chapter 3 Initial Installation and Configuration 42 Number Device role Master device Slave 1 Slave 2 Slave 3...
Страница 93: ...Chapter 4 Connecting External Equipment Optional 69...
Страница 787: ...Appendix J RADIUS Configuration Illustration 763 Note If your PX3 uses PAP then select PAP...
Страница 788: ...Appendix J RADIUS Configuration Illustration 764 10 Select Standard to the left of the dialog and then click Add...
Страница 789: ...Appendix J RADIUS Configuration Illustration 765 11 Select Filter Id from the list of attributes and click Add...
Страница 792: ...Appendix J RADIUS Configuration Illustration 768 14 The new attribute is added Click OK...
Страница 793: ...Appendix J RADIUS Configuration Illustration 769 15 Click Next to continue...
Страница 823: ...Appendix K Additional PX3 Information 799...
Страница 853: ...Appendix L Integration 829 3 Click OK...


