Chapter 6: Using the Web Interface
282
Enabling Service Advertising
The PX3 advertises all enabled services that are reachable using the IP
network. This feature uses DNS-SD (Domain Name System-Service
Discovery) and MDNS (Multicast DNS). The advertised services are
discovered by clients that have implemented DNS-SD and MDNS.
The advertised services include the following:
HTTP
HTTPS
Telnet
SSH
Modbus
json-rpc
SNMP
By default, this feature is enabled.
Enabling this feature also enables Link-Local Multicast Name Resolution
(LLMNR) and/or MDNS, which are required for resolving APIPA host
names. See
APIPA and Link-Local Addressing
(on page 3).
The service advertisement feature supports both IPv4 and IPv6 protocols.
If you have set a preferred host name for IPv4 and/or IPv6, that host
name can be used as the zero configuration .local host name, that is,
<preferred_host_name>.local, where <preferred_host_name> is the
preferred host name you have specified for PX3. The IPv4 host name is
the first priority. If an IPv4 host name is not available, then use the IPv6
host name.
Note: For information on configuring IPv4 and/or IPv6 network settings,
see
Wired Network Settings
(on page 252).
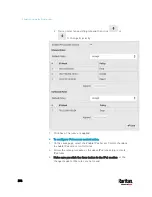
To enable or disable service advertising:
1.
Choose Device Settings > Network Services > Service Advertising.
2.
To enable the service advertising, select either or both checkboxes.
To advertise via MDNS, select the Multicast DNS checkbox.
To advertise via LLMNR, select the Link-Local Multicast Name
Resolution checkbox.
3.
Click Save.
Содержание PX3-3000 series
Страница 5: ......
Страница 18: ...Contents xviii Index 841...
Страница 66: ...Chapter 3 Initial Installation and Configuration 42 Number Device role Master device Slave 1 Slave 2 Slave 3...
Страница 93: ...Chapter 4 Connecting External Equipment Optional 69...
Страница 787: ...Appendix J RADIUS Configuration Illustration 763 Note If your PX3 uses PAP then select PAP...
Страница 788: ...Appendix J RADIUS Configuration Illustration 764 10 Select Standard to the left of the dialog and then click Add...
Страница 789: ...Appendix J RADIUS Configuration Illustration 765 11 Select Filter Id from the list of attributes and click Add...
Страница 792: ...Appendix J RADIUS Configuration Illustration 768 14 The new attribute is added Click OK...
Страница 793: ...Appendix J RADIUS Configuration Illustration 769 15 Click Next to continue...
Страница 823: ...Appendix K Additional PX3 Information 799...
Страница 853: ...Appendix L Integration 829 3 Click OK...


