


Chapter 1: Introduction
3
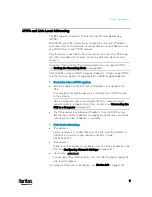
APIPA and Link-Local Addressing
The PX3 supports Automatic Private Internet Protocol Addressing
(APIPA).
With APIPA, your PX3 automatically configures a link-local IP address
and a link-local host name when it cannot obtain a valid IP address from
any DHCP server in the TCP/IP network.
Only IT devices connected to
the same subnet can access the PX3 using
the link-local address/host name. Those in a different subnet cannot
access it.
Exception: PX3 in the Port Forwarding mode does not support APIPA.
See
Setting the Cascading Mode
(on page 265).
Once the PX3 can get a DHCP-assigned IP address, it stops using APIPA
and the link-local address is replaced by the DHCP-assigned address.
Scenarios where APIPA applies:
DHCP is enabled on the PX3, but no IP address is assigned to the
PX3.
This may be caused by the absence or malfunction of DHCP servers
in the network.
Note: Configuration by connecting the PX3 to a computer using a
network cable is an application of this scenario. See
Connecting the
PX3 to a Computer
(on page 32).
The PX3 previously obtained an IP address from the DHCP server,
but the lease of this IP address has expired, and the lease cannot be
renewed, or no new IP address is available.
Link-local addressing:
IPv4 address:
Factory default is to enable IPv4 only. The link-local IPv4 address is
169.254.x.x/16, which ranges between 169.254.1.0 and
169.254.254.255.
IPv6 address:
A link-local IPv6 address is available only after IPv6 is enabled on the
PX3. See
Configuring Network Settings
(on page 251).
Host name - pdu.local:
You can type
https://pdu.local to access the PX3 instead of typing the
link-local IP address.
For retrieval of the link-local address, see
Device Info
(on page 116).
Содержание PX3-3000 series
Страница 5: ......
Страница 18: ...Contents xviii Index 841...
Страница 66: ...Chapter 3 Initial Installation and Configuration 42 Number Device role Master device Slave 1 Slave 2 Slave 3...
Страница 93: ...Chapter 4 Connecting External Equipment Optional 69...
Страница 787: ...Appendix J RADIUS Configuration Illustration 763 Note If your PX3 uses PAP then select PAP...
Страница 788: ...Appendix J RADIUS Configuration Illustration 764 10 Select Standard to the left of the dialog and then click Add...
Страница 789: ...Appendix J RADIUS Configuration Illustration 765 11 Select Filter Id from the list of attributes and click Add...
Страница 792: ...Appendix J RADIUS Configuration Illustration 768 14 The new attribute is added Click OK...
Страница 793: ...Appendix J RADIUS Configuration Illustration 769 15 Click Next to continue...
Страница 823: ...Appendix K Additional PX3 Information 799...
Страница 853: ...Appendix L Integration 829 3 Click OK...


