Chapter 6: Using the Web Interface
205
For concepts of thresholds, deassertion hysteresis and assertion
timeout, see
Sensor Threshold Settings
(on page 793).
4.
Click Save.
Tip: To customize the threshold settings on a per-sensor basis, go to
Individual Sensor/Actuator Pages
(on page 214).
To turn on or off any actuator(s):
1.
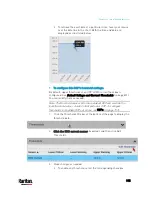
Select one or multiple actuators which are
in the same status - on or
off.
To select multiple actuators, click
to make checkboxes
appear and then select desired actuators.
2.
Click the desired button.
: Turn ON.
: Turn OFF.
Note: If you try to turn on more than one "powered dry contact"
actuators, by default only one "powered dry contact" actuator can be
turned on at the same time. You can change this limitation by
changing the active powered dry contact setting. See
PDU
(on page
3.
Confirm the operation when prompted.
Tip: If intending to control the actuator via the front panel, see
Front
Panel Settings
(on page 375).
Содержание PX3-3000 series
Страница 5: ......
Страница 18: ...Contents xviii Index 841...
Страница 66: ...Chapter 3 Initial Installation and Configuration 42 Number Device role Master device Slave 1 Slave 2 Slave 3...
Страница 93: ...Chapter 4 Connecting External Equipment Optional 69...
Страница 787: ...Appendix J RADIUS Configuration Illustration 763 Note If your PX3 uses PAP then select PAP...
Страница 788: ...Appendix J RADIUS Configuration Illustration 764 10 Select Standard to the left of the dialog and then click Add...
Страница 789: ...Appendix J RADIUS Configuration Illustration 765 11 Select Filter Id from the list of attributes and click Add...
Страница 792: ...Appendix J RADIUS Configuration Illustration 768 14 The new attribute is added Click OK...
Страница 793: ...Appendix J RADIUS Configuration Illustration 769 15 Click Next to continue...
Страница 823: ...Appendix K Additional PX3 Information 799...
Страница 853: ...Appendix L Integration 829 3 Click OK...

