


Chapter 8: Using the Command Line Interface
566
Role Configuration Commands
A role configuration command begins with
role.
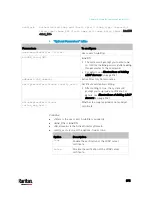
Creating a Role
This command creates a new role, with a list of semicolon-separated
privileges assigned to the role.
config:#
role create <name> <privilege1>;<privilege2>;<privilege3>...
If a specific privilege contains any arguments, that privilege should be
followed by a colon and the argument(s).
config:#
role create <name> <privilege1>:<argument1>,<argument2>...;
<privilege2>:<argument1>,<argument2>...;
<privilege3>:<argument1>,<argument2>...;
...
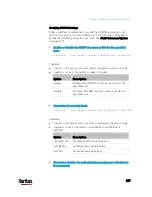
Variables:
<name> is a string comprising up to 32 ASCII printable characters.
<privilege1>, <privilege2>, <privilege3> and the like are names of the
privileges assigned to the role. Separate each privilege with a
semi-colon. See
All Privileges
(on page 566).
<argument1>, <argument2> and the like are arguments set for a
particular privilege. Separate a privilege and its argument(s) with a
colon, and separate arguments with a comma if there are more than
one argument for a privilege.
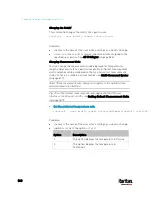
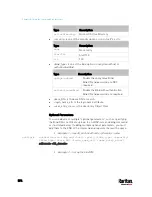
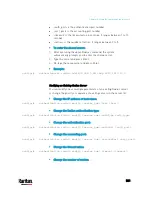
All Privileges
This table lists all privileges. Note that available privileges vary
according to the model you purchased. For example, a PDU without the
outlet switching function does not have the privilege "switchOutlet."
Privilege
Description
acknowledgeAlarms Acknowledge Alarms
adminPrivilege Administrator Privileges
changeAssetStripConfiguration
Change Asset Strip
Configuration
Содержание PX3-3000 series
Страница 5: ......
Страница 18: ...Contents xviii Index 841...
Страница 66: ...Chapter 3 Initial Installation and Configuration 42 Number Device role Master device Slave 1 Slave 2 Slave 3...
Страница 93: ...Chapter 4 Connecting External Equipment Optional 69...
Страница 787: ...Appendix J RADIUS Configuration Illustration 763 Note If your PX3 uses PAP then select PAP...
Страница 788: ...Appendix J RADIUS Configuration Illustration 764 10 Select Standard to the left of the dialog and then click Add...
Страница 789: ...Appendix J RADIUS Configuration Illustration 765 11 Select Filter Id from the list of attributes and click Add...
Страница 792: ...Appendix J RADIUS Configuration Illustration 768 14 The new attribute is added Click OK...
Страница 793: ...Appendix J RADIUS Configuration Illustration 769 15 Click Next to continue...
Страница 823: ...Appendix K Additional PX3 Information 799...
Страница 853: ...Appendix L Integration 829 3 Click OK...


