Adjuncts and Peripherals
Music-on-hold
SI Installation and Upgrades
837
June 2004
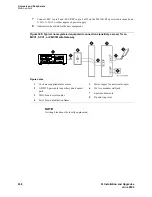
Figure 327: Typical registered equipment connections (auxiliary access) for an MCC1,
SCC1, or CMC1Media Gateway
1
If the music source is registered, the system side of the MDF connects directly to the system.
2
If the music source is not registered, the system side of the MDF connects to a 909A/B universal
coupler (see
909A/B universal coupler
on page 831).
Registered music source
Refer to
Figure 327
to install a registered music source.
1
Determine feature port assignment from Feature-Related System Parameters form.
2
Install music source according to the manufacturer’s instructions.
3
Install patch cord/jumper wires at the main distribution frame.
4
Administer the switch for the new equipment.
Nonregistered music source
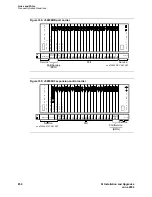
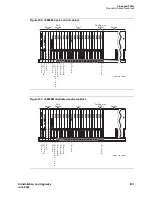
Refer to
Figure 328
and
Figure 329
when installing a nonregistered music source.
1
Determine feature port assignment from Feature-Related System Parameters Form.
2
Install the music source according to the manufacturer’s instructions.
3
Connect a cable from the assigned port carrier slot to J1 on the 909A/B universal coupler (see
909A/B universal coupler
on page 831). A wiring block must be locally engineered.
a
Connect the T-lead at pin 5 and the R-lead at pin 4 of J1 on the 909A/B universal coupler
to the corresponding leads from the TN2183.
b
Connect the CT-lead at pin 5 and the CR-lead at pin 4 of J2 on the 909A/B universal
coupler to the MDF.
4
Install patch cord/jumper wires at the MDF to connect tip and ring to the information outlet at the
music source.
5
Set the Protection/Paging switch to C1.
6
Connect a modular cord from the information outlet to the music source.
Figure notes
1
Music source
2
4-pair modular cord
3
103A or modular wall jack
4
122A music adapter (if
required—primarily required in France)
5
Tip (green) and ring (red)
6
Part of main distribution frame
7
A25D 25 pair cable (male-to-male) to
auxiliary trunk circuit pack
cydfmusc RPY 090397
1
2
3
4
5
6
7
Содержание MCC1
Страница 38: ...Upgrades to Avaya Commnication Manager Made Easy Before you start 38 SI Installation and Upgrades June 2004 ...
Страница 326: ...Installation for MCC1 Multicarrier Cabinets Made Easy 326 SI Installation and Upgrades June 2004 ...
Страница 362: ... Single Carrier Cabinets Made Easy 362 SI Installation and Upgrades June 2004 ...
Страница 498: ...Test the System LED Indicators 498 SI Installation and Upgrades June 2004 ...
Страница 650: ...Add IP Solutions Task list Upgrade a TN802 to a TN802B 650 SI Installation and Upgrades June 2004 ...
Страница 692: ...Install and Administer Trunks Add TN1654 DS1 Converter r only 692 SI Installation and Upgrades June 2004 ...
Страница 770: ...Connecting and Handling Fiber Optic Cables Cleaning Fiber Optic Cables 770 SI Installation and Upgrades June 2004 ...
Страница 784: ...Connector and Cable Diagrams Pinout Charts DS1 Interface Cable H600 307 784 SI Installation and Upgrades June 2004 ...
Страница 792: ...UPS Installation for SCC1 EPN A Carrier Cabinet Task List Install UPS 792 SI Installation and Upgrades June 2004 ...
Страница 874: ...Index Z 874 SI Installation and Upgrades June 2004 ...


