R5/R6/R7/R8si to Avaya Communication Manager
Introduction
100
SI Installation and Upgrades
June 2004
Make the Blowback Tape
To upload the translations remotely, contact the CSA. If you choose to make a blowback tape, follow this
procedure:
NOTE:
There must always be 2 system tapes on site with the DEFINITY system. Do not send the
system or backup tape to the CSA.
1
Get a blank R1V3 tape from the regional CSA. This will be the blowback tape.
2
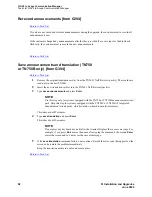
Remove the backup tape, install the blowback tape, and wait for the tape to retension.
NOTE:
The off-site CSA translation upgrade does not preserve the contents of recorded
announcements on TN750/B or earlier circuit packs. Therefore, if a TN750/B or earlier
circuit pack resides in the stack of single-carrier cabinets which is dismantled during the
upgrade, any announcements stored on the circuit pack must be rerecorded.
3
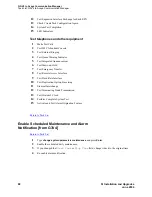
Enter
save translation
. Press Return.
4
Remove the blowback tape and label it with IL information (customer name and customer
contact).
5
Reinstall the system tape.
6
Use next-day delivery to mail the blowback tape to the CSA for use in making the translation
memory cards for the upgrade.
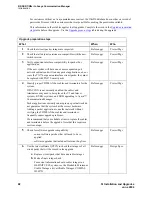
Upgrade process steps
What
When
Who
1
Check that the software load version on the processor is the
same as or higher than the version on the translation card.
(Use the
list configuration software-version memory-
resident
command.)
a
Compare the software load version on the processor
with the version on the translation card.
b
If the version on the processor is not the same as or
higher than the version on the card, download the
software load from the orange card that is included in
the crash kit.
During upgr
Design Spec
2
Use the procedures in this information product to do the
upgrade.
During upgr
Tech
3
Verify that the translations are correct for the upgraded
system. Make the needed changes.
After upgr
Software
Assoc
Содержание MCC1
Страница 38: ...Upgrades to Avaya Commnication Manager Made Easy Before you start 38 SI Installation and Upgrades June 2004 ...
Страница 326: ...Installation for MCC1 Multicarrier Cabinets Made Easy 326 SI Installation and Upgrades June 2004 ...
Страница 362: ... Single Carrier Cabinets Made Easy 362 SI Installation and Upgrades June 2004 ...
Страница 498: ...Test the System LED Indicators 498 SI Installation and Upgrades June 2004 ...
Страница 650: ...Add IP Solutions Task list Upgrade a TN802 to a TN802B 650 SI Installation and Upgrades June 2004 ...
Страница 692: ...Install and Administer Trunks Add TN1654 DS1 Converter r only 692 SI Installation and Upgrades June 2004 ...
Страница 770: ...Connecting and Handling Fiber Optic Cables Cleaning Fiber Optic Cables 770 SI Installation and Upgrades June 2004 ...
Страница 784: ...Connector and Cable Diagrams Pinout Charts DS1 Interface Cable H600 307 784 SI Installation and Upgrades June 2004 ...
Страница 792: ...UPS Installation for SCC1 EPN A Carrier Cabinet Task List Install UPS 792 SI Installation and Upgrades June 2004 ...
Страница 874: ...Index Z 874 SI Installation and Upgrades June 2004 ...


