Bring the System Online
Task List: Administer the System
480
SI Installation and Upgrades
June 2004
4
Type the Installation Location or Sold-To data in the
FL/Sold-To Number
field.
NOTE:
Sold-To number replaces the FL numbers as customer-site identifiers in the Maestro
database.
•
Sold-To numbers are typically 7 digits long, sometimes beginning with an upper-
case “S” followed by two zeros, for example: S001234567.
•
FL numbers are 10-12 letters or digits.
5
In the
Session Type
field, select:
— NEW INSTALL REGISTRATION for products that are initially installed at a customer site.
— UPGRADE REGISTRATION for all subsequent product registrations.
6
In the
Product Type
field choose DEFINITY for the following products:
7
Click on the Start Product Registration button.
8
If the data you have entered matches a Maestro database record, the Customer Verification page
appears.
9
Verify the information in the
Customer Name
and
Customer Address
fields.
If the information is not what you expected, ensure that you entered the customer’s FL/Sold-To
number correctly (Step 4 above). If you entered an incorrect number:
a
Click on the Abort Upgrade Registration Session button at the bottom of the screen.
CAUTION:
DO NOT exit your browser to abort the session. This can result in an incomplete upgrade
registration.
b
Return to the ART User Menu page to begin a new session.
If the FL/Sold-To number matches multiple customers in the database, ART displays the
name and address of each customer with a button to select for this registration session.
10
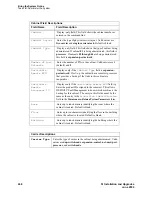
In the
Customer Type
field, select
— GOODYEAR, MOTEL 6, STATE FARM
— IN CINCINNATI BELL SERVICE AREA
— OTHER
11
Click on the Continue Upgrade Registration button.
The DEFINITY Product List page appears.
12
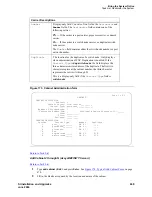
Look in the product table (first column heading is “#”) to find the row for the product that you
want to register. Click on the number in the far-left column (“#”) of the correct row.
NOTE:
It might be helpful to identify the product by looking at the Product Nickname, Product
Alarm ID, INADS Number, Serial Number, or IP Address columns in the table.
If the product is not shown in the table, or if you are not sure whether a listed product is the one
you want to register, contact the DBA group for assistance (1-800-248-1234, selecting prompt, 2,
prompt 6, then prompt 2).
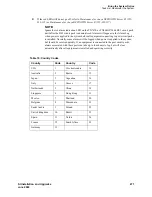
Four new fields appear.
Содержание MCC1
Страница 38: ...Upgrades to Avaya Commnication Manager Made Easy Before you start 38 SI Installation and Upgrades June 2004 ...
Страница 326: ...Installation for MCC1 Multicarrier Cabinets Made Easy 326 SI Installation and Upgrades June 2004 ...
Страница 362: ... Single Carrier Cabinets Made Easy 362 SI Installation and Upgrades June 2004 ...
Страница 498: ...Test the System LED Indicators 498 SI Installation and Upgrades June 2004 ...
Страница 650: ...Add IP Solutions Task list Upgrade a TN802 to a TN802B 650 SI Installation and Upgrades June 2004 ...
Страница 692: ...Install and Administer Trunks Add TN1654 DS1 Converter r only 692 SI Installation and Upgrades June 2004 ...
Страница 770: ...Connecting and Handling Fiber Optic Cables Cleaning Fiber Optic Cables 770 SI Installation and Upgrades June 2004 ...
Страница 784: ...Connector and Cable Diagrams Pinout Charts DS1 Interface Cable H600 307 784 SI Installation and Upgrades June 2004 ...
Страница 792: ...UPS Installation for SCC1 EPN A Carrier Cabinet Task List Install UPS 792 SI Installation and Upgrades June 2004 ...
Страница 874: ...Index Z 874 SI Installation and Upgrades June 2004 ...


