System 75 Small-Cabinet to R8si (Blowback)
Task List: System 75 Small Cabinet to R8si
298
SI Installation and Upgrades
June 2004
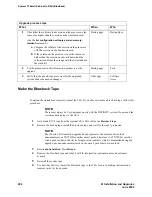
1
To ensure that the port circuit packs (in the A and B carriers) and the power units (in the B carrier)
are properly replaced, label each component with its slot number.
2
Disconnect the power cords from the power units in the B carrier.
3
Remove all port circuit packs from carriers A and B and the power units from carrier B. Store the
circuit packs in the static-proof packaging.
4
Remove the circuit-pack blanks from slots that do not contain circuit packs.
5
Remove the front trim plate from the A carrier by pulling straight off.
Return to Task List
Remove tape drive [75 small upgrade]
Return to Task List
NOTE:
The tape drive does not have to be physically removed at this time. You can disconnect it
now, and then remove it after you complete the upgrade and time is less critical.
1
Remove the tape.
2
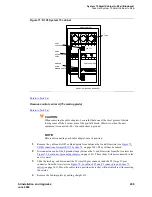
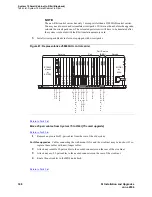
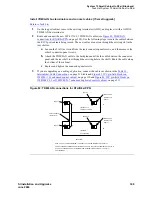
Disconnect the AHF4 cable adapter from behind slot 07 of control carrier A (see
Figure 71, R1V3
System 75 cabinet,
on page 299).
3
Open the snap connectors to remove the adapter from the tape drive’s ribbon cable. Route the
cable back to the tape drive and remove it. (There are 2 cable clamps on the cabinet’s side panel.
Use a screwdriver to unsnap them.)
Neither the cable nor the adapter will be used in the upgraded cabinet.
4
Disconnect and remove the tape drive.
— On the HCMR tape drive, disconnect the power supply from the front of the unit. Then
remove the screws at the rear of the unit that attach the drive to the chassis, and slide the
tape drive out the front of the cabinet.
— On the RMSS tape drive, disconnect the red and black wire. Remove the faceplate. Then
remove the screws that hold the unit to the chassis. Slide the drive out the front of the
cabinet.
5
Coil the red and black wire in an out-of-the-way position in the cabinet.
6
Install the 176A Apparatus Blank over the empty space left by the removal of the tape drive.
Содержание MCC1
Страница 38: ...Upgrades to Avaya Commnication Manager Made Easy Before you start 38 SI Installation and Upgrades June 2004 ...
Страница 326: ...Installation for MCC1 Multicarrier Cabinets Made Easy 326 SI Installation and Upgrades June 2004 ...
Страница 362: ... Single Carrier Cabinets Made Easy 362 SI Installation and Upgrades June 2004 ...
Страница 498: ...Test the System LED Indicators 498 SI Installation and Upgrades June 2004 ...
Страница 650: ...Add IP Solutions Task list Upgrade a TN802 to a TN802B 650 SI Installation and Upgrades June 2004 ...
Страница 692: ...Install and Administer Trunks Add TN1654 DS1 Converter r only 692 SI Installation and Upgrades June 2004 ...
Страница 770: ...Connecting and Handling Fiber Optic Cables Cleaning Fiber Optic Cables 770 SI Installation and Upgrades June 2004 ...
Страница 784: ...Connector and Cable Diagrams Pinout Charts DS1 Interface Cable H600 307 784 SI Installation and Upgrades June 2004 ...
Страница 792: ...UPS Installation for SCC1 EPN A Carrier Cabinet Task List Install UPS 792 SI Installation and Upgrades June 2004 ...
Страница 874: ...Index Z 874 SI Installation and Upgrades June 2004 ...

