Install Fiber Optic Cable Pass-Thru Kit for SCC1 (Single-Carrier) Cabinets
Install the fiber optic cable pass-thru kit (SCC1)
194
SI Installation and Upgrades
June 2004
Prepare the cabinet
Return to Task List
1
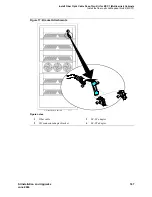
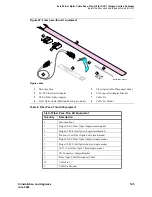
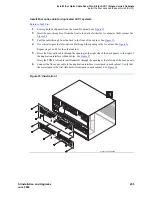
Verify the equipment received.
See
Figure 22, Fiber pass-thru kit equipment,
on page 195. Actual equipment may vary in
appearance and may ship in separate packages.
2
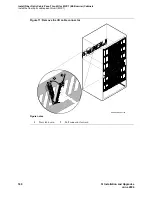
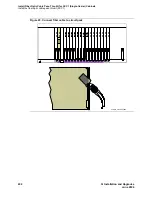
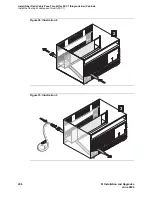
Remove the 2 perforated metal panels from the rear of the cabinet. See
Figure 23, Remove the
rear panels,
on page 196.
3
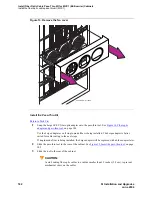
Remove the front door.
NOTE:
Administration may be required before removing the circuit pack in the following step.
4
Determine which slot (1 or 2) will contain the new fiber optic circuit pack. Remove the circuit
pack or the blanking plate from this slot.
NOTE:
For duplicated systems, you must install the duplication interface circuit pack in slot 1.
NOTE:
If a circuit pack is removed from the required slot, it must be installed into a different slot
in the cabinet. All translations associated with this circuit pack must also be moved.
5
Remove the circuit pack or the blanking plate from the slot next to the slot determined in
Step 4
.
Two consecutive open slots are required to install the fiber optic adapter.
NOTE:
If a circuit pack was removed in
Step 5
, it will be replaced into the same slot in the next
procedure.
6
From the rear, remove the I/O cable connector plate associated with the slot that will contain the
new fiber optic circuit pack.
7
Using a supplied cable tie, secure the removed I/O connector plate to the back of the cabinet or to
nearby cabling. This will keep it from moving loosely inside the cabinet.
8
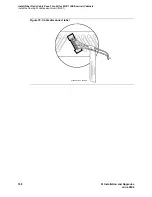
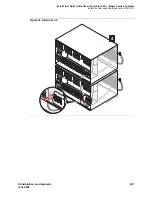
From the rear, remove the I/O cable connector associated with the slot that will contain the new
fiber optic circuit pack. See
Figure 24, Remove the I/O cable connector,
on page 197.
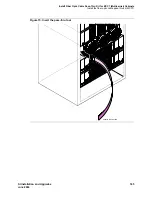
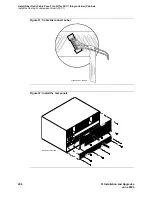
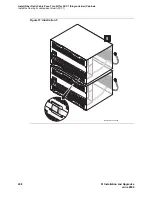
9
Using a supplied cable tie, secure the removed I/O connector to nearby cabling. See
Figure 25,
Secure the I/O cable connector,
on page 198.
Return to Task List
Содержание MCC1
Страница 38: ...Upgrades to Avaya Commnication Manager Made Easy Before you start 38 SI Installation and Upgrades June 2004 ...
Страница 326: ...Installation for MCC1 Multicarrier Cabinets Made Easy 326 SI Installation and Upgrades June 2004 ...
Страница 362: ... Single Carrier Cabinets Made Easy 362 SI Installation and Upgrades June 2004 ...
Страница 498: ...Test the System LED Indicators 498 SI Installation and Upgrades June 2004 ...
Страница 650: ...Add IP Solutions Task list Upgrade a TN802 to a TN802B 650 SI Installation and Upgrades June 2004 ...
Страница 692: ...Install and Administer Trunks Add TN1654 DS1 Converter r only 692 SI Installation and Upgrades June 2004 ...
Страница 770: ...Connecting and Handling Fiber Optic Cables Cleaning Fiber Optic Cables 770 SI Installation and Upgrades June 2004 ...
Страница 784: ...Connector and Cable Diagrams Pinout Charts DS1 Interface Cable H600 307 784 SI Installation and Upgrades June 2004 ...
Страница 792: ...UPS Installation for SCC1 EPN A Carrier Cabinet Task List Install UPS 792 SI Installation and Upgrades June 2004 ...
Страница 874: ...Index Z 874 SI Installation and Upgrades June 2004 ...

