Option Switch Settings
Printer Option Settings
SI Installation and Upgrades
749
June 2004
Printer Option Settings
Return to Task List
Printers can be used with a management terminal as journal printers for the hospitality feature and also as
an output device for Call Detail Recording (CDR).
A572 printer can function as a CDR device, system printer, or journal printer. The options are set with
function keys rather than DIP switches.
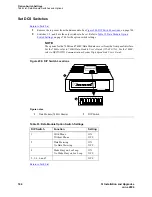
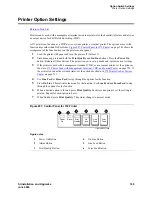
Figure 297, Control Panel for 572 Printer,
on page 749 shows the
arrangement of the function keys on the printer control panel.
1
Load the printer with paper and turn the power off (Callout 1).
2
Simultaneously press and hold the Print Quality and On Line buttons. Press the Power On
button. Release all three buttons. The printer is now in set-up mode and it prints current settings:
3
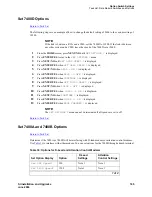
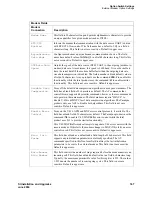
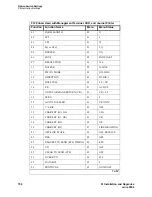
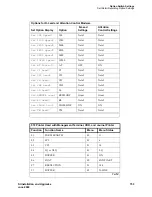
If the printer is used with a management terminal, CDR, or as a journal printer, set the options as
shown in
572 Printer Used with Management Terminal, CDR, and Journal Printer
on page 750. If
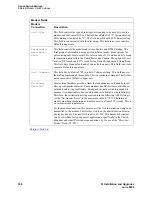
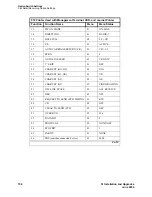
the printer is used as the system printer, set the options as shown in
572 Printer Used as System
Printer
on page 751.
4
Use Line Feed or Form Feed to step through the options for the function.
5
Press On Line. This activates the menu for the function. Use Line Feed and Form Feed to step
through the options for the function.
6
When a desired option is located, press Print Quality. Each time an option is set, the setting is
printed. Repeat for each option to be set.
7
When finished, press Print Quality. The printer changes to normal mode.
Figure 297: Control Panel for 572 Printer
Figure notes
1
Power On Button
2
Alarm Button
3
Print Quality Button
4
On Line Button
5
Line Feed Button
6
Form Feed Button
Power
On
Alarm
Quality
On
Line
Line
Feed
Form
Feed
r781610 RBP 071096
Содержание MCC1
Страница 38: ...Upgrades to Avaya Commnication Manager Made Easy Before you start 38 SI Installation and Upgrades June 2004 ...
Страница 326: ...Installation for MCC1 Multicarrier Cabinets Made Easy 326 SI Installation and Upgrades June 2004 ...
Страница 362: ... Single Carrier Cabinets Made Easy 362 SI Installation and Upgrades June 2004 ...
Страница 498: ...Test the System LED Indicators 498 SI Installation and Upgrades June 2004 ...
Страница 650: ...Add IP Solutions Task list Upgrade a TN802 to a TN802B 650 SI Installation and Upgrades June 2004 ...
Страница 692: ...Install and Administer Trunks Add TN1654 DS1 Converter r only 692 SI Installation and Upgrades June 2004 ...
Страница 770: ...Connecting and Handling Fiber Optic Cables Cleaning Fiber Optic Cables 770 SI Installation and Upgrades June 2004 ...
Страница 784: ...Connector and Cable Diagrams Pinout Charts DS1 Interface Cable H600 307 784 SI Installation and Upgrades June 2004 ...
Страница 792: ...UPS Installation for SCC1 EPN A Carrier Cabinet Task List Install UPS 792 SI Installation and Upgrades June 2004 ...
Страница 874: ...Index Z 874 SI Installation and Upgrades June 2004 ...

