


Chapter 9
Page no. 1670
JC-CAL-A-011.fm
GE Healthcare
Senographe DS
Revision 1
Service Information and Procedures Class A 2385072-16-8EN
Job Card CAL A011 - Calibration of kV Scale Factor
4. Select
SETUP/SETUP/2nd pt/CALIB
on the X-ray Console.
Note:
By default, the kV command value sent by the software for this 2nd point is 40 kV. Due to Senog-
raphe software, the Mo filter remains selected.
5. Press the Exposure button
on the X-ray Console and hold it down. A single 1-second exposure is
taken.
CALIBRATION END
appears on the X-ray Console display. Release the Exposure button
.
Note down the kV value displayed on the kV peak meter.
Note:
If for some reason this exposure has to be repeated, select
SETUP/CALIB
on the X-ray Console
before pressing the Exposure button
again.
6. Select
SETUP/kV_M
on the X-ray Console. Enter the kV value read from the kV peak meter by using
the NEXT and VALID keys and rotating the kV dial. If necessary (for example with the RMI 232 vVp
meter) remember to apply the kV correction value from the meter’s calibration curve to the value dis-
played on the kVp meter. For more information on specifying numeric values on the X-ray Console
refer to
Representation of Numeric Parameters
7. Select
SETUP/SETUP/calcul/VALID
on the X-ray Console to execute the calculation. Normally,
KV
CALIB END
appears on the X-ray Console display. The message
OUT OF RANGE
on the X-ray
Console display indicates either faulty kV measurement(s) in the steps above, or a hardware failure.
6-3
Check results
1. Remove the kV peak meter, Radiation Protection Plate, Detector Protection Plate, and Standard
19 X 23 Compression Paddle.
Note:
When removing the adhesive tape from the Radiation Protection Plate and Standard 19 X 23 Com-
pression Paddle take care not to leave glue residue on the Compression Paddle and Radition Pro-
tection Plate.
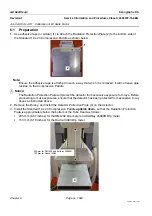
2. Install the Bucky.
3. Place some paper on the Bucky (to protect it) and place the Radiation Protection Plate on the Bucky.
This will protect the detector from excessive exposure to X-rays.
! Notice:
Before proceeding to make exposures, ensure that the detector has been protected from exces-
sive X–ray doses as instructed (by placing a Radiation Protection Plate on the top of the Bucky).
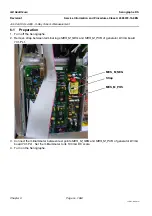
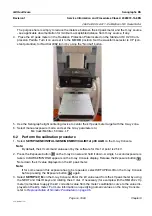
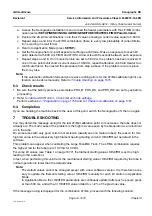
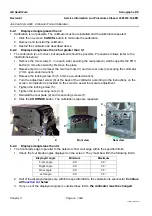
4. Place the kV peak meter on the Bucky. Turn it on and set it to the MO/MO position. Set the waveform
selector to CP (constant potential), for RadCal 4082 turn it by using the "Normal" button.
5. Use the Senographe light centering device to center the kV peak meter target with the X-ray zone.


