GE Healthcare
Senographe DS
Revision 1
Service Information and Procedures Class A 2385072-16-8EN
Job Card D/R A315 - International Keyboard
Page no. 1449
Chapter 9
JC-DR-A-315.fm
9. You are returned to the command prompt. Launch the Desktop Manager Configuration Tool again to
ensure that the Monitor settings are correct, by entering:
kdmconfig
The Desktop Manager Configuration Tool appears. Within the Desktop Manager Configuration Tool
you use the cursor keys to move up and down between the different options, and the space bar to
select an option. The currently selected option contains an
x
within the brackets.
10. At the first
kdmconfig
page, leave the
Xsun server
option selected.
Press the
F2
key to continue.
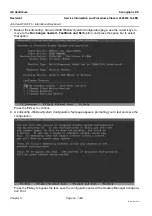
11. At the
kdmconfig - View and Edit Window System Configuration
page that appears, use the cursor
keys to move to the
Change Video Device/Monitor
option, and press the space bar to select that
option. Press the
F2
key to continue.
12. At the
kdmconfig - Video Device Selection
page that appears, use the cursor keys to move to the
XF86-NV Nvidia Corporation Quadro FX560
option, and press the space bar to select that option.
Press the
F2
key to continue.
13. At the
kdmconfig - Monitor Type Selection
page that appears, use the cursor keys to move to the
MultiFrequency 64KHz (up to 1600x1200 interlacead)
option, and press the space bar to select
that option. Press the
F2
key to continue.
14. At the
kdmconfig - Screen Size Selection
page that appears, use the cursor keys to move to the
appropriate screen size option (
18-inch (46cm
) if the system uses an 18" monitor, or
19-inch (48cm)
if the system uses a 19" monitor), and press the space bar to select that option. Press the
F2
key to
continue.
15. At the
kdmconfig - Resolution/Colors Selection
page that appears, use the cursor keys to move to the
1280x1024 256 colors @ 60Hz
option, and press the space bar to select that option. Press the
F2
key to continue.
16. At the
kdmconfig - View and Edit Window System Configuration
page that appears, leave the
No
changes needed - Test/Save and Exit
option selected. Press the
F2
key to continue.
17. At the
kdmconfig - Window System Configuration Test
page that appears, press the
F2
key to run the
screen test.
18. From the test screen that appears, click on:
•
Yes
, if screen is displayed correctly (buttons and text are readable).
•
No
, if screen is not displayed correctly and redo steps
Once the monitor test is successful, and you click
Yes
you are automatically returned to the com-
mand line.
19. At command prompt, ensure that the Control Station is in safe state for powering down, by entering:
shutdown -y -i 0
20. Power down the entire system, and proceed to
.
WARNING
Before proceeding to
, shut down correctly the equipment and switch off the
Senographe system hospital supply circuit breaker. Lock it in the off position or mark it
clearly with a warning sign to prevent others from applying power
.

