


Chapter 9
Page no. 1350
JC-DR-A-258.fm
GE Healthcare
Senographe DS
Revision 1
Service Information and Procedures Class A 2385072-16-8EN
Job card D/R A258 - Bucky Board
6-3
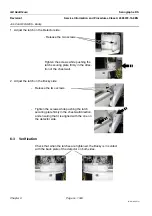
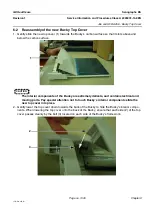
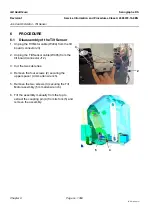
Reassembly of the new Bucky Top Cover
1. Gently slide the top cover (1) towards the Bucky carbon surface so that it slots above and below the
carbon surface.
! Notice:
The interior components of the Bucky are extremely delicate, and contain electrical and moving
parts. Pay special attention not to touch Bucky interior components while sliding the top cover into
place.
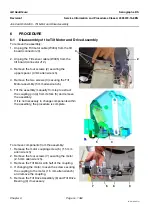
2. Gently lower the top cover down towards the back of the Bucky to hide the Bucky interior compo-
nents. When lowering the top cover onto the back of the Bucky, ensure that each side (2) of the top
cover passes cleanly by the bolt (3) located on each side of the Bucky’s framework.
1
2
3


