NOTE
Dimensions are like other annotation elements; they are view-specific. They do not appear in all other views
automatically.
Placing Permanent Dimensions
The Dimension command lets you place permanent dimensions on components in your project or family.
You can choose from aligned, horizontal, vertical, angular, radial, or arc length permanent dimensions.
To view a dimension value after placing it, select one of the components that it references.
Before placing dimensions in Revit Architecture, you may want to edit the properties for dimensions and
predefine aligned, horizontal, vertical, angular, radial, and arc length dimensions. For more information,
see
Dimension Properties
on page 238.
Aligned Dimensions
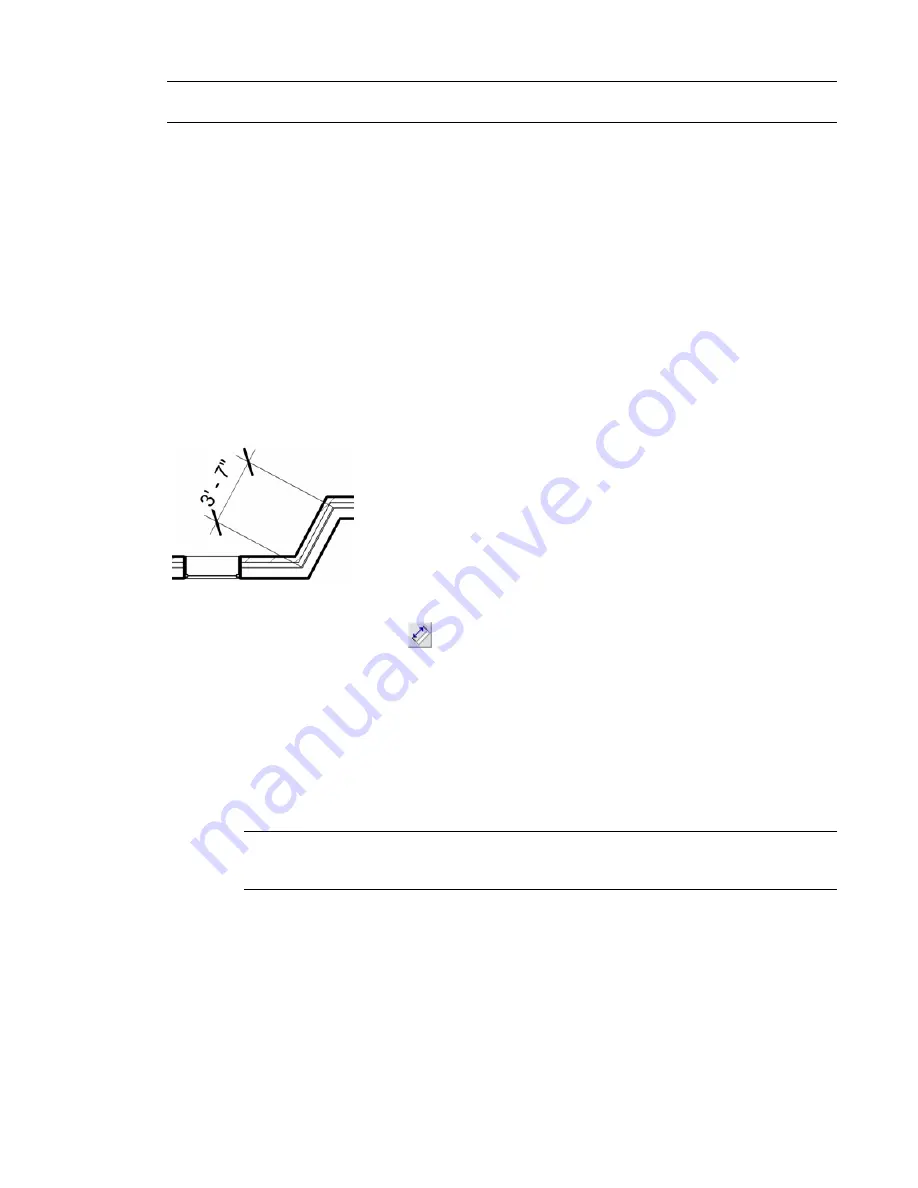
You can place aligned dimensions between 2 or more parallel references or 2 or more points, such as wall
ends.
1
Click Drafting menu
➤
Dimension, or on the Drafting tab of the Design Bar, click Dimension.
2
On the Options Bar, click
(Create Aligned Dimensions).
3
If you are creating a dimension with walls, select a value for Prefer, which sets a snap point for
the cursor.
Options are Wall centerlines, Wall faces, Center of core, and Faces of core. For example, if you
select Prefer wall centerlines, the cursor first snaps to the centerline of a wall when you place it
over the wall.
4
For Pick, select Individual References.
5
Place the cursor at a reference point on an element, such as a wall.
The reference point highlights if you can place the dimension there.
TIP
You can cycle through the different reference points for walls by pressing TAB. Intersections of
internal wall layer boundaries provide references for aligned dimensioning. A gray square reference
displays at any intersection of internal wall layers.
6
Click to specify the reference.
7
Place the cursor on the desired location of the next reference point, and click.
As you move the cursor, a dimension line appears. You can continue to select multiple references,
if desired.
8
When you have reached the last reference point, move the cursor away from the last component
and click.
The permanent aligned dimension appears.
Permanent Dimensions | 215
Summary of Contents for 24000-000000-9860 - Revit Architecture - PC
Page 1: ...Revit Architecture 2009 User s Guide April 2008 240A1 050000 PM02A ...
Page 4: ......
Page 56: ...18 ...
Page 116: ...78 Chapter 3 Revit Essentials ...
Page 172: ...134 Chapter 4 ProjectViews ...
Page 178: ...Schedule with Grid Lines Schedule with Grid Lines and an Outline 140 Chapter 4 ProjectViews ...
Page 554: ...516 ...
Page 739: ...Curtain wall Curtain Grid Curtain Walls Curtain Grids and Mullions 701 ...
Page 1004: ...966 ...
Page 1136: ...1098 ...
Page 1226: ...1188 ...
Page 1250: ...1212 ...
Page 1276: ...1238 Chapter 20 Design Options ...
Page 1310: ...1272 ...
Page 1366: ...1328 ...
Page 1406: ...1368 ...


