OPERATION GUIDE - ERASING PERIPHERAL SHADOWS ON THE IMAGE
file:///G|/Documents/Products/MX2610_3110_3610N/Operation%20Manual/MX3610OP_0122A1/mx3610_ex_ope/contents/05-050b.htm[24/03/2011 3:01:59 PM]
MX-2610N / MX-3110N / MX-3610N
ERASING PERIPHERAL SHADOWS ON THE
IMAGE
Erase
IMAGE SEND
<
6
steps in all >
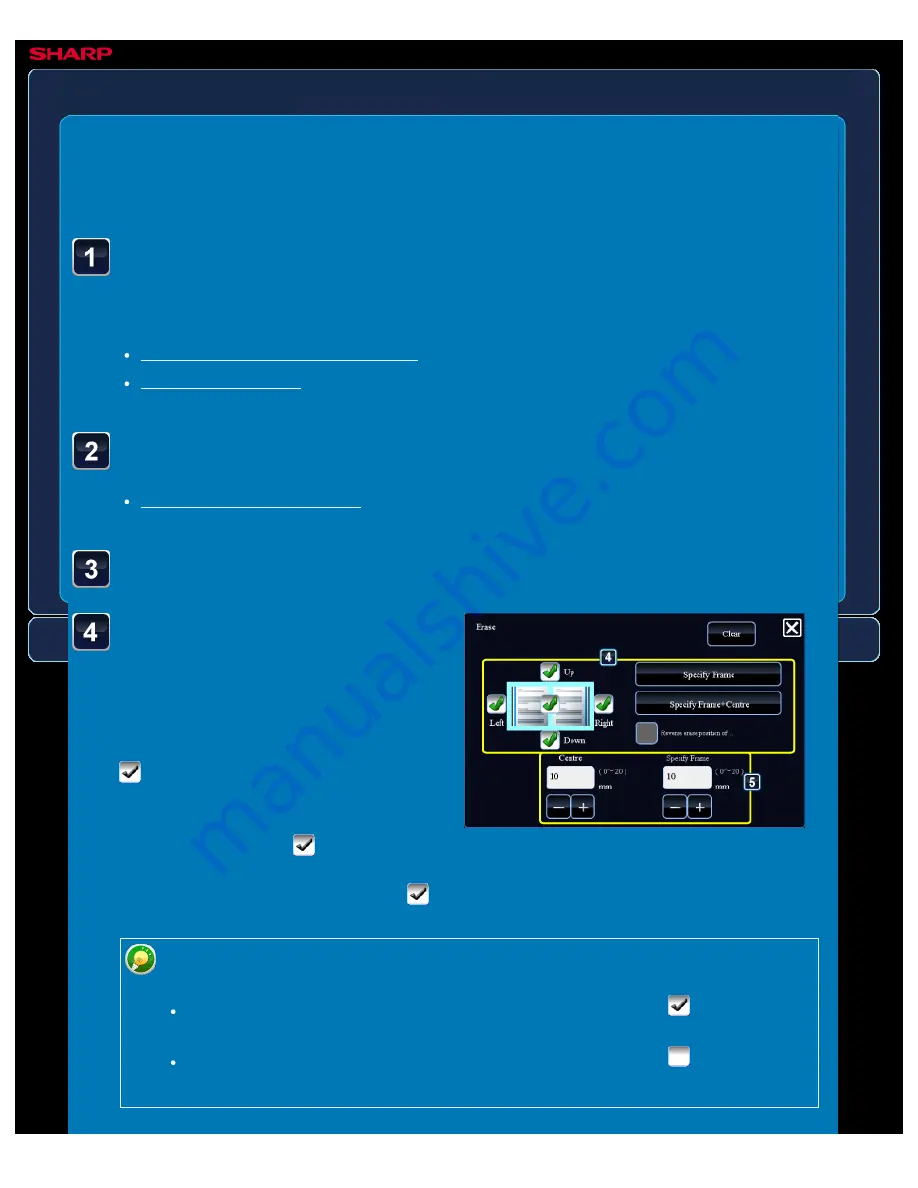
Tap the checkbox of the
edge that you wish to
erase, and specify the
erase position.
Check that he tapped checkbox is set to
.
If the [Specify Frame] key is tapped, the
[Up], [Down], [Left], and [Right]
checkboxes are set to
.
If the [Specify Frame+Centre] key is
tapped, all the checkboxes are set to
.
Place the original.
Place the original in the document feeder tray of the automatic document feeder, or on the
document glass.
Specify the destination.
Tap the [Others>>] key, and tap the [Erase] key.
Specify the erase edge on the reverse side when erasing edges of one to three
sides of Up, Down, Left, and Right on the front side to scan a 2-sided original.
If the [Reverse erase position of back face.] checkbox is set to
, the edge in
the position opposite to the erased edge on the front side will be erased.
If the [Reverse erase position of back face.] checkbox is set to
, the edge in
the same position as on the front side will be erased.


