


OPERATION GUIDE - MANUAL RATIO SELECTION
file:///G|/Documents/Products/MX2610_3110_3610N/Operation%20Manual/MX3610OP_0122A1/mx3610_ex_ope/contents/02-014b.htm[24/03/2011 2:57:20 PM]
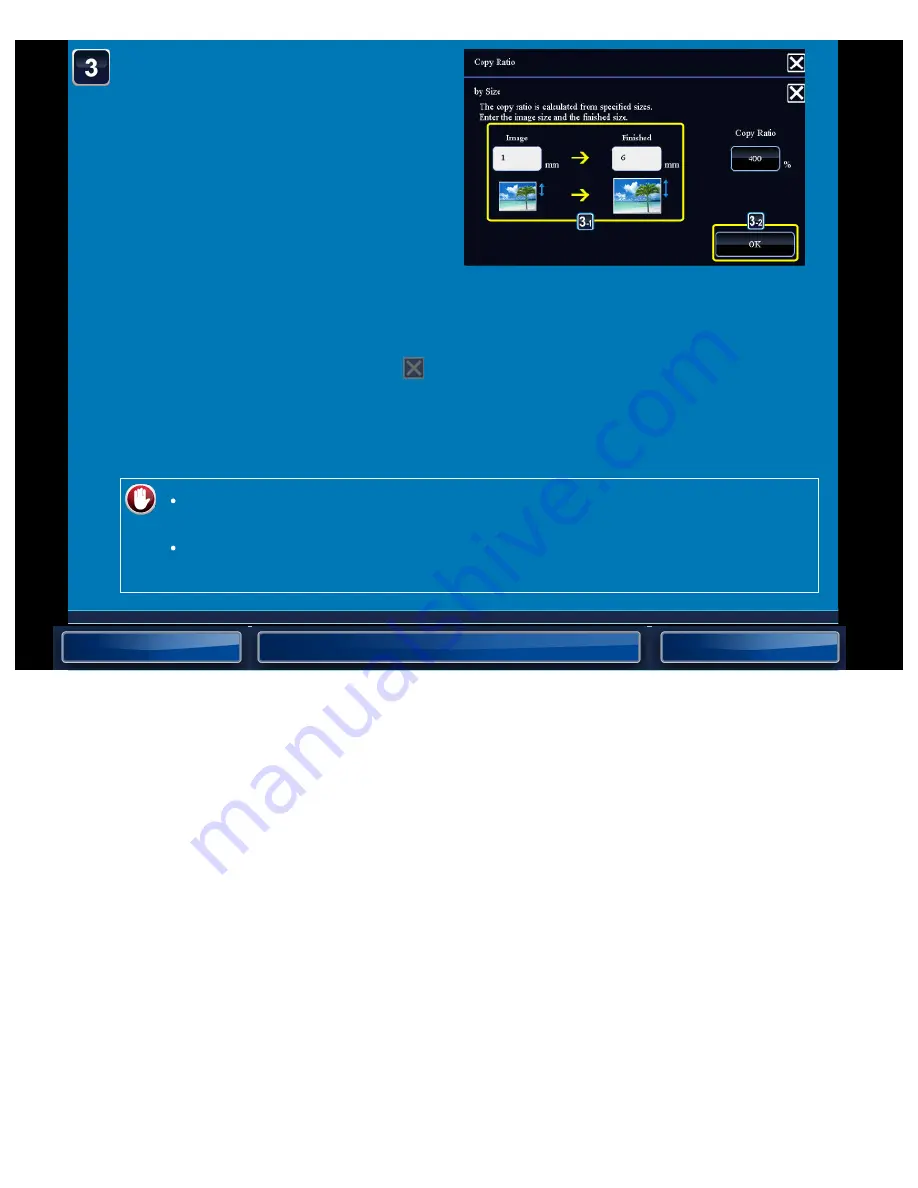
Specify the image size
(dimensions of the image
to be enlarged or reduced)
and the output size
(dimensions of the
enlarged and reduced
image), and then tap the
[OK] key.
Tap the area of image size and output
size, and enter the sizes using the
numeric keys.
After the settings are completed, tap
.
In the preview screen, check whether or
not settings produce the required results.
If you have entered an incorrect size:
Tap the [C] key, and then enter the correct size.
To cancel all settings:
Tap the [CA] key.