


OPERATION GUIDE - SAVING AND USING PRINT FILES
file:///G|/Documents/Products/MX2610_3110_3610N/Operation%20Manual/MX3610OP_0122A1/mx3610_ex_ope/contents/03-043b.htm[24/03/2011 2:59:21 PM]
MX-2610N / MX-3110N / MX-3610N
SAVING AND USING PRINT FILES
Force
retention/document
filing
PRINTER
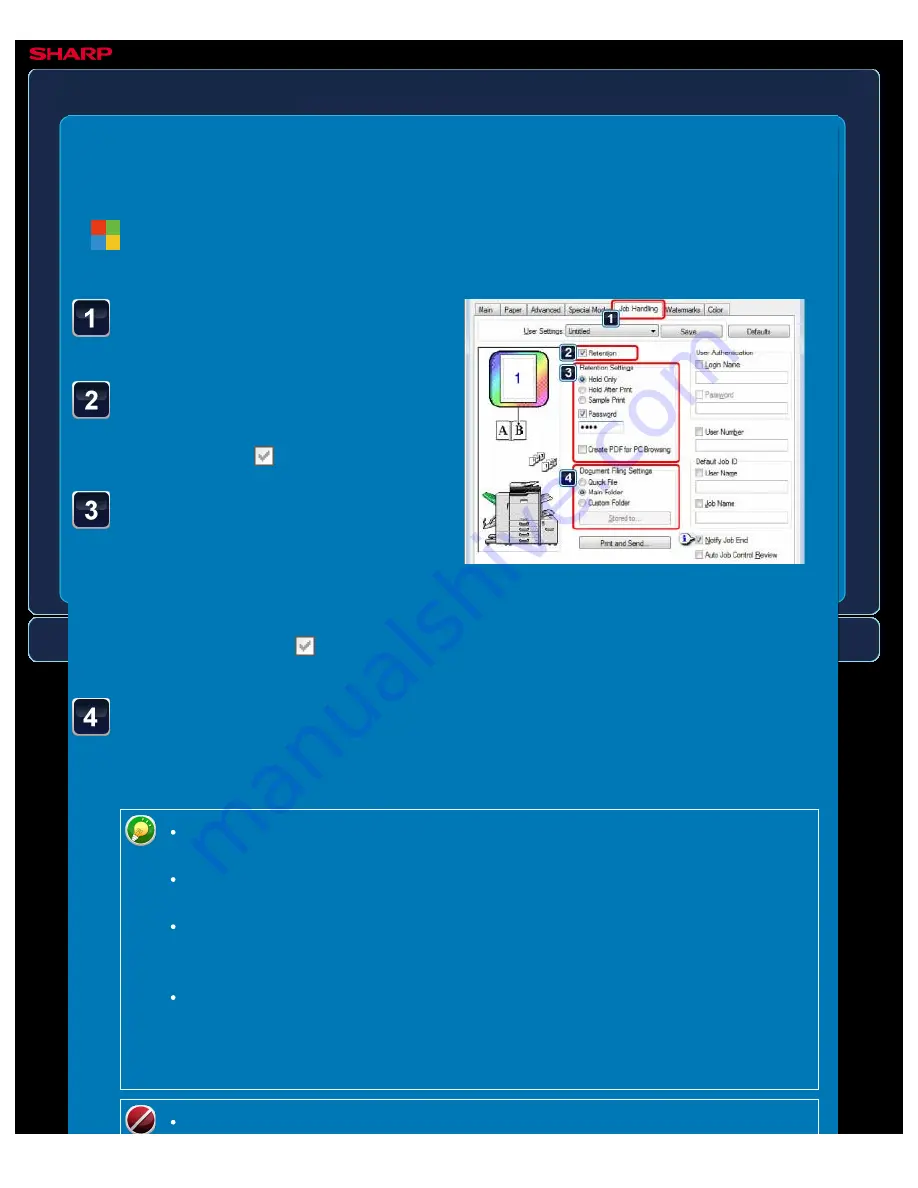
Click the [Job Handling]
tab.
Click the [Retention]
checkbox so that the
checkmark appears.
Select how to save the
print data in "Retention
Settings".
To enter a password (5 to 8 digit
number), click the [Password] checkbox
so that the checkmark
appears.
Windows
< 4 steps in all >
Select the folder to store the file in "Document Filing
Settings".
When you have selected [Custom Folder], click the [Stored to] button to select the folder.
When [Quick File] is selected, "Retention Settings" will be set to [Hold After
Print].
When [Quick File] is selected, the password entered in "Retention Settings" is
cleared.
If necessary, you can select the data format from CMYK and RGB for data to be
stored in the machine. Click the [Compatibility] button on the [Advanced] tab and
select the format from "Rip Format".
To store a file in a custom folder, you must first create the custom folder using
[System Settings] in "Setting mode" → [Document Filing Control]. If you have set
a password for the custom folder, enter the password in "Folder Password" on
the folder selection screen.
If you have configured to always use the force retention function in "Printing