OPERATION GUIDE - ADDING MARGINS
file:///G|/Documents/Products/MX2610_3110_3610N/Operation%20Manual/MX3610OP_0122A1/mx3610_ex_ope/contents/02-023b.htm[24/03/2011 2:57:28 PM]
MX-2610N / MX-3110N / MX-3610N
ADDING MARGINS
Margin shift
COPYING
<
6
steps in all >
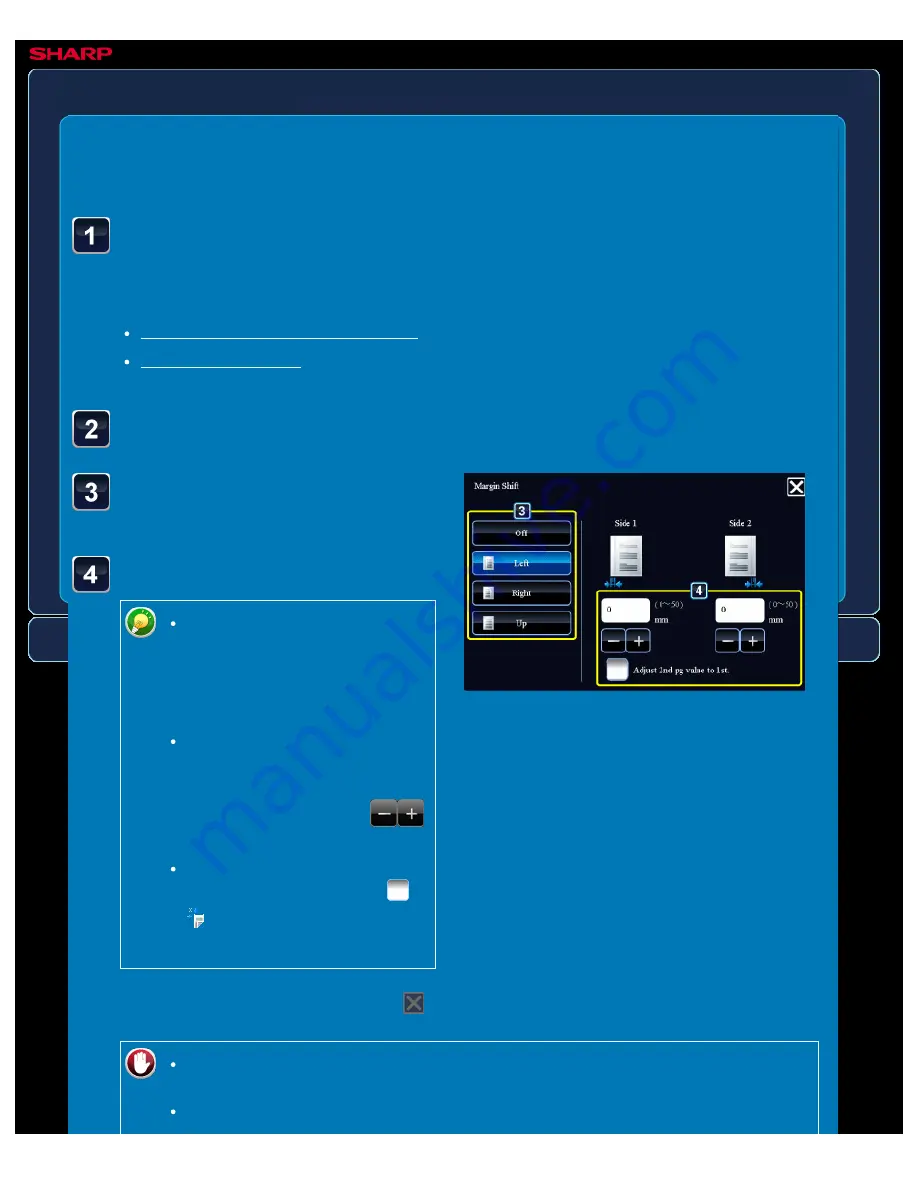
Tap the image shift
direction.
Sets a margin shift width.
Tap the numeric value display
indicating the margin shift area
on the front side or reverse
side, and enter the area using
the numeric keys.
To quickly set the area, first
specify a value close to the
desired value by the numeric
keys, then adjust it with
.
If you set the [Adjust 2nd pg
value to 1st.] checkbox to
,
goes out and you can set
sides 1 and 2 separately.
Place the original and tap the [Preview] key.
Place the original in the document feeder tray of the automatic document feeder, or on the
document glass.
Tap the [Others>>] key, and tap the [Margin Shift] key.
After the settings are completed, tap
and [<<Back] keys in sequence.
To cancel the margin shift setting:
Tap the [Off] key.
To cancel all settings:


