Initial Inspections
3-11
7SA6 Manual
C53000-G1176-C156-2
Setting Date and
Time
To enter the date and time:
G
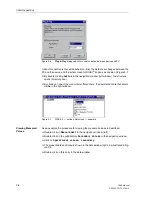
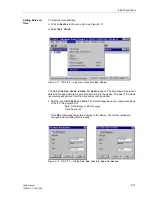
Click on
Device
in the menu bar. See Figure 3-11.
G
Select
Set Clock
.
Figure 3-11
DIGSI
®
4 — Selection of the option
Set Clock
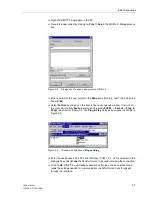
The dialog field
Set clock & date in device
opens. The field shows the present
date and the approximate present time according to the device. The day of the week
is automatically derived from the date and cannot be edited.
•
Edit the input fields
Date
and
Time
. The format depends on your regional settings
of the PC. See Figure 3-12.
Date: mm/dd/yyyy or dd.mm.yyyyy
Time: hh.mm.ss
Click
OK
to download the entered values to the device. The former values are
changed and the dialog field is closed.
Figure 3-12
DIGSI
®
4 — Dialog Field:
Set clock & date in device
Summary of Contents for siprotec 7SA6
Page 2: ...Siemens Aktiengesellschaft Book No C53000 G1176 C156 2 ...
Page 18: ...xviii 7SA6 Manual C53000 G1176 C156 2 ...
Page 32: ...Introduction 1 14 7SA6 Manual C53000 G1176 C156 2 ...
Page 82: ...Hardware and Connections 2 50 7SA6 Manual C53000 G1176 C156 2 ...
Page 119: ...SIPROTEC 4 Devices 4 25 7SA6 Manual C53000 G1176 C156 2 Figure 4 20 CFC Logic example ...
Page 190: ...Configuration 5 62 7SA6 Manual C53000 G1176 C156 2 ...
Page 652: ...Installation and Commissioning 8 78 7SA6 Manual C53000 G1176 C156 2 ...
Page 724: ...Technical Data 10 56 7SA6 Manual C53000 G1176 C156 ...
Page 800: ...Appendix A 76 7SA6 Manual C53000 G1176 C156 2 ...
Page 866: ...Appendix B 66 7SA6 Manual C53000 G1176 C156 2 ...


