Configuration
5-49
7SA6 Manual
C53000-G1176-C156-2
column B and sub-column D must have been linked. A cross in the small box will en-
able the link.
A library is provided which contains symbols for circuit breakers, isolation switches,
and grounding switches, and other devices. The standard setup may be modified, at
any time, using the DIGSI
®
4 diagram editor. User defined symbols may also be cre-
ated and saved in the library.
The user may assign various symbols to any operating equipment condition in the di-
alog window presented (e.g. CLOSE / OPEN / INTERMEDIATE) for the circuit break-
er.
The layout of the image may be displayed enlarged or reduced to show details or an
overview of the entire image.
A title bar is provided at the top of the display. It can contain the user defined name of
the substation or feeder. The status bar at the bottom may not be configured.
Proceed as follows:
•
In DIGSI
®
4, select the default display under the
Setting
option. The Display Ed-
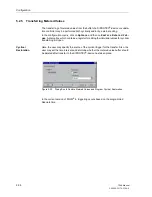
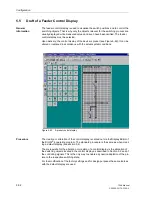
itor is started and the default display is opened (see Figure 5-46). Right-click in the
title bar and select
Open
in the context menu which appears. The desired text may
be entered.
•
Draw the desired topology (e.g., common busbars, lines, and grounding path). Se-
lect nodes, horizontal lines, and vertical lines from the library, mark them, and con-
firm the selection with
OK
.
•
Locate the operating equipment and symbols (e.g., switching devices, instrument
transformers, measured values) by selecting from the library, and click in the draw-
ing area on the desired location. Link the equipment with the respective information.
•
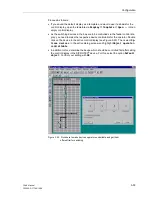
Use dynamic symbols for breaker and switches (See Figure 5-50).
Summary of Contents for siprotec 7SA6
Page 2: ...Siemens Aktiengesellschaft Book No C53000 G1176 C156 2 ...
Page 18: ...xviii 7SA6 Manual C53000 G1176 C156 2 ...
Page 32: ...Introduction 1 14 7SA6 Manual C53000 G1176 C156 2 ...
Page 82: ...Hardware and Connections 2 50 7SA6 Manual C53000 G1176 C156 2 ...
Page 119: ...SIPROTEC 4 Devices 4 25 7SA6 Manual C53000 G1176 C156 2 Figure 4 20 CFC Logic example ...
Page 190: ...Configuration 5 62 7SA6 Manual C53000 G1176 C156 2 ...
Page 652: ...Installation and Commissioning 8 78 7SA6 Manual C53000 G1176 C156 2 ...
Page 724: ...Technical Data 10 56 7SA6 Manual C53000 G1176 C156 ...
Page 800: ...Appendix A 76 7SA6 Manual C53000 G1176 C156 2 ...
Page 866: ...Appendix B 66 7SA6 Manual C53000 G1176 C156 2 ...


