Installation and Commissioning
8-51
7SA6 Manual
C53000-G1176-C156-2
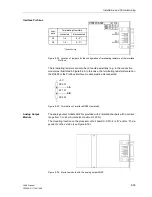
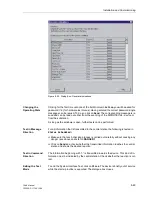
appropriately marked switching area. By double-clicking in an area, components with-
in the associated group can be turned on or off.
In the
Status
column, the present (physical) state of the hardware component is
displayed. The binary inputs and outputs are indicated by an open or closed switch
symbol, the LEDs by a dark or illuminated LED symbol.
The possible intended condition of a hardware component is indicated with clear text
under the
Scheduled
column, which is next to the
Status
column. The intended
condition offered for a component is always the opposite of the present state.
The right-most column indicates the commands or messages that are configured
(masked) to the hardware components.
Changing the
Hardware
Conditions
To change the condition of a hardware component, click on the associated switching
field in the
Scheduled
column.
Password No. 6 (if activated during configuration) will be requested before the first
hardware modification is allowed. After entry of the correct password a condition
change will be executed.
Further condition changes remain possible while the dialog box is open.
Test of the Binary
Outputs
Each individual output relay can be energized allowing a check of the wiring between
the output relay of the 7SA6 and the plant, without having to generate the message
that is assigned to the relay. As soon as the first change of state for any one of the
output relays is initiated, all output relays are separated from the internal device func-
tions, and can only be operated by the hardware test function. This implies that a
switching signal to an output relay from e.g. a protection function or control command
cannot be executed.
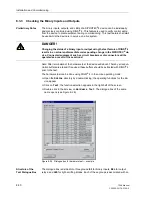
G
Ensured that the switching of the output relay can be executed without danger (see
above under DANGER!).
G
Each output relay must be tested via the corresponding
Scheduled
–cell in the di-
alog box.
G
The test sequence must be terminated (refer to margin heading “Exiting the Proce-
dure”), to avoid the initiation of inadvertent switching operations by further tests.
Test of the Binary
Inputs
To test the wiring between the plant and the binary inputs of the 7SA6 the condition in
the plant which initiates the binary input must be generated and the response of the
device checked.
To do this, the dialogue box
Hardware Test
must again be opened to view the phys-
ical state of the binary inputs. The password is not yet required.
G
Each state in the plant which causes a binary input to pick up must be generated.
G
The response of the device must be checked in the
Status
–column of the dialogue
box. To do this, the dialogue box must be updated. The options may be found below
under the margin heading “Updating the Display”.
If however the effect of a binary input must be checked without carrying out any switch-
ing in the plant, it is possible to trigger individual binary inputs with the hardware test
function. As soon as the first state change of any binary input is triggered and the
password nr. 6 has been entered, all binary inputs are separated from the plant and
can only be activated via the hardware test function.
G
Terminate the test sequence (see above under the margin heading „Exiting the Pro-
cedure“).
Summary of Contents for siprotec 7SA6
Page 2: ...Siemens Aktiengesellschaft Book No C53000 G1176 C156 2 ...
Page 18: ...xviii 7SA6 Manual C53000 G1176 C156 2 ...
Page 32: ...Introduction 1 14 7SA6 Manual C53000 G1176 C156 2 ...
Page 82: ...Hardware and Connections 2 50 7SA6 Manual C53000 G1176 C156 2 ...
Page 119: ...SIPROTEC 4 Devices 4 25 7SA6 Manual C53000 G1176 C156 2 Figure 4 20 CFC Logic example ...
Page 190: ...Configuration 5 62 7SA6 Manual C53000 G1176 C156 2 ...
Page 652: ...Installation and Commissioning 8 78 7SA6 Manual C53000 G1176 C156 2 ...
Page 724: ...Technical Data 10 56 7SA6 Manual C53000 G1176 C156 ...
Page 800: ...Appendix A 76 7SA6 Manual C53000 G1176 C156 2 ...
Page 866: ...Appendix B 66 7SA6 Manual C53000 G1176 C156 2 ...


