


Instrument Functions
R&S
®
Cable Rider ZPH
105
User Manual 1321.0950.02 ─ 07
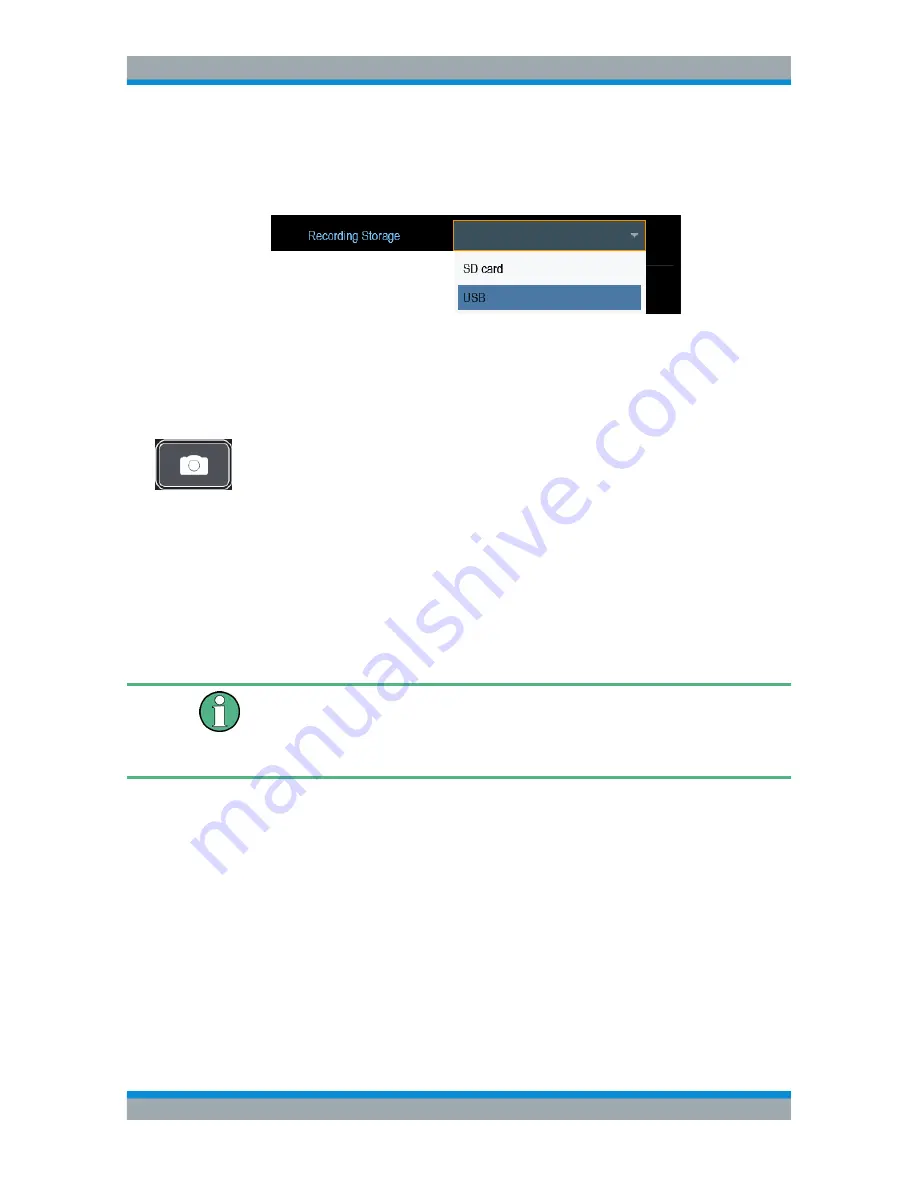
2. Select the "User Preference" softkey.
3. Select the "Recording Storage" menu item.
A drop-down menu to select the recording storage media opens.
4. Select the desired storage media.
5.8
Taking Screenshots
You can take and store a screenshot of the current screen anytime with the screenshot
key.
► Press the screenshot key.
The R&S Cable Rider ZPH takes the screenshot.
If available, the R&S Cable Rider ZPH stores the screenshot on an external storage
device (USB flash drive or micro-SD card). If both are connected, the R&S Cable Rider
ZPH uses the USB flash drive.
If no external device is available, the R&S Cable Rider ZPH stores the screenshot in its
internal memory until the internal memory is full. In that case, you can transfer the
screenshots with the R&S InstrumentView software to your computer.
Saving screenshot and dataset at the same time
Depending on the "Capture" settings configured in the "User Preference" menu, using
the screenshot key also saves a dataset in addition to the screenshot.
For more information, see
Chapter 5.9, "Managing Datasets"
,
on page 107.
Screenshot filename and file format
All screenshots get a default filename "Screenshot####". The files also get numbers
(####) in an ascending order, beginning with 0000. You can select a default filename
and a starting number in the "User Preference" menu.
The file format of screenshots is either *.png or *.jpg, depending on your configuration
in the "User Preference" menu.
1. Press the [SETUP] key.
2. Select the "User Preference" softkey.
3. Select the "Default Filename" and "Filename Counter Starts At" items and assign a
filename and number as you wish.
Taking Screenshots


