background image

COPYRIGHT  © 1999 CANON INC.   CANON imageRUNNER 400/330 REV.0 JAN. 1999 PRINTED IN JAPAN (IMPRIME AU JAPON)

14-169

CHAPTER 14  TROUBLESHOOTING

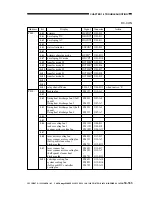
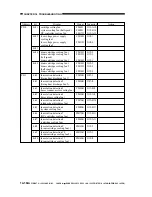
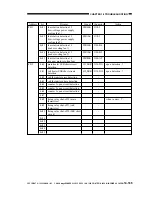
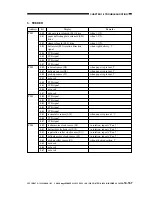
Address

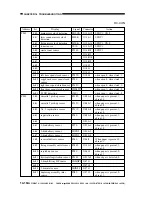
P009

P010

Remarks

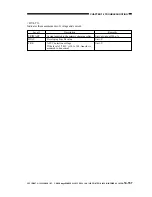
when '0', ON.
when '0', ON.
when '1', ON.
when '1', ON.
when '1', ON.
when '1', ON.
when '1', ON.
when '1', ON.
when '1', ON.
when '1', ON.

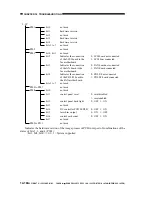
bit

bit0
bit1
bit2
bit3
bit4
bit5
bit6
bit7
bit0
bit1
bit2
bit3
bit4
bit5
bit6
bit7

Display

not used
not used
not used
not used
not used
not used
LED1 on DADF controller PCB
LED2 on DADF controller PCB
DSW1-8 on DADF controller PCB
DSW1-7 on DADF controller PCB
DSW1-6 on DADF controller PCB
DSW1-5 on DADF controller PCB
DSW1-4 on DADF controller PCB
DSW1-3 on DADF controller PCB
DSW1-2 on DADF controller PCB
DSW1-1 on DADF controller PCB

Summary of Contents for imageRunner 330

Page 1: ...COPYRIGHT 1999 CANON INC CANON imageRUNNER 400 330 REV 0 JAN 1999 PRINTED IN JAPAN IMPRIME AU JAPON REVISION 0 JAN 1999 DU7 1102 000 ...

Page 2: ...UESTIONS REGARDING INFORMATION CONTAINED HEREIN SHOULD BE DIRECTED TO THE COPIER SERVICE DEPARTMENT OF THE SALES COMPANY THIS DOCUMENTATION IS INTENDED FOR ALL SALES AREAS AND MAY CONTAIN INFOR MATION NOT APPLICABLE TO CERTAIN AREAS COPYRIGHT 1999 CANON INC Printed in Japan Imprimé au Japon Use of this manual should be strictly su pervised to avoid disclosure of confidential information Prepared b...

Page 3: ...ucts Technical Support Dept 1 Office Imaging Products Technical Support Div Office Imaging Products Quality Assurance Center CANON INC Printed in Japan REVISION 0 JAN 30809 5 7 Hakusan 7 chome Toride City Ibaraki Pref 302 8501 Japan ...

Page 4: ... System discusses the principles of how images are formed It also explains the timing at which the various units involved in image formation are operated and show how they may be disassembled assembled and adjusted Chapter 7 Pick Up Feeding System explains the principles of picking up and feeding copy paper in view of the functions of electrical and mechanical units used to move copy paper and in ...

Page 5: ...escriptions in this Service Manual are subject to change without notice for product improvement or other purposes and major changes will be communicated in the form of Service Information bulletins All service persons are expected to have a good understanding of the contents of this Service Manual and all relevant Service Information bulletins and be able to identify and isolate faults in the mach...

Page 6: ...AU JAPON iii System Configuration The copier may be configured with its accessories as follows n Pick Up Delivery Accessories 1 DADF A1 2 Finisher C1 3 Multi Output Tray C1 4 Saddle Finisher C2 5 Finisher E1 6 Cassette Feeding Unit S1 7 Cassette Feeding Unit R1 8 Paper Deck B1 3 2 5 8 4 6 7 1 ...

Page 7: ... 400 330 REV 0 JAN 1999 PRINTED IN JAPAN IMPRIME AU JAPON iv n System Accessories 1 Handset C1 120V ONLY 2 Expansion Board Base Unit C1 3 SCSI Interface Board D1 4 Printer Board 5 Super G3 FAX Board 6 Battery Board A1 PDL I F Board 1 5 4 3 2 6 ...

Page 8: ...ered at least for one week after installation 2 The communication memory lamp on the control panel indicates the presence absence of fax memory images If it is on indicating the presence of images be sure to print out the images before turning off the main power switch and disconnecting the power plug 3 Turing off the control panel power switch will not remove power from some units Be sure always ...

Page 9: ...ng accessories be sure to use the connectors indicates in the diagram If for example you connect the paper deck to the cassette pedestal connector and turn on the paper the fuse on the paper deck PCB will blow at times requiring replacement with a new PCB For the Feeder For the Paper deck For the Cassette Feeding Unit For the Finisher Figure Rear View of the Body ...

Page 10: ... 13 A Turning On the Power 1 13 B Control Panel 1 14 C Special Features Modes 1 15 D Additional Functions 1 16 V ROUTINE MAINTENANCE BY THE USER 1 19 VI SAFETY 1 20 A Safety of Laser Light CLASS 1 LASER PRODUCT 1 20 B CDRH Regulations 1 21 C Handling the Laser Unit 1 22 D Safety of Toner 1 24 VII IMAGE FORMATION 1 25 A Outline 1 25 CHAPTER 2 BASIC OPERATION PROVIDES I BASIC OPERATION 2 1 A Functio...

Page 11: ...EMBLY 4 22 A CCD Unit 4 23 B IP PCB 4 24 C Replacing the ROM DIMM on the image processor PCB 4 25 IV CONTROLLING THE LASER SCANNER MOTOR 5 8 A Outline of Operations 5 8 B Turning On and Off the Laser Scanner Motor 5 9 V DISASSEMBLY ASSEMBLY 5 10 A Laser Scanner Assembly 5 11 CHAPTER 3 EXPOSURE SYSTEM I OUTLINE OF OPERATIONS 3 1 A Outline 3 1 B Sequence of Operations original exposure system 3 2 II...

Page 12: ...ER 7 PICK UP FEEDING SYSTEM I OUTLINE OF OPERATIONS 7 1 A Outline 7 1 B Sequence of Operations pick up from the cassette 7 4 C Operation in Standby State 7 16 D Detecting the Level of Paper 7 18 E Identifying the Size of Paper 7 20 F Multifeeder 7 25 G Controlling the Registration Roller Clutch 7 27 H Making Overlay Copies 7 28 I Operation 7 28 J Delivery Assembly 7 40 K Detecting Jams 7 43 II DIS...

Page 13: ...1 B Operation 10 2 II FANS 10 4 A Arrangement and Functions 10 4 B Sequence of Operations 10 6 C Detecting Errors E805 10 9 III POWER SUPPLY 10 10 A Outline of the Power Supply System 10 10 B Power Supply PCB 10 11 C Transition to and from Sleep Mode 10 12 IV COUNTERS 10 14 A Outline 10 14 B Operations of Counters 10 16 V DISASSEMBLY ASSEMBLY 10 17 A External Covers 10 18 B Removing the Front Door...

Page 14: ... IV SCHEDULED SERVICING TABLE 13 5 A Copier 13 5 B Paper Deck 13 6 CHAPTER 14 TROUBLESHOOTING I MAINTENANCE AND INSPECTION 14 3 A Image Basic Adjustment Procedure 14 3 B Points of Scheduled Servicing 14 4 II STANDARDS AND ADJUSTMENTS 14 5 A Image Adjustment 14 5 B Exposure System 14 10 C Image Formation System 14 13 D Pick Up Feeding System 14 15 E Fixing System 14 20 F Electrical System 14 22 III...

Page 15: ...Mode 14 214 I FEEDER 14 217 J SORTER finisher saddle stitcher 14 221 IX SELF DIAGNOSIS 14 223 A Copier 14 225 B DADF 14 231 C Cassette Feeding Unit R1 S1 14 232 D Multi Output Tray D1 14 232 E Finisher C1 14 233 F Saddle Finisher C2 14 235 G Finisher E1 14 239 H Paper Deck B1 14 241 I SCSI Interface Board D1 14 242 APPENDIX A GENERAL TIMING CHART A 1 B SIGNAL NAME ABBREVIATION LIST A 3 C GENERAL C...

Page 16: ...fault Ratios 1 6 G Copying Speed 1 7 III NAMES OF PARTS 1 9 A External view 1 9 B Cross Section 1 11 IV OPERATION 1 13 A Turning On the Power 1 13 B Control Panel 1 14 C Special Features Modes 1 15 D Additional Functions 1 16 V ROUTINE MAINTENANCE BY THE USER 1 19 VI SAFETY 1 20 A Safety of Laser Light CLASS 1 LASER PRODUCT 1 20 B CDRH Regulations 1 21 C Handling the Laser Unit 1 22 D Safety of To...

Page 17: ...cy of copying work The mechanism can turn out a large number of double sided copies while limiting damage to the paper to a minimum 4 Large Capacity Paper Source Adding accessories the machine can be turned into a paper source holding as many as 5550 sheets m 2 cassettes front loading standard 500 x 2 m Multifeeder 50 m Cassette Pedestal S1 500 x 2 m Paper Deck B1 3500 A4 B5 5 Saddle Finisher w Bo...

Page 18: ...ed Fluorescent lamp Lens array OPC drum Item Copying Charging Exposure Copy density adjustment Development Pick up Transfer Separation Cleaning Fixing Specifications Indirect electrostatic copying Roller charging AC DC Laser exposure Automatic or manual Dry single component toner projection Cassette Retard method center reference Multifeeder Dupro method center reference Roller charging DC Static ...

Page 19: ...6E 25 to 800 in 1 increments Provided Provided From main power supply 77 sec or less From sleep state 77 sec or less From power save mode Without recovery time 0 sec 10 mode 9 sec or less 25 mode 20 sec or less 40 mode 33 sec or less 6 0 sec or less topmost cassette Direct A4 LTR auto density adjustment no pre scanning 1 to 999 copies See Table 1 201 A3 297 x 420 mm 297 x 432 mm 11 x17 to A5 STMT ...

Page 20: ...LTR Colored paper Canon recommended A4 385 mm high 3500 sheets of 80 g m2 A4 ZSKxxxxx LTR ZSLxxxxx Shifting the size guide plate and setting in service mode OPTION ACC DK P not including protrusions grip cover rail 31 kg approx body 10 kg approx rails By copier DC power Same as copier Multifeeder tray Copy tray Leading trailing edge Left right Auto clear Auto sleep time Item 50 sheets 100 sheets 2...

Page 21: ...xxxx 405 PNWxxxxx 335 PNXxxxxx 405 QNYxxxxx 335 QNZxxxxx 405 RNXxxxxx 335 RNYxxxxx 405 SNYxxxxx 335 SNZxxxxx 405 TNYxxxxx 335 TNZxxxxx 405 UNYxxxxx 335 UNZxxxxx w o FAX expansion 910W 193W 190W 190W 170W 143W 116W 69W 71 dB or less by sound power level Impulse mode 50 dB or less by sound power level Impulse mode 0 01 ppm or less in average 0 02 ppm or less at max 585mm 720mm 538mm 97 5 kg or less ...

Page 22: ...4E Reduction 0 250 0 500 A3 B5 0 611 A3 A4R 0 707 B4 B5R B4 A4R 0 815 A3 B4 0 865 A4R B5R 0 250 0 500 11x17 LTRR 0 647 11x17 LGL 0 733 LGL LTRR 0 786 0 250 0 500 A3 A4R 0 707 Enlargement B4 A3 1 153 B5R A4R B5 A4 A4R B4 1 223 A5 B5 A4RA3 1 414 B5RB4 A5A3 2 000 4 000 8 000 LGL 11x17 1 214 LTRR 11x17 1 294 STMT LTRR 2 000 STMTR 11x17 4 000 8 000 A4R A3 1 414 A5 A3 2 000 4 000 8 000 Table Dafault Rep...

Page 23: ... A4 B5 A5 A3 A4 A3 B5 B4 A4 B4 A5 B5 B4 A3 B5 B4 Copy size A3 A4 A4R A5 A5R B4 B5 A5R B5R A4R B5R A4R A5 B4 B5 A3 A3 B4 B4 B5 A3 B4 405 400 copies min 19 40 28 40 40 22 40 40 33 28 33 28 40 22 40 19 19 22 22 40 19 22 335 330 copies min 19 33 28 33 33 22 33 33 33 28 33 28 33 22 33 19 19 22 22 33 19 22 Feeder used delivery to copy tray auto paper select used density auto adjust used non sort mode to...

Page 24: ...io DIRECT REDUCE ENLARGE Size LTR 11x17 LGL LTRR STMT STMTR LGL LTRR 11x17 LGL 11x17 LTRR 11x17 STMTR 11x15 LTRR LGL 11x17 LTRR 11x17 STMTR 11x17 405 400 Copies min 40 19 23 30 40 40 30 23 30 40 30 19 19 19 335 330 Copies min 33 19 23 30 33 33 30 23 30 33 30 19 19 19 The above specifications are subject to change for product improvement ...

Page 25: ...RAL DESCRIPITON III NAMES OF PARTS A External view Model with DADF A1 as Standard 1 Cassette Feeding Unit R1 accessory 2 Front cover 3 Copy tray 4 DADF A1 5 Control panel power switch Figure 1 301 6 Original delivery tray for feeder 7 Multifeeder 8 Main power switch 9 Cassette heater switch accessory 6 9 1 2 3 4 5 7 8 ...

Page 26: ...ping assembly releasing lever 5 Developing assembly 6 Feeding assembly releasing lever 7 Drum unit 8 Service documentation case 9 Door switch assembly 10 Static eliminator cleaning tool 11 Total copy counter 12 Downloading connector bi Centronics 13 Downloading switch Left for downloading Right for copying 14 LCD contrast adjustment 15 Not used Figure 1 302 COPY LOAD 2 1 6 5 4 3 14 11 9 7 8 10 15 ...

Page 27: ...ageRUNNER 400 330 REV 0 JAN 1999 PRINTED IN JAPAN IMPRIME AU JAPON 1 11 CHAPTER 1 GENERAL DESCRIPITON B Cross Section Figure 1 303 20 19 21 22 23 24 25 26 27 28 29 30 31 32 33 34 35 36 37 38 17 18 16 15 14 13 12 11 10 9 8 7 6 5 4 3 2 1 ...

Page 28: ...fing glass 16 Developing assembly 17 Multifeeder pick up roller 18 Vertical path roller 1 19 Vertical path roller 2 20 Cassette 2 feeding roller 21 Cassette 2 separation roller 22 Cassette 1 separation roller 23 Cassette 2 pick up roller 24 Cassette 1 feeding roller 25 Cassette 1 pick up roller 26 Duplexing assembly outlet roller 27 Registration roller 28 Transfer roller 29 Static eliminator 30 Fe...

Page 29: ... Turning On the Power The machine is equipped with two power switches main power switch and control panel power switch To turn on the machine be sure to turn on the main power switch an then the control panel switch in sequence Figure 1 401 1 Control panel power switch 2 Main power lamp 3 Main power switch 4 Cassette heater switch accessory 1 2 3 4 ...

Page 30: ...PY key 3 FAX key 4 OPTIONS key 5 CLEAR key 6 ENERGY SAVER key 7 Control panel power 8 STOP key 9 Power indicator 10 START key 11 ID key 12 Number keys 13 INTERRUPT key 14 ADDITIONAL FUNCTIONS key 15 GUIDE key 16 RESET key Figure 1 402 Turns on when the main power switch is on 120V PRINT I F Key COPY FAX ON OFF 1 2 3 4 5 6 7 8 9 0 C OPTIONS ID 1 16 15 14 13 12 11 10 9 8 2 3 4 5 6 7 ...

Page 31: ...to copy two originals on a single sheet Use it when setting originals of different sizes but of the same width in the feeder Use it to make copies of multiple originals for production of a booklet Use it to create a margin for binding along the side of a copy Use it to erase the shadow or images of frames and holes from a copy Use it to reduce two four or eight originals automatically for copying ...

Page 32: ...ack Bypass ON OFF Drawers ON OFF Use it to enable disable cassette auto select for each cassette for copier fax printer multifeeder on off cassette on off Use it to set a paper size and paper icon for the special cassette Setting the thick paper icon will turn on thick paper mode for transfer bias and fixing control SPC1 SPC2 A4 SPC3 SPC4 LTR Use it enable or disable size input off input of size a...

Page 33: ... control panel power switch is turned off by the day of the week no setting custom copy settings standard key 1 setting standard key 2 setting auto orientation auto collate photo mode standard settings initialize custom common setting Use it to set the Preference key for the Initial screen Select from the mode keys on the Extended mode screen and the memory keys from the mode memory Use it to set ...

Page 34: ...copy density for copier made of a typical original without dirt or fogging with the density memory at center Use it to clean the pick up roller assembly by moving copy paper inside the feeder Use it to clean the roller assembly if copies are soiled Use it to edge out several staples by feeding paper to the middle stapling unit after removing a staple jam Use it to correct minute discrepancies in m...

Page 35: ...rm the following once a week 1 Wipe the copyboard glass with a moist cloth and then dry wipe it 2 Wipe the copyboard cover DADF feeding belt with a cloth moistened with mild detergent solution and then dry wipe it Instruct the user to perform the following if image faults e g vertical white spots occur 1 Execute charging roller transfer roller cleaning in user mode 2 Clean the separation static el...

Page 36: ... certified as a Class I product under the Radiation Performance Standards of the United States Department of Health and Human Services DHHS established in 1968 The certification means that the machine is a laser product which will not emit harmful laser light Its laser system is completely contained inside a protective housing and inside external covers so that its beam will not escape during norm...

Page 37: ...to laser products manufactured on and after August 1 1976 and the sale of laser products without certification is prohibited within the United States Figure 1 602 shows the label certifying compliance with the CDRH regulations and all laser products sold in the United States are required to bear the label Figure 1 601 Caution Some models may carry a label with a different text description CANON MA...

Page 38: ...screwdriver or the like with a high reflectance into the laser path Be sure also to take off watches and rings they will reflect the laser beam in some cases damaging the eye The machine s laser beam is ultrared light The covers that can reflect a laser beam are identified by the label shown in Figure 1 602 Exercise care when serving areas behind these covers This label is attached to a laser unit...

Page 39: ... DU COUVERCLE DU DÉMONTAGE DE L ENSEMBLE DE DÉVELOPPEMENT EVITER TOUTE EXPOSITION DIRECTE AVEC LE FAISCEAU VORSICHT UNSICHTBARE LASERSTRAHLUNG WENN ABDECKUNG GEÖFFNET NICHT DEM STRAHLAUSSETZEN ATTENZIONE EMISSIONE DIUN RAGGIO LAZER INVISIBILE A SEGUITO DELL APERTURA DELLA COPERTURA O DELLA RIMOZIONE DEL GRUPPO DI SVILUPPO EVITARE L ESPOSIZIONE DIRETTA AL RAGGIO LASER PRECAUCIÓN RADIACIÓN LÁSER INV...

Page 40: ...ron and small amounts of dyes If your skin or clothes have come into contact with toner remove it as much as possible with dry tissue and wash off the remainder with water Do not use hot water or toner will become jelly and fuse with cloth fibers In addition do not bring toner into contact with vinyl material to avoid chemical reaction decomposition Caution Do not throw toner into fire It may expl...

Page 41: ...tostatic reproduction method and is constructed as shown in Figure 1 701 Figure 1 701 Image processing block Laser scanner unit Fixing cleaning assembly Lens CCD Fixing assembly Pick up from the multifeeder Developing assembly Drum cartridge Primary charging roller Pre exposure lamp Separation static eliminator Transfer charging roller Scanning lamp Copyboard glass Pick up from the cassette deck ...

Page 42: ... Step 2 Primary charging AC negative DC Step 3 Laser exposure Step 4 Development AC negative DC bias Step 5 Transfer positive DC Step 6 Separation negative DC Step 7 Fixing Step 8 Drum cleaning Figure 1 702 Flow of copy Rotation of drum 1 Pre exposure 2 Primary charging 3 Laser exposure 4 Development 5 Transfer 6 Separation 7 Fixing 8 Drum cleaning Latent static image formation block Delivery Regi...

Page 43: ...TED IN JAPAN IMPRIME AU JAPON CHAPTER 2 BASIC OPERATION PROVIDES I BASIC OPERATION 2 1 A Functional Construction 2 1 B Outline of the Electrical Circuitry 2 2 C Sequence of Operations 2 4 D Main Motor M1 Control Circuit 2 8 E Inputs to and Outputs from the Major PCBs 2 10 ...

Page 44: ...tem control system Figure 2 101 Original Exposure System Original Control System Control panel Digital image processing Image I F DC controller Composite power supply Low voltage power supply Image processing system Drum cleaning Primary charging Drum Transfer Separation Multifeeder Fixing Delivery Lower feeding assembly Cassette 1 Cassette 2 Cassette 3 Cassette 4 Cassette 5 Cassette 6 Cassette pe...

Page 45: ...CPU for DC controller PCB IP DIMM Flash ROM IP CPU DCC DIMM Flash ROM DC PC RAM A for expansion 32 MB J723 RAM B for expansion 32 MB J723 Description Controls the control panel Controls memory management Controls job management Controls the feeder DC controller PCB copy data controller accessory communication Controls the copy reader and printer Controls the printer functions board controls the fa...

Page 46: ...wer to the fluorescent lamp Controls the drum film thickness detection Controls transfer Controls power to the loads Figure 2 102 IP CPU DC CPU GA IPC Feeder Copy data controller Finisher DIMM IP 4MB DIMM DC 1MB DC controller PCB Image processor PCB Paper deck pedestal Cassette pedestal Laser scanner motor DC loads Control panel CPU If IP for the image processor if DC for the DC controller A separ...

Page 47: ... printer is in wait Double sided mode is selected Overlay mode is selected Image composition mode is selected Book binding mode is selected Transparency interleaf mode is selected Shift mode is selected Binding mode is selected Rotation sort group sort mode is selected Staple mode is selected The image must be rotated Multiple copies must be made The ratio in sub scanning direction is less than 50...

Page 48: ...ply OFF Temperature control Main motor Fixing heater Primary charging roller bias DC component Transfer charging roller Separation static eliminator Developing bias DC component Developing bias AC component Transfer guide bias Primary charging roller bias AC component Scanning lamp Scanner motor Scanner HP sensor Laser exposure Laser scanner motor Shading measurement Developing clutch Pick up moto...

Page 49: ...xing temperature is the surface temperature of the upper fixing roller which may be checked in service mode DISPLAY ANALOG FIX C b Basic Sequence of Operations Table 2 103 INTR1 initial rotation 1 INTR2 initial rotation 2 SCAN scan PRINT print LSTR last rotation From when the main power switch is turned on or the front door is opened closed to when standby or INTR2 starts From when the IP CPU gene...

Page 50: ...e 60s Reversal delivery Duplexing reversal motor Double speed rotation Reversal double speed rotation COPY Main motor Fixing heater Primary charging roller bias DC component Transfer charging roller Separation static eliminator Developing bias DC component Developing bias AC component Transfer guide bias Primary charging roller bias AC component Scanning lamp Scanner motor Scanner HP sensor Laser ...

Page 51: ...ply Drive signal Operating driving parts Control Description 24 VDC from the composite power supply MMD from the DC controller PCB Photosensitive drum registration roller developing assembly vertical path roller feeding assembly delivery roller multifeeder pick up roller Turns on off the main motor Controls the main motor to a specific speed Clock pulse generator circuit Main motor M1 Drive circui...

Page 52: ...or is subjected to constant speed control ensuring that it rotates at a specific speed The driver PCB controls the motor in such a way that the frequency of the clock pulses occurring as a result of the rotation of the motor and that of the reference pulse signal from the main motor PCB will match While in control the motor sends a signal M1LCK 1 to the DC controller PCB to indicate that it is rot...

Page 53: ...C controller PCB Checks are not possible in the field and explanations are omitted J301 J706 J712 J711 J703 J704 Analog processor PCB Beam detection BD PCB Fax battery board J718 1 2 3 4 5 Original size sensor 0 5V 5V 5V 5V DSZ0 DSZ1 DSZ2 DSZ3 Checks are not possible in the field and explanations are omitted Low voltage power supply PCB Original size sensor 2 Original size sensor 1 Original size s...

Page 54: ... 2 2 Figure 2 107 Image processor PBC Checks are not possible in the field and explanations are omitted Control panel CPU PCB Main power supply lamp PCB Control panel inverter PCB LCD panel LCD Control panel power supply switch PCB LCD contrast adjustment PBC One touch dial cover open closed detection J901 J710 Keypad PCB Function key PCB Downloading PCB SW9001 J707 J9001 Copy download switch ...

Page 55: ...ck up sensor Horizontal registration paper sensor 5V 5V 5V 5V 5V 5V 5V 5V 5V PS2S PS3S PS4S PS6S PS7S PS8S PS9S PS10S When the scanner is at the home position 1 The light blocking plate is at PS1 When the copyboard cover feeder is closed 1 The light blocking plate is at PS2 When paper is at the sensor 1 The light blocking plate is at PS3 When paper has moved past the sensor 1 The light blocking pl...

Page 56: ...nsure Waste toner ensure PS11S PS12S 5V 5V 5V PS13S 5V PS14S When paper has moved past the sensor 1 The light blocking plate is at PS11 When the right door is open 1 The light blocking plate is at PS12 When the left door is open 1 The light blocking plate is at PS13 When the waste toner case is full 0 The light blocking plate is not at PS14 J108 B9 B8 B7 J108 B15 B14 B13 J114 6 5 4 J102 A12 A11 A1...

Page 57: ...de the developing assembly is below a specific level 0 See III Tunning On Off the Scaning Lamp in Chapter 3 Detects the temperature around the drum J425 J427 J411 J433 J417 J430 J431 J419 MTPW analog signal Detects the width of copy paper placed on the multifeeder Upper cassette size detection cassette 1 Lower cassette size detection cassette 2 J115B 8 7 6 5 4 3 J115B 14 13 12 11 10 9 Multifeeder ...

Page 58: ... level detection Cassette 1 delivery detection Cassette 2 delivery detection TH1 TH2 X UCSPD LCSPD 1RPD0 2RPD0 1RPD1 2RPD1 See I C Controlling the Fix Temperature in Chapter 9 When Q1604 has detected paper 1 When Q1605 has detected paper 1 When Q1606 has detected the lifter 1 When Q1608 has detected the lifter 1 When Q1607 has detected the lifter 1 When Q1609 has detected the lifter 1 J108 A10 J10...

Page 59: ...r scanner motor drier PCB 5V 5V M1D M1LCK J102 B9 B10 B11 B12 J104 A1 A2 A3 J106 10 11 8 9 12 13 24V24V See I D Controlling the Main Motor in Chapter 2 See IV Controlling the Laser Scanner Motor in Chapter 5 J18 M3 Scanner motor J116 1 2 3 4 5 J28 J424B M2 M2LCK M2D 24V 0V J115 A5 A6 A7 J406 Fixing motor J441A J402A M4LCK M4D M6A M6A M6B M6B M7A M7A M7B M7B M8A M8A M8B M8B 24V 0V M6 J22 Lower feed...

Page 60: ...id Fixing cleaning belt drive solenoid SL2D SL3D SL4D J102 B3 B4 J102 B1 B2 J102 B7 B8 J106 6 7 J102 B5 B6 J104 A9 A10 J115 A3 A4 When 0 CL1 turns on When 0 CL2 turns on When 0 CL4 turns on When 0 SL1 turns on When 0 SL3 turns on When 0 SL4 turns on When 0 SL5 turns on When 0 CL 5 turns on J50 J49 J40 J17 J51 J420 J31 J406 M9 Horizontal registration motor J102 A1 A2 A3 A4 A5 A6 24V24V J29 J416 J42...

Page 61: ... Low voltage cooling fan 2 While the fan is rotation FM11D is 1 While rotating at a specific speed returns the LCK signal to the PCB See II Fans in Chapter 10 While the fan is rotating FM10D is 1 While rotating at a specific speed returns the LCK signal to the PCB While the fan is rotating FM8D is 1 While rotating at a specific speed returns the LCK signal to the PCB While the fan is rotating FM7D...

Page 62: ...rum cartridge cooling fan 2 Drum cartridge cooling fan 3 FM18 While the fan is rotating FM18D is 1 While rotating at a specific speed returns the CLK signal to the PCB While the fan is rotating FM16D is 1 While rotating at a specific speed returns the CLK signal to the PCB While the fan is rotating FM17D is 1 While rotating at a specific speed returns the CLK signal to the PCB While the fan is rot...

Page 63: ...116 DC controller PCB Pre exposure lamp Counter CNT1 24VU CL3 24VU SL1 M5 Motor drive circuit J112 A1 A2 J115 B9 B10 Pick up assembly PCB J108A A1 A4 J108A A5 J108A A6 A7 A8 A9 PEXP CNT1D CL3D SL1D When 0 count up When 0 CL3 turns on When 0 SL1 turns on When 1 ON Vertical path roller clutch Cassette pick up solenoid Cassette pick up motor A A B B J409 J404 J9 J408 J402A ...

Page 64: ...LAMP 3 4 A Outline 3 4 B Controlling the Pre Heating Mechanism 3 5 C Turning On and Off the Scanning Lamp 3 5 D Controlling the Intensity 3 5 E Detecting Errors 3 6 IV IDENTIFYING THE SIZE OF AN ORIGINAL 3 7 A Outline 3 7 B Identifying the Size by the Paper Sensors 1 3 7 C Identifying the Size by the Paper Sensors 2 3 9 D Identifying the Size by the Original Width Length Sensor of the Feeder 3 10 ...

Page 65: ...ror mount which forms an optical path between an original and the CCD and the scanner motor which drives the scanner Figure 3 100 Original exposure system Image processing system Extended image processing system Lens CCD PCB CCD unit Image processor PCB Scanning lamp No 1 mirror No 2 mirror No 3 mirror Laser exposure system Laser driver PCB Laser semiconductor No 3 laser mirror Laser beam No 2 las...

Page 66: ... 330 REV 0 JAN 1999 PRINTED IN JAPAN IMPRIME AU JAPON B Sequence of Operations original exposure system Figure 3 101 Scanner motor M3 Scanner HP sensor PS1 Scanning lamp FL1 INTR SCAN SCAN SCAN LSTR STBY STBY SLEEP Forward Reverse Copy Start key ON Control panel power switch ON ...

Page 67: ...ner home position sensor PS1 reverse forward No 2 mirror mount No 1 mirror mount Drive signal J116 J112 J113 J113 J714 J714 Figure 3 201 II SCANNER DRIVE SYSTEM The No 1 No 2 mirror mount is driven by the scanner motor M3 The scanner motor is a stepping motor and is controlled by the image processor PCB The position of the No 1 mirror mount is detected by the scanner home position sensor PS1 ...

Page 68: ...ns Controlling the scanning lamp pre heating mechanism Turning on off the scanning lamp Controlling the scanning lamp intensity Figure 3 301 Scanning lamp FL1 Scanning lamp intensity sensor DC controller PCB Image processor PCB Composite power supply PCB Scanning lamp activation control Pre heating control AC power supply voltage input PW CPU Intensity control PWM signal Shading correction data J7...

Page 69: ...is applied to the filament during a copying run C Turning On and Off the Scanning Lamp The scanning lamp is turned on or off by the intensity control signal from the image processor PCB A lamp activation voltage is applied to the scanning lamp in response to the signal D Controlling the Intensity The intensity control signal is a pulse signal and the intensity of the scanning lamp is varied by cha...

Page 70: ...mum level E Detecting Errors If an error is detected as when the scanning lamp fails to turn on in response to the intensity control signal the DC CPU on the image processor PCB sends an error detection signal to the PW CPU on the composite power supply PCB When the PW CPU receives an error detection signal it generates the scanning lamp OFF signal without waiting for instructions from the image p...

Page 71: ... or by the original width length sensor of the feeder B Identifying the Size by the Paper Sensors 1 The paper sensors are arranged under the copyboard glass Figure 3 401 to identify the size of an original placed on the copyboard glass AB Original Sensors Inch Original Sensors Figure 3 401 Arrangement of Original Sensors A3 A4 B4 B5 B5R A4R A5 11x17 LTR LTRR LGL STMT Paper sensor 0 Paper sensor 1 ...

Page 72: ... of sensor states Tables 3 301 202 This way of identification enables the use of dark originals The output level of each sensor however will not change under the conditions a or b below in the case of c A3 paper will be selected first if the appropriate cassette is absent the standard mode cassette will be selected a An A3 dark original is used b A book original is used The thickness of a book pre...

Page 73: ...on in response to the closing of the copyboard cover detecting the presence of an original In the table Yes means that the output level changed when it was read at intervals of 0 1 sec after it had turned on in response to the closing of the copyboard cover detecting the absence of an original Table 3 400 A B originals Original size A3 B4 A4R A4 B5 B5R No Original size sensor 0 No Yes Yes No Yes Y...

Page 74: ... the Feeder The D ADF accessory is designed to identify the size of an original with reference to its width set by the side guide plate and the length in feeding direction As such identification occurs as soon as an original is picked up and is effective for the following default sizes A configuration A5 A4 A4R A3 B configuration B5 B5R B4 Inch configuration STMT LTR LTRR Foolscap LGL 11x17 ...

Page 75: ... starting the work 2 For assembly reverse the steps used for disassembly unless otherwise noted 3 Identify the screws by type length diameter and location 4 The mounting screws used for the grounding wire and varistors are equipped with toothed washer to ensure electrical conductivity Be sure to use the washers during assembly work 5 As a rule do not operate the machine with any of its parts remov...

Page 76: ... lamp is soiled dry wipe it 1 Disconnect the power plug 2 Remove the copyboard glass 1 Figure 3 501 3 Remove the four screws and detach the rear cover 4 Remove the feeder unit or the copyboard cover then remove the two screws and detach the rear upper cover 5 Disengage the two hooks 3 and disconnect the connector then detach the scanner cooling fan Figure 3 502 6 Move the No 1 mirror mount so that...

Page 77: ...TION DENS 5 items 2 Removing the Pre Exposure Lamp Assembly 1 Remove the drum unit 2 Remove the inside cover 3 Remove the screw 2 and disconnect the connector 3 then detach the pre exposure lamp assembly 1 Figure 3 505 B Scanner Drive Assembly 1 Removing the Scanner Drive Motor 1 Remove the copyboard glass 2 Remove the rear cover and the rear upper cover 3 Remove the flywheel 4 Remove the two scre...

Page 78: ...Figure 3 508 2 Removing the Scanner Cable 1 Remove the following Copyboard glass Control panel Rear cover rear upper cover right cover left cover 2 Remove the metal fixings 1 of the scanner cable both front and rear Figure 3 509 3 Loosen the two screws 3 to free the cable spring stay 2 both font and rear Figure 3 510 4 Loosen the set screws 4 and detach the cable both front and rear Figure 3 511 7...

Page 79: ...Secure the cable in place with the pulley clip 3 Fit the mirror positioning tool 2 4 Fit the cable as shown 3 4 5 6 5 Loosen the set screw font only of the drive pulley and then tighten it so that the tension is even throughout 7 6 Secure the No 1 mirror mount and the scanner cable metal fixing in place temporarily 8 7 Secure the cable spring stay so that the length of the spring is 38 to 39 mm 9 ...

Page 80: ... changing its pin arrangement as shown below Note that 1 2 3 in the figures indicate the locations of the pins while A B C indicate the pins Figure 3 513 FY9 3009 040 Initially Figure 3 514 FY9 3009 040 Adapted for Use Caution Note that pin A of the mirror positioning tool FY9 3009 040 will not be used for the machine Figure 3 515 1 2 3 A B C C 1 2 3 B 1 2 3 Longest pin fit into 1 Shortest pin fit...

Page 81: ...mirror mount forward and match the hole in the upper front plate and the hole in the slide section of the No 1 No 2 mirror mount The same applies to the rear side plate 3 Fit the mirror positioning tool to the No 1 mirror mount and the No 2 mirror mount both front and rear Figure 3 516 4 Tighten the set screws of the pulley 5 Secure the scanner cable metal fixing in place to the No 1 mirror mount ...

Page 82: ... 3 C AE Processing ABC processing 4 4 D A D Conversion 4 5 E Analog Signal Processing Block 4 6 III DIGITAL IMAGE PROCESSING 4 7 A Outline 4 7 B Shading Correction 4 8 C Total Processing 4 9 D Density Processing 4 12 E Binary Processing 4 16 F Image Memory 4 19 G Overlay Copying 4 21 IV DISASSEMBLY ASSEMBLY 4 22 A CCD Unit 4 23 B IP PCB 4 24 C Replacing the ROM DIMM on the image processor PCB 4 25...

Page 83: ...ssing are performed in the following PCBs each sending resulting image signals to the next PCB Figure 4 100 CCE PCB Extension boards accessory Image processor PCB Laser driver PCB Laser exposure system CCD A D conversion Shading correction Binary processing Screen processing Resolution conversion for fax Smoothing Super G3 FAX Board F1 PBL I F Board Printer Motherboard Printer Board SCSI I F board...

Page 84: ...ersion Shading correction Various image processing Density processing Binary processing Screen processing Resolution conversion for fax image Smoothing for image memory Compression decompression Image storage Relays image signals to and from extension boards Supplies power to the Super G3 FAX Board Sends receives image data through a modem Synchronizes image signals form extension printers Supplie...

Page 85: ... processing block odd and even numbered pixels are communicated separately The analog signal processing block combines the signals representing odd and even numbered pixels and sends the result to the A D conversion block Figure 4 200 CCD Analog signal processing block Shading correction data A D conversion AE processing ABC processing Offset correction Gain correction Pixel synthesis Shading corr...

Page 86: ... on Vtop and Vbottom i e the minimum output image signal level the darkest pixel of the original a density range is determined and a reference voltage is determined so that the range may be expressed in 256 gradations 3 The reference voltage is sent to the A D conversion circuit Figure 4 201 Related Service Mode ADJUST AE AE TBL Use this mode to make adjustments if the density of text is tool ligh...

Page 87: ...image signals from the CCD into 8 bit digital image signals It produces linear digital output in response to analog input if E mode is selected it performs A D conversion based on the reference voltage from the AE processing block Increases or decreases in the reference voltage will in turn increase or decrease the dynamic range difference between maximum output level and minimum output level ...

Page 88: ...ck performs the following Gain correction on image data from the CCD Offset correction on image data from the CCD Pixel synthesis on image data fro the CCD Measurement of the standard white plate standard white paper Shading correction Related Service Mode FUNCTION CCD CCD ADJ FUNCTION CCD MAN ADJ Shading auto adjustment 1 for normal image adjustment Shading auto adjustment 2 for lamp PCB replacem...

Page 89: ...ng and is sent to the laser driver PCB direct copying In other cases image data is stored in memory first and then transferred to the laser driver PCB memory copying Figure 4 300 CCD PCB 600x600 dpi Shading correction Total processing Enlargement reduction Shift Image composition enlargement reduction Edge emphasis Sharpness Nega posit reversal Image synthesis overlay processing Density processing...

Page 90: ...paper is measured by the CCD PC and the collected data is stored in memory The data is then subjected to computation and the result will be used as the target value at time of shading correction 2 Shading Correction Shading correction is executed for each scan of an original The light of the scanning lamp is directed to the standard white plate Figure 4 301 and the light reflected by the plate is ...

Page 91: ...composition enlargement reduction Edge emphasis Sharpness Unlike the existing models the machine uses different methods for enlargement reduction and image composition 1 Enlargement Reduction For the vertical ratio sub scanning direction the scanner is moved at different speeds thereby changing the scanning width per pixel in relation to an original In the case of a ratio lower than 50 data units ...

Page 92: ...heet of copy paper 2 4 on 1 mode in which four originals are copied by reduction on one sheet of copy appear 3 8 on 1 mode in which eight originals are copied by reduction on one sheet of copy paper The images will be laid out as follows according to the selected mode original size and copy size Figure 4 303 2 on 1 Originals 1 2 Originals 1 2 1 1 2 1 4 3 2 1 4 3 2 2 3 4 4 on 1 Originals 1 2 1 3 4 ...

Page 93: ...d on the size of the original and the size of the copy paper If the lengthwise ratio and the breadthwise ratio are different the smaller of the two will be selected However the ratio is always between 25 and 800 The Copy Start key is pressed A copy is generated In book mode all image data is stored The Copy Start key must be pressed for a second time Varies according to the type of layout selected...

Page 94: ...not having density information the laser intensity and the developing bias are varied for the reproduction of density as if in analog mode Original scan Output end Copy Start key ON Read image density read image mode set Density processing density correction curve Multiple value data Multiple value data Binary data Copy Start key ON Laser exposure Development Binary processing from image memory re...

Page 95: ...resistance result of measurement a Coy Density Key Density Correct Key The density correction curve varies as shown according to the key settings Figure 4 306 b Text Text Photo Photo Mode When text mode is selected the contrast is increased by using a steep density correction curve When text photo or photo mode is selected on the other hand a curve that ensures better gradation and reproduction of...

Page 96: ...ording to the result of measurement The surface of the photosensitive drum is charged to a specific voltage AC DC Application current values are sampled while charging takes place to compute the resistance of the photosensitive drum The resistance is checked at such times as shown below During initial rotation after the Copy Start key is pressed During initial rotation after the front door is open...

Page 97: ...emory Copying When generating output during memory copying binary image data stored in the image memory is processed not allowing the use of a density correction curve for density processing and instead requiring variation of the developing bias for the laser intensity Figure 4 309 The copy density is reduced images made lighter by decreasing the developing bias An excessive decrease however will ...

Page 98: ...erent binary processing methods are also used for different image modes text photo 1 Binary Processing text mode text photo mode Step 1 The average of the densities of the adjacent pixels is computed to determine a slice level and the pixel in question is identified as black if its density is higher than the slice level and white if otherwise The pixel in question tends to be black if it is surrou...

Page 99: ...ing enabling 256 gradations while still using binary image data The flow of processing is as shown in Figure 4 311 As many as 4 x 8 pixels are treated as a single unit and pixels are distributed into 256 patterns according to the mode of density distribution The units of 4 x 8 pixels are divided so that the pixels in question are arranged at 45 forming a screen pattern Figure 4 311 106 4 pixels 8 ...

Page 100: ...ollows Figure 4 312 Image data received from the telephone line Image data read from scanner Binary processing by GENESIS Compression Image memory Image memory Image memory non compression Image memory Transmission Compression Communication started Decompression Printing Method of compression used by the other party identified by communication Fax Reception Fax Reception Compression Smoothing Reso...

Page 101: ...n which compressed image data is stored on a page by page basis and a work area in which images read by the scanner is stored temporarily for rotation or compressed data after processing is stored temporarily Figure 4 313 Page memory for printing non compression Image memory for copier Image memory for printer Image memory for fax Memory for reading non compression Memory for header footer Image m...

Page 102: ...hine comes with an image memory of 32 MB as standard and allows expansion up to 96 MB 32 MB x 2 The increased area will be used as common memory for page storage Figure 4 314 Installation of memories must be in a specific sequence always with memory 1 and then memory 2 Image processor PCB Image memory 1 for expansion Image memory 2 for expansion ...

Page 103: ...he machine uses its image memory for overlay processing and the flow of processing is as follows The Copy Start key is turned down The original is scanned The image data is subjected to enlargement reduction and the result is stored in the page storage area The reading operation ends The image is laid out in the page memory for printing Copies are generated ...

Page 104: ... work 2 The steps used to disassemble the parts must be reversed when assembling them unless otherwise noted 3 The screws must be identified by type length diameter and location 4 The washer used with a specific mounting screw e g for grounding wire and varistor must not be left out to ensure electric conductivity 5 The screws that are paint locked in place must not be removed during disassembly w...

Page 105: ... cover 1 Figure 4 400 4 Remove the screw and detach the original size sensor 2 to keep it away from the CCD unit Figure 4 401 5 Remove the grounding wire 3 disconnect the two connectors 4 and remove the cable 5 6 Remove the screw 1 pc each and detach the CCD unit stop spring 6 then detach the CCD unit Figure 4 403 Figure 4 402 Caution Do not remove the screws that are pain locked in place Particul...

Page 106: ... mount right step 3 6 Remove the screw 4 and disconnect the two connectors 5 then detach the original sensor mount left 3 Figure 4 405 7 Disconnect the 11 connectors of the IP PCB 6 Caution Do not forget to disconnect the connector 8 8 Remove the seven screws 7 of the P PCB then detach the IP PCB Figure 4 406 Caution When moving the No 1 mirror mount unit to the home position be sure not to apply ...

Page 107: ...emove the ROM cover 4 While opening the claws of the slot lift and pull out the ROM DIMM Figure 4 407 Figure 4 408 2 Mounting the ROM DIMM 1 Insert the ROM IDMM into the slot at an angle 2 Shift down the ROM DIMM Shift the ROM DIMM in the direction of the arrow until a click is heard At this time do not force it Figure 4 409 Figure 4 410 3 Mount the covers that have been removed then connect the p...

Page 108: ...NERATING THE BD SIGNAL 5 3 III LASER DRIVER PCB 5 5 A Outline 5 5 B Stabilizing the Laser Output 5 6 C Switching the Laser Activation Mode 5 7 D Switching the Laser Output 5 7 IV CONTROLLING THE LASER SCANNER MOTOR 5 8 A Outline of Operations 5 8 B Turning On and Off the Laser Scanner Motor 5 9 V DISASSEMBLY ASSEMBLY 5 10 A Laser Scanner Assembly 5 11 ...

Page 109: ...unit is directed to the polygon mirror rotating at a specific speed The laser beam is reflected by the polygon mirror and then led to the photosensitive drum by way of the laser mirror It is also reflected by the BD mirror for detection by the BD PCB Figure 5 100 Original exposure system Image processing system Extended image processing system Lens CCD PCB CCD unit Image processor PCB Photosensiti...

Page 110: ... PRINTED IN JAPAN IMPRIME AU JAPON Figure 5 101 Image processor PCB Laser driver PCB DC controller PCB Photosensitive drum BD PCB Laser mirrors BD mirror 8 facet mirror Laser scanner motor Collimating lens Laser unit BD signal Laser scanner motor drive signal Laser scanner drive PCB Laser drive signal ...

Page 111: ...ble sided copy to find out the degree of displacement to the rear front It uses the result of measurement to vary the laser emission timing determined in reference to the BD signal so as to ensure that a specific image is always in a specific position of copy paper Figure 5 200 BD detection PCB BD mirror Laser Collimating lens Polygon mirror 8 facet Photosensitive drum Laser scanner unit Image are...

Page 112: ...the image signals are read in conjunction with the clock signals for transfer to the laser driver PCB Figure 5 201 Related Service Mode E100 The BD signal is not detected within 2 sec after the laser beam is turned on laser emission start signal The synchronization of the BD signal has an irregularity Image processor PCB Laser driver PCB BD detection PCB CCD PCB Memory for horizontal synchronizati...

Page 113: ...ith the sync signals generated for internal use on the laser driver PCB The laser drive signals are generated based on these image signals to drive the laser semiconductor Figure 5 300 5V Clock signal generation for synchronization BD detection PCB Laser drive signal generation Laser power control Laser power signal Laser drive control APC control Laser driver PCB Q504 Q506 Q507 Q509 Q508 Horizont...

Page 114: ...chine controls the mechanism so as to ensure stable output The laser beam is emitted The laser beam is detected by the photodiode PD built in the laser element The output voltage sample voltage of the photodiode is returned to the APC circuit The sample voltage is compared against the target voltage to determine the laser drive current The laser beam is monitored for every line scan and the drive ...

Page 115: ...CB D Switching the Laser Output The laser output may be either high or low and control is made so that images appropriate to either mode may be obtained The output modes are switched by changing the target voltage under APC control in response to the laser output switching signal serial communication These laser outputs are used as shown in Table 5 300 Table 5 300 Laser output Low High Mode When l...

Page 116: ...m the image processor PCB When the rotation speed of the motor deviates from a specific value the motor clock signal goes 1 Figure 5 400 Related Error Code E110 The motor clock signal M4LCK was generated Laser scanner motor M4 8 facet mirror Motor drive circuit Laser scanner motor driver PCB GND J714 J113 J714 J113 J714 J113 J104A J104A J104A J46 J46 J46 Motor clock signal Motor drive signal M4D M...

Page 117: ...3 An original is placed in the feeder b Turning Off the Laser Scanner Motor The laser scanner motor turns off when the period of time selected in silent mode in user mode expires The period represents the time between the end of LSTR and the time when the laser scanner turns off B of Figure 5 401 0 8 sec 1 to 9 1 to 9 min Figure 5 401 B May be changed in user mode silent mod between 0 and 9 if set...

Page 118: ...work 2 The steps used to disassemble the parts must be reversed when assembling them unless otherwise noted 3 The screws must be identified by type length diameter and location 4 The washer used with a specific mounting screw e g for grounding wire and varistor must not be left out to ensure electric conductivity 5 The screws that are paint locked in place must not be removed during disassembly wo...

Page 119: ...e the CCD unit cover IP cover and IP PCB 3 Remove the five screws 2 and detach the laser scanner unit cover 1 Figure 5 500 4 Remove the four screws 4 and disconnect the three connectors 5 and detach the laser scanner unit 3 Figure 5 501 Caution After mounting the laser scanner unit check to make sure that the harness 6 is not trapped by the IP PCB 5 Remove the two screws 8 and detach the laser uni...

Page 120: ...iminator Bias 6 12 F Controlling the Transfer Guide 6 14 G Primary Charging Roller Cleaning Mechanism 6 15 II DEVELOPING ASSEMBLY 6 16 A Outline 6 16 B Controlling the Developing Bias 6 17 C Controlling Toner Level Detection 6 20 III DRUM CLEANER 6 21 A Outline 6 21 B Detecting Waste Toner 6 22 IV DISASSEMBLY ASSEMBLY 6 23 A Drum Unit 6 24 B Transfer Charging Roller 6 25 C Drum Sensor Unit 6 25 D ...

Page 121: ...n the control signals from the image processor PCB for the following items Primary charging roller bias Transfer charging roller bias Separation static eliminator constant current Developing bias Transfer guide bias Upper fixing roller bias See Chapter 9 Fixing System Figure 6 100 Composite power supply PCB Image processor PCB Photosensitive drum Primary charging roller Developing assembly Transfe...

Page 122: ... is used to trigger the registration clutch CL1 B Sequence of Operations INTR1 STBY INTR2 SCFW SCFW LSTR SCRV SCRV STBY SLEEP Main motor M1 Copier output only Fixing heater H4 Primary charging roller bias DC component Transfer charging roller Separation static eliminator Developing bias DC component Developing bias AC component Primary charging roller bias AC component Scanning lamp FL1 Scanner mo...

Page 123: ...sensor and software counter reading Figure 6 102 Primary charging roller Photosensitive DC controller PCB Image processor PCB Composite power supply PCB High voltage main transformer for DC component Drum temperature detection Humidity detection AC power supply voltage input Serial communication DC bias AC bias DC CPU PW CPU Primary charging output enable signalVPDC Transformer drive signal DC bia...

Page 124: ...s turned on thereby driving the high voltage main transformer The primary charging output enable signal from the image processor PCB goes 0 The DC bias control signal pulse signal is generated A DC bias is applied to the primary charging roller The AC bias ON signal by serial communication is generated The AC bias control signal pulse signal is generated An AC bias is applied to the primary chargi...

Page 125: ...the AC bias control signal from the PW CPU as follows The output voltage of the DC bias is returned to the PW CPU The DC control signal is varied in response to the return voltage The DC bias assumes a constant voltage constant voltage control The current for the AC bias output is taken into the drive control circuit The AC bias current is compared against the reference value and the AC control si...

Page 126: ...e temperature reading Figure 6 103 5 Correcting the AC Bias Humidity The AC bias output characteristics change according to the humidity around the photosensitive drum In a low humidity environment the charging efficiency drops to cause uneven charging requiring maintenance of the current at a higher level The AC bias is varied as shown in Figure 6 104 according to the reading of the humidity sens...

Page 127: ...rned on The current output is measured and communicated to the PW CPU of the composite power supply PCB The PW CPU computes the optimum application voltage Primary charging is initiated using the optimum application voltage 7 Controlling the Output Mode To prevent stray toner in non image areas in continuous copying both AC bias and DC bias outputs are varied between image areas and non image area...

Page 128: ...PCB Composite power supply PCB High voltage main transformer Humidity detection AC power supply voltage input Serial communication Transfer bias DC CPU CPU Transfer charging output enable signal HVTEN Transformer drive signal Constant voltage constant current switch signal HVTSEL Transfer bias ON signal Transfer bias level signal Measurement value Transfer output mode signal 1 HVTM2 Transfer outpu...

Page 129: ... PCB by serial communication The transfer bias control signal pulse signal is generated A DC bias is applied to the transfer charging roller 3 Controlling the Output The DC bias output applied to the transfer charging roller is controlled as follows The optimum transfer bias level differs depending on paper size and the environment and the IP CPU execute automatic control of the output level to su...

Page 130: ...terioration of the transfer roller A reference current is applied each time the Copy Start key is pressed to measure the degree of voltage output for correction as follows A reference current is applied during initial rotation after the Copy Start key is pressed The transfer voltage is detected and returned to the PW CPU on the composite power supply PCB The PW CPU computes an optimum application ...

Page 131: ...y Start key is pressed During last rotation During initial rotation after error correction made in response to jam removal During roller cleaning operation in user mode adjust clean this is accompanied by cleaning of the primary charging roller n Reference Bias This bias is used to correct the application voltage level ATVC control It is applied each time the Copy Start key is pressed thereby corr...

Page 132: ...jected to the following On off control Constant voltage control Output control by paper type Figure 6 107 Separation static eliminator Photosensitive drum DC controller PC Image processor PCB Composite power supply PCB High voltage main transformer AC power supply voltage input Serial communication J103A J209A J103B J209B DC CPU PW CPU Separation bias output enable signal HVSPEN Separation bias mo...

Page 133: ...rol The bias output is returned to the output control circuit to maintain a specific voltage 4 Controlling the Output According to Paper Type Paper with poor separation characteristics e g thin paper tends to cause separation faults To ensure proper separation the application voltage is increased from the normal 2 3 kV to 3 0 kV The selection of an application voltage is made by the separation bia...

Page 134: ... and is negative in polarity 400 VDC toner is also charged to negative polarity The transfer guide bias is applied as soon as the control panel power switch is turned on and continued until power is removed Figure 6 108 Transfer guide Photosensitive drum DC controller PCB Image processor PCB Composite power supply PCB High voltage main transformer AC power supply voltage input Serial communication...

Page 135: ...g pad against the primary charging roller and at the same time moving it across the length of the roller Cleaning is performed for the following When making 50 or more copies in continuous mode during last rotation at the end of the copying operation When making less than 50 copies during last rotation when the cumulative number of copies has reached 500 When roller cleaning is executed under adju...

Page 136: ...rive signal MID J102 Toner detection signal TSIS Developing bias M1 Developing assembly clutch Developing cylinder CL4 Toner stirring rods J108 II DEVELOPING ASSEMBLY A Outline The developing assembly consists of the developing cylinder toner sensor TS1 and toner stirring rod The developing assembly is locked in position manually by operting the locking lever together with the developing assembly ...

Page 137: ...ff the developing bias DC component Turning on and off the developing bias DC component Figure 6 201 Developing cylinder Photosensitive DC controller PCB Image processor PCB Composite power supply PCB High voltage main transformer DC component High voltage transformer for development AC component AC power supply voltage input Serial communication DC CPU PW CPU Transformer drive signal Transformer ...

Page 138: ...he developing bias AC component is controlled as follows The AC bias ON signal from the image processor PCB goes 0 The AC component transformer is turned on An AC component is added to the developing bias DC component and the result is applied AC component amplitude Vpp 800 V AC component frequency Vf 1840 Hz 4 Controlling the Developing Bias DC Component to Constant Voltage The output of the DC b...

Page 139: ...emory Copying Related Service Mode ADJUST DEVELOP DE OFST Enter the offset value for the developing bias DC component Be sure to enter the value indicated on the service label if you have replaced the composite power supply PCB 6 Controlling the Level of the Developing Bias DC Component 2 The level of the developing bias DC component is switched between image areas and non image areas to prevent s...

Page 140: ...ing clutch CL4 remains on It then computes the 0 s most recent two cases of the toner sensor output and indicates the Add Toner message in the touch panel as needed Figure 6 202 Developing clutch CL4 Check Toner sensor TS1 3 sec 5 sec 2 sec NG 11 sec OK 9 sec OK 7 sec NG 82 sec When the power switch is turned on recovery is made after stirring the toner for another 30 sec When the power switch is ...

Page 141: ...r feeding blade The waste toner scarped off the drum is moved to the rear of the cleaner case by the feeding blade which is driven by the main motor The waste toner case is monitored by the waste toner sensor PS14 Figure 6 301 Waste toner sensor PS14 Waste toner feeding blade Photosensitive drum Main motor DC controller PCB Image processor PCB DC CPU Cleaning blade M1 J102 J102 Waste toner case fu...

Page 142: ...ing blade starts to drag causing the coupling to move back and forth in axial direction and pushing the waste toner sensor lever and as a result turning on and off the waste toner sensor PS14 repeatedly The machine assumes that the waste toner case is full under the following conditions and will indicate the Waste Toner Case Full message while in standby state n The waste toner sensor turned on an...

Page 143: ...ed before starting the work 2 The steps used to disassemble the parts must be reversed when assembling them unless otherwise noted 3 The screws must be identified by type length diameter and location 4 The washer used with a specific mounting screw e g for grounding wire and varistor must not be left out to ensure electric conductivity 5 The screws that are paint locked in place must not be remove...

Page 144: ...ht can lead to white spots or black bands 2 Cleaning If the surface of the photosensitive drum is soiled wipe it with a flannel cloth coated with toner Do not use paper lint free or otherwise Caution Do not dry wipe or do not use solvent Do not use cleaning powder 3 When Replacing the Drum Unit When replacing the drum unit fill out the label figure 6 401 with the date and the counter reading attac...

Page 145: ...embly 2 Remove the screw and detach the transfer charging roller unit 3 Open the claw 1 of the bushing at the front and slide the transfer charging roller 2 to the front to detach Figure 6 402 Caution Do not touch the surface 1 of the transfer roller otherwise image faults can occur Figure 6 403 C Drum Sensor Unit 1 Remove the drum unit 2 While pulling the two claws 1 detach the drum unit 2 Figure...

Page 146: ...magnet plate 1 shown in the illustration and remove this plate from the transfer guide Figure 6 404 1 1 2 Cleaning Clean with moist cloth every 1 200K copies However in case of soiling at the edge of copy papers clean as often as required 3 Attachment 1 Insert the pointed end of the magnet plate to the pin at the inner part of the transfer guide and then insert the plate with the oval hole to the ...

Page 147: ...ories power supply PCB Scanner cooling fan assembly Main drive unit Registration clutch 2 Free the harness and remove the two screws 1 then detach the harness guide 2 Figure 6 405 3 Remove the two screws 3 and detach the primary charging roller cleaning solenoid unit 4 Figure 6 406 4 Disconnect the connector 5 and remove the two screws 6 then detach the primary charging roller cleaning solenoid 7 ...

Page 148: ...t try to hold it as if to sandwich the developing cylinder to prevent toner from caking 2 After mounting the developing assembly be sure to mount the developing assembly stopper 3 The distance between he cylinder and the blade is adjusted to a high accuracy at the factory Do not try to adjust it When attaching the dveloping assembly take special care to insure that the transfer guide is provided w...

Page 149: ...remove the grip 1 of the developing assembly Figure 6 410 3 Remove the two screws 4 and disconnect the connector 5 then detach the toner sensor 3 Removing the Blade Mount 1 Remove the two screws M3x4 2 and disengage the three hooks 3 then detach he developing assembly upper cover 1 Figure 6 412 2 Remove the two screws 5 and detach the blade mount 4 Figure 6 413 Caution The blade is adjusted at the...

Page 150: ...he grip ring 10 Figure 6 417 8 Remove the two screws 11 then detach the sleeve holder front and the roll 13 Figure 6 418 7 8 9 10 12 13 11 4 Removing the Developing Cylinder 1 Remove the developing assembly from the copier 2 Remove the grip of the developing assembly 3 Detach the developing assembly upper cover 4 Remove the E ring 1 and remove the bearing 2 and the gear 3 Figure 6 414 5 Remove the...

Page 151: ...the roll 16 Figure 6 419 10 Remove the developing cylinder 17 together with the bearings 18 Figure 6 420 16 15 14 17 18 18 5 Positioning the Developing Assembly Magnetic Seal Butt the magnetic seal against the opening as shown in the figure check to make sure that the magnetic seal and the housing are in firm contact Figure 6 421 Figure 6 422 Opening contact reference Magnetic seal Magnetic seal r...

Page 152: ...t the factory when it is mounted to the blade mount Do not detach it from the mount If the blade must be replaced on its own adjust its position so that the distance between the blade and the developing cylinder is 0 21 0 03 mm using a gap gauge CK 0057 000 Figure 6 423 The surface of the developing cylinder is susceptible to damage Be sure to guide the gap gauge along its both ends Blade Developi...

Page 153: ... of Paper 7 18 E Identifying the Size of Paper 7 20 F Multifeeder 7 25 G Controlling the Registration Roller Clutch 7 27 H Making Overlay Copies 7 28 I Operation 7 28 J Delivery Assembly 7 40 K Detecting Jams 7 43 II DISASSEMBLY ASSEMBLY 7 51 A Pick Up Assembly 7 52 B Multifeeder 7 55 C Feeding Assembly 7 58 D Lower Feeding Assembly 7 59 E Registration Roller Assembly 7 61 F Delivery Assembly 7 62...

Page 154: ... detect jams Figure 7 101 shows the arrangement of sensors input parts while Figure 7 102 shows clutches and solenoids output parts These figures are conceptual diagrams and omit the cassette drive system Notation PS3 PS4 PS6 PS7 PS8 PS9 PS10 PS11 PS18 PS19 PS40 Q1604 Q1605 Name Multifeeder paper sensor Pre registration paper sensor Reversal assembly inlet sensor Delivery sensor Duplexing assembly...

Page 155: ...ON Figure 7 101 Sensors in the Pick Up Feeding System Delivery roller Photosensitive drum Registration roller Multifeeder pick up roller No 2 registration roller Duplexing feeding roller 1 Duplexing feeding roller 2 Duplexing assembly outlet roller Duplexing assembly inlet roller PS3 PS11 PS4 PS9 PS8 PS6 PS40 PS7 Q1604 Q1605 PS18 PS19 ...

Page 156: ...r holding plate releasing solenoid Fixing assembly inlet guide drive solenoid Main motor Fixing motor Pick up motor Lower feeder motor Delivery assembly reversal motor Delivery motor Horizontal sensor shift motor Duplexing reversal motor Table 7 102 Motors Clutches and Solenoids in the Pick Up Feeding System Figure 7 102 Motors Clutches and Solenoids in the Pick Up Feeding System M8 M2 M1 M7 M10 C...

Page 157: ...moved as far as the registration roller by the No 2 registration roller and the vertical path roller The drive of the vertical path roller and the No 2 registration roller is switched by turning on and off the vertical path roller clutch CL3 The drive of the registration roller comes from the main motor M1 by way of the registration roller clutch CL1 Table 7 103 and Figure 7 103 show the loads in ...

Page 158: ...J108 J108 A4 J108 A5 J102 B4 J1601 A14 A15 J1604 1 J1603 1 DC controller PCB Cassette pick up PCB Photosensitive drum Pick up unit Cassette pick up motor Registration roller Cassette pick up PCB No 2 registration roller Main motor Vertical path roller Vertical path roller clutch Feeding roller Pick up roller Lifter Pick up roller Feeding roller Separation roller Lifter Separation roller Pick up ro...

Page 159: ...er level sensor 0 Cassette 2 paper level sensor 1 Signal UCSPD LCSPD 1RPD0 1RPD1 2RPD0 2RPD1 Pin No J108 A2 J108 A11 J108 A13 J108 A14 J108 A15 J108 A16 Pin No of the signal line on the DC controller PCB Table 7 104 Sensors on the Cassette Pick Up PCB pick up unit Figure 7 104 Sensors on the Cassette Pick Up PCB J1604 J1605 J1602 J1601 J1603 1 4 4 1 4 1 1 3 B12 A1 B1 A12 J1606 1 3 Q1603 Q1604 Q160...

Page 160: ...erations Cassette 1 A4 2 Copies Continuous Face Up Delivery Figure 7 105 Pick Up from the Cassette INTR LSTR PRINT Cassette 1 pick up solenoid SL2 Cassette pick up motor M4 Pick up sensor PS18 Vertical path roller clutch CL3 Vertical path roller paper sensor PS8 Registration roller paper sensor PS5 Registration clutch CL1 Main motor M1 Copy Start key ON ...

Page 161: ...operation The distance traveled by the pick up roller shaft varies according to the level of copy paper 2 When the cassette starts to run out of paper and as a result the pick up roller shaft moves down accordingly farther to reach the decreasing stack the lifter trigger lever pushes the pick up roller shaft thereby releasing the cam to rotate 3 The rotation of the cam rotates the eccentric cam mo...

Page 162: ...When the machine is in standby state the lifter is held in place by the retaining claw when the cassette is slid out this claw is disengaged to free the lifter so that the lifter starts to move down Caution If the main power is removed while the lifter is moved up the claw used to move up the lifter can at times remain in contact with the lifter gear In such a condition the lifter may not be relea...

Page 163: ...hing the Drive of the Pick Up Roller When the cassette pick up roller rotates clockwise the gear 1 moves up to drive the upper pick up roller When the roller rotates counterclockwise on the other hand the gear 1 move down to drive the lower pick up roller Figure 7 107 shows how the pick up roller is controlled c Pick Up Roller Shaft Reference When the cassette is set the pick up roller is moved do...

Page 164: ... SYSTEM Figure 7 108 Upper Cassette Pick Up Movement pick up motor rotating clockwise Figure 7 109 Lower Cassette Pick Up Movement pick up motor rotating counterclockwise Cassette pick up motor M5 Gear 1 Feeding roller Separation roller Pick up roller Cassette pick up motor M5 Feeding roller Pick up roller Separation roller Gear 1 ...

Page 165: ...t operating as follows when picking up a single sheet of paper 1 The pick up solenoid SL1 turns on and the drive of the cam motor rotates the cam 1 2 As a result the pick up lever starts to swing 3 As a result the pick up roller shaft moves down to come into contact with the stack of paper and picks a single sheet by the drive of the pick up motor M5 4 The cam 1 rotates and as a result the pick up...

Page 166: ...ut of paper the paper detecting lever falls through the detecting hole The paper detecting lever operates in conjunction with the light blocking plate which blocks the photointerrupter Q1604 for cassette 1 Q1605 for cassette 2 enabling identification of the absence of paper Figure 7 112 Figure 7 112 Detecting Lever and the Absence of Paper Q1604 cassette 1 Q1605 cassette 2 Paper detecting lever ...

Page 167: ...l out roller Figure 7 113 M5 SL1 PS11 PS18 Name Pick up roller Pick up roller down solenoid Vertical path sensor Cassette 1 pick up sensor Table 7 105 n Detecting a Delay Paper does not reach the pick up sensor within a specific time after the pick up roller down solenoid SL1 turns on 1 If paper does not arrive after detection of about 1 sec retry operation is started PS11 PS18 SL1 M5 Pick up roll...

Page 168: ...ller is driven for a feed length of 10 cm The paper is moved so that it will be in view when the right cover is opened 2 The control panel indicates the Jam message suggesting removal from the right cover side 3 Open the right cover and remove the jam If the paper is not visible even when the pull out roller is operated remove the paper from the cassette side 1 Paper does not arrive after detectio...

Page 169: ... pick up solenoid SL1 turn on to swing the pick up lever n The pick up roller shaft is controlled by the lever 1 and the pick up lever Figure 7 116 Movement of the Lever 1 b Moving Up the Lifter When the main power is turned on while the cassette is set or the cassette is set while in standby state the pick up roller shaft moves down to push down the lifter trigger lever When the pick up roller sh...

Page 170: ...y the force of a spring moving up the pick up roller shaft so that the pick up roller will not interfere with the cassette Figure 7 118 Moving Up the Pick Up Roller Releasing the Separation Roller The lever 1 is provided with a protrusion for pushing down the separation roller assembly When the cassette is slid out the lever 1 rotates to move down the separation roller thereby disengaging the sepa...

Page 171: ...te mounted to the lifter gear As the cassette runs out of paper the lifter moves up gradually when the cassette fully runs out of paper the cassette sensor Q1604 for cassette 1 detects the absence of paper Figure 7 120 Paper full Paper absent Note The diagrams represent views from the rear Figure 7 121 Level of Paper in the Cassette upper Light blocking plate Lifter Pick up roller Paper Lifter Pic...

Page 172: ...relationship between paper levels and sensor states and the indications on the control panel Table 7 106 The absence of paper is detected by the cassette paper sensor 500 sheets 0 Q1606 Q1607 upper cassette Q1608 Q1609 lower cassette 0 0 1 0 1 1 0 1 1 The light blocking plate is over the sensor 0 The light blocking plate is not over the sensor Level Indication ...

Page 173: ...is set for a specific paper size and the cassette is slid into the machine the cassette size detecting switch will identify the size of the paper inside the cassette based on the combination of the protrusion and recess on the size detecting cam b AB Inch Switch The AB or Inch configuration is selected by means of a switch When the switch is set and the cassette is slid into the machine the casset...

Page 174: ... B4 U1 FLSO OFICIO A OFI E OFI B OFI A LGL U2 FOLIO U3 A FLS No cassette STMT STMTR LTR A LTR LTRR A LTRR LGL 11x17 U4 U5 U6 U7 U8 SW5 OFF ON ON OFF OFF ON ON OFF OFF ON ON OFF ON ON OFF OFF ON ON OFF OFF OFF ON ON SW4 OFF OFF ON ON ON ON OFF OFF OFF OFF ON OFF OFF ON ON ON ON OFF OFF OFF OFF OFF ON SW3 OFF ON ON ON OFF OFF OFF OFF ON ON ON OFF ON ON ON OFF OFF OFF OFF ON ON ON ON SW2 OFF ON ON ON...

Page 175: ...148 210 210 297 420 182 257 364 330 317 340 320 355 340 330 337 140 216 216 220 279 280 356 432 203 267 330 190 268 Main scanning direction mm 210 148 297 210 297 257 182 257 216 216 220 220 216 220 210 206 216 140 279 280 216 220 216 279 267 203 203 268 190 3 Paper Size The width and length of paper are detected by the copier s CPU with reference to the cassette dial set by the user Figure 7 124 ...

Page 176: ...pply n SP 1 2 SPECIAL1 2 A specific size selected by the user may be stored in memory in user mode A cassette icon may be stored for indication on the control panel For details see the User s Manual U1 FOOLSCAP OFFICIO A OFFICIO E OFFICIO B OFFICIO A LGL U2 FOLIO U3 A FLS U4 G LTR U5 G LTR R U6 G LGL U7 K LGL U8 K LGL R A3 A4R S P 1 A 4 A5R A 5 S P 2 U 3 B5 B 5 R B 4 U1 U 2 LGL LTR R S P 3 L T R S...

Page 177: ...pper cassette is capable of holding paper which is B4 or smaller The side guide plate side rear edge inside the cassette must be adjusted manually The side guide plate is not equipped with a sensor requiring setting of the previously mentioned rotary switch correctly Figure 7 125 Upper Lower Cassette Size Figure 7 126 Side Guide Plate Upper cassette middle size A5 to B4 Lower cassette A5 to A3 lar...

Page 178: ...of the multifeeder pick up clutch CL2 The multifeeder pick up roller and the separation pad make sure that no more than one sheet of paper is picked up and fed to the registration roller The foregoing series of operations is performed for each pick up Figure 7 127 1 J102 B11 J102 B1 J102 A6 CL3D CL2D M1 CL2 SL3 DC controller PCB Main motor driver PCB Main motor Registration roller Pre registration...

Page 179: ...tration for multifeeder pick up may be adjusted using the screw on the slide guide For details see II Standards and Adjustments n Detecting the Length The length of paper is detected in reference to the period of time during which the pre registration sensor PS4 remains on The maximum paper length is identified by 432 x 279 mm 11 x 17 Figure 7 127 2 3 Sequence of Operations A4 2 copies Figure 7 12...

Page 180: ...pying on 1st side Copying on 2nd side Double sided origina Double sided copy Copying on 1st side Copying on 2nd side Double sided original Singe sided copy Copying on 1st side Copying on 2nd side Paper separation single sided Copying on 1st side left Copying on 2nd side right Page separation Double sided copy Copying on 1st side left Copying on 2nd side right Signal sided original Overlay copy Cop...

Page 181: ...embly When the trailing edge of the paper moves past the reversing assembly inlet sensor PS6 and reaches a specific position point of reversal the duplexing reversing roller starts to rotate in reverse to move the paper to the lower feeding assembly When copying on the first side and the last side the paper is not retained in the lower feeding assembly but is re picked up Otherwise the paper is re...

Page 182: ...ouble speed rotation Main motor M1 Fixing motor M2 Cassette pick up solenoid SL1 Pick up motor M5 Vertical path roll clutch CL3 Vertical path roller paper sensor PS11 Pre registration paper sensor PS4 Registration clutch CL1 Developing clutch CL4 Laser exposure Internal delivery sensor PS6 Delivery reversal motor M7 Duplexing reversal motor M10 Duplexing assembly inlet sensor PS8 Lower feeder moto...

Page 183: ... vertical path assembly by the delivery flapper after fixing operation the paper is then switched back and sent to the lower feeding assembly The machine can arrange the order of images read from memory for printing not having to send and retain paper and ultimately speed up double sided copying As many as two sheets of paper may exist at one time between the registration sensor and the lower feed...

Page 184: ... sheet is picked up from the cassette 2 The 1st image side is copied to the 1st sheet The 2nd sheet is picked up 3 The 3rd image side is copied to the 2nd sheet The 1st sheet is switched back in the left feeding path assembly for re pick up 4 The 2nd image side is copied to the 1st sheet The 3rd sheet is picked up from the cassette The 2nd sheet is switched backing the left feeding path assembly m...

Page 185: ... is copied The 4th sheet is picked up from the cassette The 3rd sheet is switched back in the left vertical path assembly and kept in wait 7 The 2nd sheet is delivered The 7th image side is copied on the 4th sheet 8 The 3rd sheet is re picked up and the 6th image side is copied The 5th sheet is picked up from the cassette The 4th sheet is switched back in the left vertical path assembly and is kep...

Page 186: ...h sheet is switched back in the left vertical path assembly and is kept in wait in the lower feeding assembly 11 The 3rd image side of the 2nd set is copied on the 6th sheet The 5th sheet is re picked up 12 The 2nd image side is copied to the 5th sheet of the 2nd set The 7th sheet is picked up from the cassette The 6th sheet is re picked up from the left vertical path assembly and is kept in wait ...

Page 187: ... the cassette The 7th sheet is switched back in the left vertical path assembly and is kept in wait in the lower feeding assembly 15 The 6th sheet is delivered The 7th image side is copied on the 8th sheet of the 2nd set The 7th sheet is re picked up 16 The 6th image side is copied on the 7th sheet of the 2nd set The 8th sheet is switched back in the left vertical path assembly moved through the l...

Page 188: ...ageRUNNER 400 330 REV 0 JAN 1999 PRINTED IN JAPAN IMPRIME AU JAPON 7 35 CHAPTER 7 PICK UP FEEDING SYSTEM 17 The 7th sheet is delivered 18 The 8th sheet is delivered Figure 7 131 5 2 1 4 3 6 5 7 2 1 4 3 6 5 7 7 2 1 4 3 6 5 7 2 1 4 3 6 5 ...

Page 189: ...end paper is checked for horizontal registration when it is moved from the lower feeding assembly The rear front registration detection mechanism is located near the vertical path roller assembly and consists of a horizontal registration sensor PS10 and a horizontal registration shift motor M9 The horizontal registration sensor shift motor M9 is used to move the horizontal resignation sensor PS10 ...

Page 190: ...cording to the size of paper and it is about 10 mm from the trailing edge of paper assumed to move in an ideal path The detection start position is determined by the cassette size and the slide guide of the multifeeder Figure 7 133 shows the sequence of operations used when detecting the rear front registration 1 When the light blocking plate is not present detects the edge of paper and contact of...

Page 191: ...f rear front registration Figure 7 134 Table 7 108 M1 M6 M9 LC3 PS11 PS9 PS10 Electrical parts Main motor Lower feeder roller Horizontal registration sensor shift motor Vertical path clutch Vertical path sensor Re pick up sensor Horizontal sensor PS9 PS11 M1 M9 PS10 CL3 M6 J114 J102 B11 MMD J114 B5 PS9S J102 B9 PS10S J108 B8 PS11S CL3D J108 A4 J102 DC controller PCB Duplexing feeding roller Duplex...

Page 192: ...gistration in service mode ADJUST FEED ADJ ADJ REFE In this mode the position of the horizontal registration sensor is moved virtually in memory to move the point of laser exposure It is not to move the sensor position mechanically If the image is displaced toward the rear decrease the setting Figure 7 135 If the image is displaced to the front increase the setting Figure 7 136 H P Image area Spec...

Page 193: ...rolled by the delivery flapper and fed to the left vertical path assembly A specific time after the trailing edge of the paper moves past the revering assembly inlet sensor PS6 the reversal feeding roller 1 starts to rotate in reverse At this time the delivery flapper solenoid SL2 remains off and the paper is fed to the delivery assembly for face down delivery Figure 7 137 Figure 7 138 b Face Up D...

Page 194: ...livery Figure 7 139 INTR2 LSTR STBY Double speed rotation Reversal double speed rotation COPY Main motor M1 Fixing motor M2 Cassette pick up solenoid SL1 Pick up motor M5 Vertical path roller clutch CL3 Vertical path roller paper sensor PS11 Pre registration paper sensor PS4 Registration clutch CL1 Internal delivery sensor PS6 Reversal delivery motor M7 Duplexing reversal motor M10 External delive...

Page 195: ...r solenoid SL2 remains off and it turns on when paper is fed from the fixing assembly to the delivery assembly Copy paper Fixing assembly left vertical path assembly Fixing assembly delivery assembly Left vertical path assembly delivery assembly Solenoid OFF ON OFF Table 7 109 Figure 7 140 Delivery Flapper Solenoid Off Figure 7 141 Delivery Flapper Solenoid On SL2 OFF SL2 ON ...

Page 196: ...ped and a Jam message will be indicated on the control panel Figure 7 142 Pin No of the signal line on the DC controller PCB Table 7 110 PS3 PS4 PS6 PS7 PS8 PS9 PS11 PS18 PS19 PS40 Name Multifeeder paper sensor Pre registration paper sensor Reversing assembly inlet sensor Delivery sensor Duplexing assembly inlet sensor Vertical path paper sensor Re pick up paper sensor Cassette 1 pick up sensor Ca...

Page 197: ...ary jam The sensor detects paper but the paper does not leave the sensor within a specific period of time i e the sensor does not turn off c Residual Jam Paper exists over the sensor at time of power on i e the sensor turns on Caution The machine also identifies a jam when the front door right door or the delivery door is opened or the cassette is slid out during copying operation 3 Sequence of Op...

Page 198: ...Delay Jam Paper turns on the vertical path roll clutch CL3 but it does not reach the pre registration sensor PS4 within a specific period of time Figure 7 145 Pre Registration Roller Sensor Delay Jam INTR Multifeeder pick up clutch CL2 Pre registration sensor jam check Pre registration sensor PS4 Main motor M1 Copy Start key ON 2nd sheet picked up jam message indicated Normal Error INTR Vertical p...

Page 199: ... inlet sensor PS6 within a specific period of time Figure 7 146 Fixing Assembly Paper Sensor Delay Jam f Delivery Sensor Delay Jam Paper moves past the reversing assembly inlet sensor PS6 but doe not reach the delivery sensor PS7 within a specific period of time Figure 7 147 Delivery Delay Jam SCFW SCRV SCFW SCRV LSTR Registration clutch CL1 Fixing assembly paper sensor jam check Reversal assembly...

Page 200: ...r Stationary jam Paper turns on the delivery sensor PS7 but does not move past the delivery sensor within a specific period of time Figure 7 148 Delivery Sensor Stationary Jam SCFW SCRV LSTR Delivery sensor PS13 Delivery sensor jam check Main motor M1 Jam message indicated Note1 Normal Error Note1 Note1 The intervals vary according to the length of paper ...

Page 201: ...embly inlet sensor PS6 but does not reach the duplexing assembly inlet sensor PS12 within a specific period of time Figure 7 149 Lower Feeding Assembly Inlet Delay Jam SCFW SCRV SCRV LSTR SCFW Reversing assembly inlet sensor PS7 Delivery flapper solenoid SL2 Delivery sensor PS7 Delivery roller motor M8 Duplexing assembly inlet sensor jam check Duplexing assembly inlet sensor PS8 Main motor M1 Jam ...

Page 202: ...ick Up Delay Jam normal Figure 7 151 Re Pick Up Delay Jam error j Fixing assembly Outlet Sensor Stationary Jam Paper moves past the pre registration paper sensor PS4 but does not reach the internal delivery sensor PS6 within a specific period of time or paper is detected at power time SCRV LSTR Duplexing assembly inlet sensor PS8 Re pick up sensor jam check Re pick up sensor PS9 Main motor M1 Norm...

Page 203: ...111 Jam History in Service Mode The machine also keeps the following data in response to a jam Remaining number of copies to make Selected copying mode Using these data items the machine runs recovery mode to make the remaining number of copies after jam removal Reference If the message Put Originals Back and Press the Copy Start Key appears on the control panel put back the original in the feeder...

Page 204: ... work 2 The steps used to disassemble the parts must be reversed when assembling them unless otherwise noted 3 The screws must be identified by type length diameter and location 4 The washer used with a specific mounting screw e g for grounding wire and varistor must not be left out to ensure electric conductivity 5 The screws that are paint locked in place must not be removed during disassembly w...

Page 205: ...door 2 from the hook 3 then detach the right door 2 Removing the Pick Up Feeding Separation Roller 1 Slide out the cassette 2 Holding the knob 1 pull out the roller in its axial direction Figure 7 201 5 Disconnect the connector 4 of the pick up assembly and remove the grounding screw 5 6 Remove the four screws 7 and detach the pick up assembly 6 Figure 7 202 Figure 7 203 3 Mounting the Pick Up Fee...

Page 206: ...nectors 2 then while opening the two claws 3 remove the two pick up PCB 4 Figure 7 204 3 Remove the coil spring 5 and two screws 6 then detach the leaf spring 7 and the solenoid Figure 7 205 4 Remove the five screws 9 then while freeing the two claws 10 detach the frame lid 11 5 Remove the two screws 12 and detach the motor mount 13 Figure 7 206 6 Remove the two screws 14 and detach the pick up mo...

Page 207: ...vertical path roller clutch CL3 19 Figure 7 209 5 Adjusting the Rear Front Registration Check to make sure that the margin along the image front on paper picked up from each cassette is 2 5 1 5 mm Figure 7 210 If not as indicated perform the following steps 1 Slide out the cassette of the holder to be adjusted 2 Remove the two screws and detach the horizontal registration mount 1 Figure 7 211 15 1...

Page 208: ...igure 7 214 3 Close the multifeeder and open the right door then pull out the rolls Both left and right rolls are of the same shape Figure 7 215 4 Pull the multifeeder to the front to remove Reference When mounting the multifeeder connector cover match its top an then push its bottom from below front rear Hex screw Horizontal registration plate Figure 7 213 Figure 7 212 Caution When adjusting the ...

Page 209: ...ler 5 Caution 1 Take care not to drop the pin fitted at the rear of the multifeeder pick up roller 2 Take care not to deform the grounding plate found at the rear of the roller shaft 3 Removing the Separation Pad 1 Remove the right door 2 Remove the multifeeder pick up roller 3 While pushing the end 1 of the right door in the direction of A move the rear of the separation pad cover 2 in the direct...

Page 210: ...e when the solenoid plate is in contact with the claw of the control ring Figure 7 221 6 Attaching the Timing Belt to the Multifeeder 1 Butt the side guide plates of the multifeeder against both ends A open state 2 Move the slide volume to the center in the direction of B and attach the timing belt to the pulley Figure 7 222 7 Adjusting the Rear Front Registration Make a copy in Direct and check t...

Page 211: ...e the fixing assembly 2 Remove the drum unit 3 Remove the inside cover 4 Remove the transfer charging roller unit 5 Disconnect the connector 1 and remove the grounding screw 2 6 Remove the screw and detach the feeding assembly positioning pin 3 then detach the feeding assembly 4 from the front Figure 7 225 2 Removing the Feeding Fan 1 Remove the feeding assembly and place it after turning it over ...

Page 212: ...ving the feeding fan cover or the feeding fan take care not to damage the feeding belt D Lower Feeding Assembly 1 Removing the Lower Feeding Assembly 1 Remove the front door and the inside cover 2 Remove the cassette 1 2 3 Remove the pick up assembly 4 Lock the feeding assembly 5 Remove the lower left door 6 Remove the delivery assembly and the fixing assembly 7 Disconnect the two connector 1 Figu...

Page 213: ...y lever 3 Figure 7 230 9 Remove the two screw 4 10 Push the lower feeding assembly to the rear and shift it down and to the front to remove Figure 7 231 3 5 4 Place the left plate over Warning label Figure 7 231 1 2 Mounting the Lower Feeding Assembly a Mounting the Lower Feeding Assembly Pay attention to the top down spatial relationship of the cover The stay on the left side must be at the top ...

Page 214: ...n mount FAM17 FM18 Low voltage power supply cooing fan unit Rear harness unit 2 screws Power cord mount Low voltage cord mount Accessories power supply PCB Scanning lamp Registration clutch Main drive unit 2 Remove the transfer guide positioning boss 1 spring 2 and two E rings 3 from the rear of the copier Figure 7 232 1 2 3 b Mounting the Upper Feeding Guide Check to make sure that the feeding as...

Page 215: ... Figure 7 234 5 Remove the lower registration roller and then the upper registration roll in the order indicated Be sure to take care not to damage the teeth of the gear F Delivery Assembly 1 Removing the Delivery Assembly 1 Turn off the power and disconnect the power plug 2 Open the front door 3 Open the delivery assembly and remove the screw 2 then detach the delivery assembly connector cover 1 ...

Page 216: ...lever assembly 6 Disconnect the connector 5 7 Open the delivery assembly and remove the screw 7 then detach the cable from the copier both rear and front Figure 7 237 8 Pull out the spacer 8 from the right side of the delivery assembly 9 Release the bushing 9 by shifting it to the left Figure 7 238 10 Shift the delivery assembly to the right and detach its left and then its right When mounting the...

Page 217: ... Remove the delivery assembly 2 Remove the E ring 1 and the bearing at the front Figure 7 242 3 Disconnect the connector 3 and remove the three screws 4 then detach the external delivery motor 2 Figure 7 243 4 5 6 7 1 2 3 4 4 Figure 7 239 1 2 3 3 2 Removing the Paper Guide Plate If the sheet attached to the paper guide starts to deform wavy because of jams replace the paper guide If unattended it ...

Page 218: ...at discharge fans 6 Remove the four screws 8 used to secure the delivery assembly cover in place both front and rear Figure 7 245 7 Remove the delivery roller 9 and remove the delivery assembly cover 10 Figure 7 246 8 Detach the static eliminator 11 from the delivery assembly Figure 7 247 9 Attach the static eliminator as follows a Attach the static eliminator to the center of the delivery assembl...

Page 219: ...ap between the rubber ring moved to the solenoid frame and the steel E ring of the paper deflecting plate 1 solenoid SL5 is about 0 2 mm 5 Mount the delivery assembly to end the adjustment work Figure 7 249 G Lower Feeding Motor 1 Removing the lower Feeding Motor Mount 1 Disconnect the power plug and remove the following Rear cover 4 screws Flywheel 3 screws Connector mount DC controller PCB 2 scr...

Page 220: ... 1 Figure 7 251 2 Removing the Pick Up Drive Unit 1 Disconnect the power plug and remove the following Drum unit Developing assembly Rear cover Flywheel Composite power supply PCB Power supply cord mount Low voltage power supply cooling fan Low voltage PCB Scanner motor cooling fan mount FM17 FM18 Accessories PCB Scanner cooling fan 2 Remove the two screws and detach the harness guide 1 Figure 7 2...

Page 221: ...grip ring has been mounted correctly Figure 7 254 4 Multifeeder Clutch 1 Remove the four screws and detach the rear cover then remove the two screws 2 and disconnect the connector 3 Figure 7 255 I Vertical Path Assembly Remove the vertical path assembly 1 Remove the following Inside cover Pick up unit Pick up drive unit 2 Remove the two rolls and disconnect the connector then detach the multifeede...

Page 222: ...wo multifeeder unit mounts 5 6 Disconnect the connector 7 and detach the vertical path assembly Figure 7 258 2 Removing the Horizontal Registration Motor 1 Remove the following Pick up unit p 4 19 Pick up drive unit p 4 16 Vertical path unit p 4 17 2 Remove the two screws 2 and disconnect the connector 3 then detach the horizontal registration motor 1 Figure 7 259 5 7 6 6 1 3 2 ...

Page 223: ... to and Outputs from the Deck Driver 8 1 B Pick Up 8 4 C Detecting Paper 8 7 D Deck Lifter 8 9 E Opening Closing the Deck compartment 8 12 F Controlling the Deck Motor 8 14 II DETECTING JAMS 8 18 A Outline 8 18 III DISASSEMBLY ASSEMBLY 8 20 A External Covers 8 21 B Paper Deck 8 24 C Drive System 8 29 D Feeding System 8 36 E Electrical System 8 39 ...

Page 224: ...it sensor Deck lifter position sensor Deck set sensor Deck feed sensor Deck paper supply position sensor Deck paper level ensure Deck open sensor When PS101 detects copy paper 1 The light blocking plate is at PS101 When copy paper does not exist in the deck 0 The light blocking plate is not at PS102 Side deck driver PCB When the deck lifter is at the upper limit 1 The light blocking plate is at PS...

Page 225: ... SW102 J102 1 2 DLLD J8 5 4 DOLON NO NO 0VU 38VU Deck open switch Deck open indicator Deck open detecting switch Deck lifter lower limit detecting switch Power supply Copier Open switch PCB Side deck driver PCB When SW100 is pushed to open the deck 0 While the deck is opening closing 0 LED turns on or flashes while the deck lifter motor is rotating When the deck is open 0 SW101 is not pushed When ...

Page 226: ... M102 J22 1 2 J17 9 10 J8 6 7 11 12 J107 9 10 See p 8 16 When 0 CL101 turns on When 0 CL102 turns on When 0 SL102 turns on When 0 SL101 turns on CL101 24VU DPFCD J11 1 2 J104 6 7 CL102 24VU DPUCD J13 2 1 J3 11 12 DPRSD 24VU SL101 J9 2 1 J8 1 2 J104 1 2 DOPSD 24VU SL102 J23 2 1 J108 1 2 M101 Deck main motor Deck lifter motor Deck feeding clutch Deck pick up clutch Deck pick up roller releasing sole...

Page 227: ...key is pressed and the deck pick up clutch CL102 turns on the drive of the deck main motor M101 rotates the pick up roller to pick up copy paper At this time the pick up feeding roller and the separation roller serve to make sure that only one sheet of copy paper is picked up When the deck pick up sensor PS101 detects copy paper the deck pick up roller releasing solenoid SL101 turns on to move the...

Page 228: ...Figure 8 103 DC CPU Copier Side deck driver PCB PS106 PS101 CL101 CL102 M101 SL101 Deck pick up paper detection signal DPPD Deck feed paper detection signal DPFD Deck feeding clutch drive signal DPFCD Deck pick up clutch drive signal DPUCD Deck pick up roller releasing solenoid drive signal DPRSD Deck main motor drive signal ...

Page 229: ...D IN JAPAN IMPRIME AU JAPON 3 Sequence of Operations pick up from the deck Figure 8 104 INTR LSTR STBY ON Copy Start key Deck main motor M101 Deck pick up clutch CL102 Deck pick up roller releasing solenoid SL101 Deck pick up sensor PS101 Deck feed sensor PS106 Deck feeding clutch CL101 SCAN PRINT ...

Page 230: ...cting lever of the pick up roller assembly leaves the deck paper sensor the copier s control panel will indicate the Add Paper message Figure 8 105b Paper Absent 2 Switching the Deck Paper Size The deck paper size may be switched to suit the needs of the use by moving the guide plate inside the deck to match the size of copy paper and then by entering the new paper size in service mode OPTION ACC ...

Page 231: ... an approximate level of paper inside its compartment for indication on the copier s control panel Table 8 101 shows the combinations used to identify the levels of copy paper and the indications on the copier s control panel for the levels Table 8 101 Paper level approx 1750 to 3500 sheets 500 to 1750 sheets 1 to 500 sheets 0 sheet Control panel indication PS102 1 1 1 0 PS107 1 1 0 0 PS108 1 0 0 ...

Page 232: ... after the sensor lever blocks the deck lifter position sensor The lifter states to move down on the other hand when the deck open switch SW100 is pressed and continues to move down until the lifter leaves the sensor lever of the deck paper supply position sensor PS107 i e falling edge of the sensor signal When copy paper is supplied and the lever of the deck paper supply position sensor is pushed...

Page 233: ...ick up roller Deck pick up feeding roller Deck separation roller Lifter Deck lifter motor Deck main motor Deck open detecting switch SW101 Deck lifter position sensor PS104 Deck lifter upper limit sensor PS103 Deck open switch SW100 Deck lifter lower limit detecting switch SW102 Deck lifter cable Deck paper supply position sensor PS107 Deck paper level sensor PS108 ...

Page 234: ... moves up and down behind the indicator window in the deck front cover in keeping with the movement of the rack When the copy paper starts to run out and as a result the lifter moves up to the pick up position the area of the black belt within the indicator window increases gradually replacing the white area and thereby indicating the level of copy paper Figure 8 107 M102 Black belt Rack Indicator...

Page 235: ... blocks the light blocking plate of the compartment so that the lifter moves up to the pick up position When the deck lifter motor starts to rotate in response to the opening closing of the deck the deck open indicator LED100 on the open switch PCB turns on or flashes Figure 8 108 Deck lifter lower limit detection signal DLLD J107 8 Deck lifter motor drive signal J107 M102 DC CPU Side deck driver ...

Page 236: ...Compartment open OFF Deck open switch ON Deck open indicator LED100 Deck lifter motor M102 Deck paper supply position sensor PS107 Deck open detecting switch SW101 Deck open solenoid SL102 Deck lifter position sensor PS104 Lifter down open Lifter up Compartment set Varies depending on the size of the stack Deck lifter lower limit detecting switch SW102 Deck open sensor PS109 ...

Page 237: ...s 1 the motor drive circuit goes 0 causing the motor to rotate at a specific speed When the deck main motor drive signal DOMON goes 0 on the other hand the motor drive circuit turns off to stop the motor The copier s DC CPU monitors the rotation of the deck main motor with reference to the PLL lock signal DMPLK if for some reason the PLL lock signal remains 1 for 900 ms while the DMON is 1 it will...

Page 238: ... copier models The switching mechanism is triggered in response to and based on the combination of the states of the speed switch signals DBIT0 DBIT1 sent by the copier s DC CPU to the side deck driver PCB The combinations of the states of these signals are as shown in Table 8 102 and in the case of the GP40 the motor is made to rotate at medium speed Table 8 102 Motor speed High speed Medium spee...

Page 239: ...r the deck lifter up signal has been generated the copier s control panel will indicate E041 1 Moving Up the Lifter The deck is connected to the copier i e the deck set signal DSET is 1 The deck compartment is closed i e the deck open detection signal DOPND is 1 The deck compartment is closed i e the deck open detecting switch is on The deck lifter upper limit signal DLUL is 0 and the deck lifter ...

Page 240: ...07 Deck paper supply position sensor Deck paper supply position detection signal DPSP Deck lifter lower limit detecting switch SW102 Deck lifter lower limit detection signal DLLD PS109 Deck open sensor Deck open detection signal DOPND PS103 Deck lifter upper limit sensor Deck lifter upper limit detection signal DLUL Deck open signal DOPN Deck open detection signal DOPD Deck lifter motor drive sign...

Page 241: ...ure 8 201 The copier s DC CPU read the signals from these sensors at such times as programmed in advance to detect a jam If the copier s DC CPU detects a jam it will discharge all sheets moving ahead of the jam and stop the ongoing operation it then show instructions for jam removal on the control panel Figure 8 201 Table 8 201 Notation PS106 PS101 Name Deck feed sensor Deck pick up sensor Descrip...

Page 242: ...ollowing conditions 1 Paper is blocking the deck feed sensor PS106 when the copier is turned on at the end of the wait up state or during the standby state 2 Deck Pick Up Vertical Path Delay Jam Figure 8 202 Copy Start key ON Jam indicator INTR SCAN PRINT Deck pick up clutch CL102 Jam check Deck pick up sensor PS101 Deck feed sensor PS106 Deck main motor M101 Normal Error ...

Page 243: ... s power plug before starting the work 2 Unless otherwise noted assemble the parts by reversing the steps used to disassemble them 3 Identify the screws by type length diameter and location 4 Some mounting screws are equipped with toothed washers to protect against static electricity Be sure to use them 5 As a rule do no operate the machine with any of its parts removed 6 If the deck is equipped w...

Page 244: ...front cover 3 Compartment open close switch 4 Front cover 5 Right cover 6 Upper cover 7 Rear cover 8 Grip cover 1 Removing the Front Cover 1 Disconnect the deck from the copier and push down the latch plate 2 of the compartment to open the compartment 1 Figure 8 302 2 Loosen the four screws 3 and detach the front cover 4 of the deck to the front Figure 8 303 1 2 3 4 5 6 7 8 rear 1 2 3 4 ...

Page 245: ... If you inadvertently moved the drive belt for the paper level indicator behind the front cover when removing the front cover or moved the deck lifter be sure to move down the deck lifter to its lower limit and move the drive belt manually so that the white area increases arrow in Figure 8 305 before mounting the front cover Otherwise the movement of the deck can damage the drive mechanism of the ...

Page 246: ... cover 2 Figure 8 306 3 Removing the Right Cover 1 Remove the three screws 1 and move the right cover 2 to the front to remove it to the rear Figure 8 307 4 Removing the Upper Cover 1 Remove the rear cover See p 8 23 2 Push down the latch plate 2 of the compartment to open the compartment 1 Figure 8 308 3 Remove the three screws 3 and disconnect the connector 4 then detach the upper front cover 5 ...

Page 247: ... the Deck from the Copier 1 Place a stack of copy paper 3 about 8 cm high on the floor for the deck 2 to prevent deformation of the roll support plate 1 Figure 8 311 2 Remove the right cover See p 8 23 3 As shown in Figure 8 312 match the hole in the deck lower left stay and the hole in the compartment and insert a screwdriver 4 from inside the compartment to hold it in place Figure 8 312 7 6 8 cm...

Page 248: ...nd detach the deck 6 from the deck mount 7 Figure 8 313 5 Holding the deck 8 as shown place it on the stack of paper prepared in step 1 Figure 8 315 Figure 8 314 2 Removing the Compartment 1 Place a stack of copy paper 3 about 8 cm high on the floor for the deck 2 to prevent deformation of the roll support plate 1 left 5 7 right 6 5 8 8 cm approx 2 3 1 3 ...

Page 249: ...screw 6 and the stopper plate 7 then slide the compartment 8 farther to the front Figure 8 317 4 Remove the right cover See p 8 23 5 Remove the screw 9 of the harness guide disconnect the connector 10 and remove the three screws 12 each from left and right then detach the compartment 8 while lifting it slightly 6 Place the compartment 8 on the stack of paper prepared in step 1 Figure 8 318 rear 5 ...

Page 250: ... 2 If the lifer of the paper deck is up turn on the copier s power switch and press the sensor lever 2 of the paper supply position sensor inside the compartment 1 to move the lifter to its lower limit Figure 8 319 3 Remove the screw 3 and mount the paper trailing edge guide plate 4 to suit the new paper size 4 Remove the screw 5 one each and mount the left and right guide plates 6 to suit the new...

Page 251: ...ws 2 At this time use scale 3 of the latch plate as a point of reference Figure 8 321 5 Adjusting the Position of the Roll If the compartment cannot be opened closed smoothly requiring adjustment of the roll at the front of the deck perform the following 1 Remove the front cover See p 8 21 2 With the compartment fully slid out turn the four mounting screws 4 on the roll support plate 3 so that the...

Page 252: ...eck pick up clutch 3 Caution When mounting the pick up clutch be sure to fit the clutch in the slip stop 4 Further be sure to hook the harness on the U groove 5 Figure 8 323 2 Removing the Deck Feeding Clutch CL101 1 Remove the deck pick up unit See p 8 36 2 Remove the harness retainer 1 disconnect the connector 2 and remove the E ring 3 then detach the deck feeding clutch 4 Caution When mounting ...

Page 253: ...me take care not to damage the gear at the tip of the motor spindle Figure 8 325 4 Removing the Deck Lifter Motor M102 1 Open the compartment of the deck and remove any paper 2 Turn on the copier s power switch If the lifter is up push the sensor lever 1 of the paper supply position sensor inside the compartment Stop the lifter 2 when it is about 7 cm from the bottom plate of the compartment and i...

Page 254: ...e 8 328 5 Removing the Lifter Cable deck front side plate 1 Open the compartment and remove any paper 2 Remove the screw and remove the paper trailing edge guide plate from inside the compartment 3 Push down the sensor lever 1 of the paper supply position sensor inside the compartment and match the left and right holes in the compartment side plate and the left and right holes in the lifter then i...

Page 255: ...g shaft 5 and the E ring 6 then detach the pulley cover 7 7 Remove the two screws 8 and the cable fixing plate 9 then detach the lifter cable 10 on the outside 8 Remove the two screws 11 and the cable fixing plate 12 on the right side then detach the lifiter cable 13 on the inside 9 To detach the lifiter cable 13 from the pulley 14 on the inside remove the two set screws 1 16 of the pulley 15 on t...

Page 256: ...he left and right holes in the compartment side plate and the left and right holes in the compartment side plate then insert two long screwdrivers 2 At this time try to match the top face of the lifter to the marking line on the left side late of the compartment to facilitate the work Figure 8 332 4 Detach the compartment See p 8 25 5 Remove the screw 3 and detach the sensor plate 4 6 Remove the s...

Page 257: ...E AU JAPON 8 Insert a hex wrench into the hole of the lifter drive shaft 10 to prevent it from rotating as shown Caution If you fail to perform step 8 the lifter cable will slack when you remove the lifter motor Figure 8 336 Figure 8 335 9 Remove the five screws 12 and detach the lifter motor unit 13 10 11 12 12 13 ...

Page 258: ...the lifter cable on the pulley 4 4 Hook the ball of the lifter cable on the pulley 5 of the lifter drive shaft then wind it along the pulley groove about 1 5 times At this time be sure to keep the lifter cable taut so that the long screwdrivers are slightly pulled up 5 Secure the pulley in place to the lifter drive shaft with two set screws 6 6 Secure all pulleys to the lifter drive shaft then mea...

Page 259: ...it 3 be sure to tighten the three screws shown in Figure 8 339 first 2 Removing the Deck Pick Up Roller 1 Remove the deck pick up unit See p 8 36 2 Turn over the deck pick up unit and remove the resin ring 1 one each then detach the deck pick up rollers 2 Figure 8 340 3 Orientation of the Deck Pick Up Roller When mounting the deck pick up roller 1 at the front be sure that the marking 2 on the col...

Page 260: ...e the deck pick up unit See p 8 36 2 Turn over the deck pick up unit 3 Remove the resin ring 1 and move the deck pick up feeding roller 2 and the drive belt 3 to the front to remove Figure 8 342 5 Orientation of the Deck Pick Up Feeding Roller When mounting the deck pick up feeding roller 1 be sure that the belt pulley 2 is toward the front When mounting the pick up feeding roller rubber to the pi...

Page 261: ...r the deck separation roller is pink initially and changes in color to orange and then to yellow faster if exposed to light This is a characteristic of the urethane sponge and there is no different in performance and parts are not identified by color 7 Adjusting the Deck Separation Roller Pressure If double feeding or pick up failure occurs when the deck is used as the source of paper change the p...

Page 262: ...d on the support plate with a scriber If you are replacing the solenoid on its own be sure to secure it in its initial position Figure 8 346 E Electrical System 1 Removing the Side Deck Driver PCB 1 Disconnect the deck from the copier and remove the six screws then detach the rear cover 2 Disconnect the nine connectors 1 and remove the two screws then remove the deck driver PCB 3 Figure 8 347 2 Re...

Page 263: ... Remove the three screws 3 and disconnect the connector 4 then detach the upper front cover 5 Figure 8 349 3 Remove the two screws 6 and detach the open switch PCB 7 3 4 5 Figure 8 350 Caution When mounting the upper front cover be sure that it is not trapped by the open switch PCB and all connectors are connected correctly 7 6 ...

Page 264: ...Outline 9 1 B Fixing Drive Assembly 9 3 C Controlling the Fixing Temperature 9 6 D Protective Mechanism for the Fixing System 9 10 E Upper Fixing Roll Bias 9 12 II DISASSEMBLY ASSEMBLY 9 13 A Fixing Assembly 9 14 B Fixing Cleaner Assembly 9 26 C Fixing Assembly Inlet Solenoid Assembly 9 28 D Fixing Drive Assembly 9 29 E Fixing Cleaning Belt Solenoid 9 29 ...

Page 265: ...roller assembly Operations 3 times for A4 LTR or less including A4 LTR 4 times for paper lager than A4 LTR Error detection is executed by the following and the power to the fixing heater is shut down upon detection Thermal switch SSR short circuit Main thermistor TH1 temperature Sub thermistor TH2 temperature E000 Main thermistor overheating detection E001 Sub thermistor overheating open circuit d...

Page 266: ...APON Fixing motor M2 Cleaning belt drive solenoid Locking lever THSW TH1 TH2 SL5 SL6 Fixing assembly inlet guide drive solenoid Main thermistor Cleaning belt Thermal switch Fixing assembly inlet guide Upper fixing roller Sub heater Main heater Feeding lever Sub thermistor Figure 9 101 Parts of the Fixing Assembly Functions ...

Page 267: ...tem of the fixing assembly SL5 SL6 M2 Fixing motor Fixing assembly inlet guide solenoid Cleaning belt drive solenoid Inlet guide Upper fixing roller Lower fixing roller Cleaning belt take up arm DC controller PCB Composite power supply Image processor PCB DC CPU J220 900V J104 A8 J104 A4 SL6Pull SL6Back J115 A7 M2D J115 A4 SL5D Cleaning belt Figure 9 102 Fixing Assembly Drive System ...

Page 268: ...ay be closed by pressing the OK key Operate as follows to enable display of the Warning message switch on the User screen OPTION USER WEB DISP 0 Disable display of the warning on the User screen default 1 Enable display of the warning on the User screen For the service person Replace the Cleaning Belt For the user The Belt Is Out The length of the cleaning belt at time of the warning is good for a...

Page 269: ...he selected paper size using the fixing assembly inlet solenoid to improve feeding Figure 9 102 B5R exclusive to postcard size A3 to 5R inclusive Height of the fixing inlet guide Down Up Fixing assembly inlet solenoid SL6 The solenoid drive signal turns on only when the height of the fixing assembly inlet guide needs to be changed A specific period of time after the registration clutch turns on im...

Page 270: ...H1 and the sub thermistor TH2 and is controlled by the DC CPU which varies the main heater drive signal H1 D and the sub heater drive signal H2 D according to the levels of TH1 and TH2 DC CPU Image processor PCB DC controller PCB RL1 THSW1 Leakage power breaker Error detection circuit SSR TH2 TH1 H1 H2 Upper fixing roller Main power switch Door switch SW2 SW1 H1 D H2 D H1 ERR H2 ERR 0V TH1 S RL D ...

Page 271: ... may be selected on the screen designed for the selection of manual feed paper size Normal mode 18 C or more L mode less than 18 C Normal mode Thick paper mode manual feed Printing 195 C Effective temperature 190 C 195 C Standby 190 C If the ambient temperature when the main power is turned on is 18 C or less n OPTION BODY TEMCON2 2 Enhanced fixing is selected Control temperature At power on main ...

Page 272: ...nabling printing operation When the temperature of the fixing roller has reached 190 C initial multiple rotation is executed for 20 sec enabling printing operation For each job initial multiple rotation is executed during the period from 190 C to 195 C Thick paper mode may be selected on the screen designed for the selection of manual feed paper size on the screen designed for the selection of man...

Page 273: ...y will start power save mode lowering the fixing temperature to a specific level sleep state 1 155 C Save Power key 10 2 125 C Save Power key 25 3 95 C Save Power key 40 Standby 180 C n Thick Paper Mode 1 Place thick paper in the special cassette and select the Thick Paper icon in user mode Related service mode COPIER OPTION BODY TEMPCON2 2 Set thick paper on the multifeeder tray and select Thick ...

Page 274: ...tor temperature reaching fails to reach 55 C 45 sec after the main power switch has been turned on The output of the thermistor meets the following 31 sec or more after detection of 40 C to detection of 75 C 23 sec or more after detection of 75 C to detection of 100 C 19 sec or more after detection of 100 C to detection of 120 C 19 sec or more after detection of 120 C to detection of 140 C 19 sec ...

Page 275: ...t Detection Block Diagram Phase signal Open circuit detection L Overheating detection H To DC CPU To DC CPU To DC CPU To DC CPU Image processor PCB Fixing temperature control J114 A7 J113 B1 J114 A9 J114 A10 SSR Short Circuit Detection Block Diagram Main heater activation detection circuit Sub heater activation detection circuit Timer circuit Hard relay off signal 3 SSR error signal H2 D H1 D J114...

Page 276: ... Figure 9 105 Bias Contact of the Upper Fixing Roller Purpose Sequence Bias Contact Description To limit offset of toner to the upper fixing roller Applies a bias only when paper moves through the fixing rollers Negative DC bias 900 V Metal core of the upper fixing roller Figure 9 105 Contact Metal core of the upper fixing roller High voltage cable red ...

Page 277: ... 2 The steps used to disassemble the parts must be reversed when assembling them unless otherwise noted 3 The screws must be identified by type length diameter and location 4 The washer used with a specific mounting screw e g for grounding wire and varistor must not be left out to ensure electric conductivity 5 The screws that are paint locked in place must not be removed during disassembly work 6...

Page 278: ...ly knob Figure 9 201 3 Remove the screw 3 Figure 9 202 4 Detach the fixing delivery connector cover 4 as if to displace it upward Figure 9 202 Caution When mounting the connector cover take care so that its bottom will not interfere with the spring shown in the figure Take care so that the connector cover will not interfere with the spring displacing the spring Figure 9 202 1 1 2 Lift to detach Ho...

Page 279: ... 203 7 Remove the screw 7 and detach the fixing assembly outlet sensor connector cover 8 Figure 9 204 Figure 9 205 5 6 red cable 7 8 10 5 Remove the delivery assembly 6 Disconnect the two connectors 5 and detach the high voltage cable 6 red cable 8 Disconnect the connector 9 and remove the two screws 10 then slide out the fixing assembly ...

Page 280: ...e 9 208 Caution When mounting the harness take care not to trap the harness with the harness guide 6 Remove the fasten 6 of the heater terminal 5 Hooks 6 2 Removing the Fixing Heater 1 Remove the fixing assembly from the copier 2 Remove the two screws 2 and detach the protective cover 1 Figure 9 206 3 Remove the screw 3 w spring used to secure the heater terminal in place 4 Remove the faston 4 of ...

Page 281: ...t be touched b The sub heater has one round terminal 12 The main heater has fastons 13 on both ends Distinguish the two by the lead wires 11 Figure 9 211 1 n Sub Heater Figure 9 211 2 c Pay attention to the lead wires on both ends of the main heater and the sub heater the side with the shorter lead wire is to the front d When viewing from the front of the fixing assembly mount the main heater to t...

Page 282: ... fixing cleaner assembly 2 Figure 9 212 3 Remove the fixing heater 4 Shift the paper guide 3 to the left to detach Figure 9 213 5 Remove the four screws 6 and detach the thermal switch assembly 4 and the thermistor assembly 5 Figure 9 214 6 Remove the three screws 8 and another screw 9 M3x6 then detach the harness guide 7 Figure 9 215 7 Remove the two screws 11 an detach the heater guide plate Fig...

Page 283: ... it in the hole 13 to release the lower roller Figure 9 217 1 Figure 9 217 2 9 Open the separation claw assembly 14 and mount the protection cover 15 with a screw 16 this way the separation assembly will remain free Figure 9 218 10 Remove the C ring 17 used to secure the upper fixing roller in place then remove the gear 18 and the insulating bush 19 Figure 9 219 12 13 15 16 14 17 18 19 ...

Page 284: ...2 Lift the lower fixing roller 21 together with the bearing Figure 9 221 n Points to Note When Mounting the Upper Fixing Roller 1 Be sure to mount the following in the order indicated C ring 1 bias ring 2 bias insulating plate 3 bearing 4 and insulating bush 5 Figure 9 222 1 2 Be sure to keep the roller wrapped in paper whenever possible to protect its surface against dirt and scratches 20 21 1 2 ...

Page 285: ... Removing the Lower Separation Claw 1 Open the front door 2 Open the delivery assembly 3 Take out the fixing assembly 4 Remove the following from the fixing assembly and detach the separation claw unit 5 Positioning pin 1 1 pc Screw 2 1 pc Spring 3 2 pc Grounding screw 4 1 pc Figure 9 223 5 Remove the screw 6 1 each and detach the two lower separation claw units 7 then detach the two lower separat...

Page 286: ...etach the upper separation unit 2 then detach the five upper separation claws 4 while paying attention to the spring 3 1 each Figure 9 225 6 Position of the Fixing Assembly Inlet Guide The fixing assembly inlet guide is adjusted in connection with the inlet guide mount As such its position need not be adjusted if the inlet guide is mounted Caution If you detached the inlet guide mount you would ha...

Page 287: ... assembly 4 Remove the four screws 3 and detach the fixing assembly inlet sensor connector cover 1 and the fixing assembly outlet sensor 2 from the bottom of the fixing assembly Figure 9 226 8 Applying Lubricant Apply heat resisting grease CK 0427 to the parts shown Figure 9 227 Engagement of the gears on flat teeth heat resisting grease Edge of gears lubricant Engagement of gears of the fixing as...

Page 288: ...re from the thermistor is not excessively taut Reference You need not adjust the position of the thermistor If the contact is not even check to make sure that the thermistor spring is not deformed Figure 9 229 10 Mounting the Thermal Switch Check to make sure that the thermal switch 1 is in even contact with the surface of the upper fixing roller 2 Reference You need not adjust the position of the...

Page 289: ...s two layers of toner 2 Select NIP CHK in service mode FUNCTION FIXING then press the OK key 3 Check to see that the copier automatically makes a soiled black copy and delivers it 4 Measure the area of the copy where the toner is shiny Figure 9 230 Caution a and c are points 10 mm from the ends of the copy paper Dimension b a c Measurements 5 5 0 3 mm 0 5 mm or less Taken when both upper and lower...

Page 290: ...the end Caution If you have replaced the fixing cleaning belt reset the reading of WEB in service mode COPIER COUNTER MISC FIX WEB 2 Detaching the Fixing Cleaning Belt 1 Remove the fixing assembly from the copier 2 Remove the two screws 1 and remove the fixing cleaner assembly 2 Figure 9 232 3 Turn over the fixing cleaner assembly 4 Lift the take up shaft 3 while moving it in the direction of the ...

Page 291: ...leaning belt around the take up shaft five to ten times At this time check that the area coming into contact with the roller is impregnated with oil Figure 9 236 1 Caution Check the fixing belt to see that it is not slack or wrinkled and it is not wound askew b After attaching the fixing belt insert a small flat blade screwdriver into the fixing belt drive shaft and turn it counterclockwise until ...

Page 292: ...cover Flywheel Composite power supply unit DC controller unit 2 Remove the harness and remove the two screws 1 then detach the harness guide 2 Figure 9 237 3 Remove the three screws 3 and remove the fixing assembly inlet solenoid assembly 4 Figure 9 238 Caution The fixing assembly inlet guide solenoid assembly is adjusted at the factory Do not remove the solenoid i e do not loosen the screw 6 1 1 ...

Page 293: ...he fixing assembly toward the delivery assembly side by 3 cm 5 Remove the three screws 2 and disconnect the connector 3 then detach the fixing drive assembly 1 Figure 9 239 E Fixing Cleaning Belt Solenoid Make adjustments so that the gap of the solenoid 2 is 0 2 when the solenoid arm 1 is butted against A Figure 9 240 The act of butting here means letting the solenoid arm drop in the direction of ...

Page 294: ... Errors E805 10 9 III POWER SUPPLY 10 10 A Outline of the Power Supply System 10 10 B Power Supply PCB 10 11 C Transition to and from Sleep Mode 10 12 IV COUNTERS 10 14 A Outline 10 14 B Operations of Counters 10 16 V DISASSEMBLY ASSEMBLY 10 17 A External Covers 10 18 B Removing the Front Door Inside Cover 10 20 C Control Panel 10 21 D DC Controller PCB 10 23 E Composite Power Supply PCB 10 24 F L...

Page 295: ...pable of showing images in 320 x 240 dots The control panel has the following functions 1 Data communication 2 LCD processing 3 LCD contrast adjustment 4 Touch switch input processing Figure 10 101 Image processor PCB Control panel CPU PCB Control panel inverter PCB LCD panel Keypad PCB LCD contrast adjustment PCB Control panel power switch PCB Function key PCB Control panel IP CPU Fax one touch k...

Page 296: ...s data display data to the control panel CPU PCB as instructed by a program The control PCU PCB on its part relays the data to the LCD panel 3 LCD Contrast Adjustment The machine is equipped with a dial on the control panel to enable the user to adjust the LCD contrast The user may turn the dial to obtain LCD contrast of his her choice 4 Control Panel CPU Monitors key inputs for transmission to th...

Page 297: ...a by Centronics interface Flash memory for IP CPU Flash memory for DC CPU Back up RAM Uploading X X X m 4M DIMM 1M DIMM 1M DIMM Downloading m m m m m Possible X Not possible To switch between copying operation and downloading operation use the bit switch on the download PCB Shift the bit switch to the right LOAD to select download mode The machine disables copying operations Shift the bit switch t...

Page 298: ...ooling fan 3 DC controller PCB cooling fan Scanner motor cooling fan Function Draws copy paper to the feeding belt Helps feeding Discharges heat from around the fixing assembly Cools the laser driver PCB Cools the laser scanner motor Cools the laser scanner motor Insulates the drum cartridge against heat from the fixing assembly Discharges heat from the drum cleaning assembly and fixing assembly D...

Page 299: ...CHAPTER 10 EXTERNALS AUXILIARY MECHANISMS Figures 10 201 202 and 203 show the arrangement of fans Figure 10 201 Direction of Air Current 1 3 Figure 10 202 Direction of Air Current 2 3 Figure 10 203 Direction of Air Current 3 3 FM4 FM13 FM12 FM16 FM15 FM14 FM5 FM6 FM18 FM17 FM10 FM11 FM8 FM7 FM3 FM2 FM1 FM9 ...

Page 300: ...The speed is switched between full and half by changing the voltage supplied by the DC CPU to the fans CPU for the DC controller circuit mounted on the image processor PCB Speed Full Half PORT B 0 1 Timing Copying Stanby Supply source Composite power supply PCB Low voltage power supply PCB PORT A 1 0 Supply voltage 24V 15V Figure 10 204 DC CPU Image processor PCB Voltage switching circuit From com...

Page 301: ...Feeding fan FM1 Reversing guide cooling fan FM9 Low voltage power supply cooling fan FM10 11 Reader cooling fan FM12 13 Scanner motor cooling fan FM18 If time for shift to noise reduction mode in user mode is set to 1 through 9 and the following takes place A key is pressed An original is placed in the feeder The copyboard cover or the feeder is opened The length of time varies according to the se...

Page 302: ...nner motor cooling fan FM6 Cleaner heat discharge fan FM7 Drum cartridge cooling fan FM14 15 16 Low voltage power supply cooling fan FM10 11 Reader cooling fan FM12 13 Scanner motor cooling fan FM18 System cooling fan FM8 DC controller cooling fan FM17 FM4 FM5 FM6 and FM7 start to rotate at full speed in response to the following however they will maintain the condition shown in the chart even dur...

Page 303: ... check the detail code in service mode 3rd block from the right COPIER DISPLAY ERR Figure 10 206 In addition each fan has its own direction current of air be sure to orient them correctly whenever they must be disassembled assembled or replaced Figure 10 207 OK Display I O Adjust Function Option Test Counter ERR 1 3 READY AA BBBB CCCC DDDD EEEE FFFF G HH AA BBBB CCCC DDDD EEEE FFFF G HH AA BBBB CC...

Page 304: ...n transformer High voltage generation 38V 3 4V 5 2V 8V 15V 12V Accessories power supply Fixing motor Main motor main body load Cassette pedestal Side paper deck Multi Output Tray 3 Pre exposure lamp Fluorescent lamp Primary charging roller Scanner motor Laser scanner motor Side paper deck for main motor Image processor PCB Image processor PCB DC controller PCB CCD PCB Cassette pedestal G3FAX Laser...

Page 305: ...r PCB DC controller PCB CCD PCB fax PCB Fixing motor main motor machine DC load cassette pedestal side paper deck in operation Multi Output Tray 3 Pre exposure lamp Fluorescent lamp primary charging roller developing cylinder transfer charging roller transfer guide separation static eliminator fixing bias Rated output voltage 38V 15V 7 6V circuit name 8 0V 5 2V circuit name 5 1V 3 4V 12V 24VU 24VR...

Page 306: ...ing to the condition of power supply Table 10 302 State Main power off Sleep 3 Sleep 2 Sleep 1 Standby Possible operation None Fax data transmission reception Fax data transmission reception fax printing All IP CPU OFF ON Fixing heater OFF Pre heat ON Image memory for fax Retention by battery Retention by battery LCD OFF ON CPU for the image processor PCB Includes the period in which pre heat is e...

Page 307: ... off time weekly timer The fax output has been generated The mode of consuming power varies according to the setting made by the Save Power key 10 25 40 A fax output is generated No fax output is being made Standby Sleep 3 The fixing heater turns off Sleep 2 Save power mode starts Sleep 1 The control panel power switch is pressed A function key is pressed The feeder cover is opened An original is ...

Page 308: ... operations according to country see IV B Name External delivery sensor PS7 Re pick up sensor PS9 Delivery sensor PI3 No 1 paper sensor PI1A Others Operating conditions When paper is delivered single sided 2nd side image of double sided When paper is picked up 1st side of double sided When a finisher is installed When the saddle stitcher function is used When paper is picked up when pick up roller...

Page 309: ...COPYRIGHT 1999 CANON INC CANON imageRUNNER 400 330 REV 0 JAN 1999 PRINTED IN JAPAN IMPRIME AU JAPON 10 15 CHAPTER 10 EXTERNALS AUXILIARY MECHANISMS Figure 1 402 Arrangement of Counters 1 2 3 4 ...

Page 310: ...of Counters n 100 V Areas n 120 V Areas excluding F13 6642 F13 66498 Ref 1 2 3 4 Total copy counter Counts totals copier output printer output fax output Counts fax output Counts printer output Counts copier output and mail box printout Counter Total Fax Printer Control card accessory n 230 V Areas F13 6642 F13 6649 Ref 1 2 3 4 Total copy counter Counts copier output Counts fax output Counts print...

Page 311: ...ng when disassembling assembling the machine 1 Disconnect the power plug for safety before starting the work 2 Reverse the steps used to disassemble the parts when assembling them unless othewise noted 3 Identify the screw by type length diameter and location 4 Do not remove any screws that are paint locked when disassembling parts 5 As a rule do not operate the machine with any of its parts remov...

Page 312: ...assembly lower cover 9 Rear left cover 8 Left door Note Remove the covers as necessary to clean inspect or repair the inside of the machine Covers that can be detached by merely removing mounting screws are left out of the discussions 1 Removing the Right Cover If the lower right cover is not found skip steps 4 and 5 1 Remove the four screws and detach the rear cover 2 Open the front door 3 Slide ...

Page 313: ...nd detach the right cover 5 Figure 10 505 2 Removing the Left Cover 1 Remove the rear cover 2 Open the front door 3 Insert a screwdriver into the slot 2 identified by a marking on the rear left cover 1 and disengage the hook then detach the rear left cover Figure 10 506 4 Remove the inside cover See B Removing the Front Cover Inside Cover 5 Remove the two screws and detach the vertical size plate ...

Page 314: ...he front door Figure 10 508 2 Remove the screw 3 and detach the fixing assembly knob Figure 10 509 3 Unlock the developing assembly by turning the locking lever 4 and remove the knob 5 of the drum unit then pull out the drum unit carefully 4 Turn the locking lever 4 to lock the developing assembly in place Figure 10 510 5 Unlock the feeding assembly and remove the feeding assembly lever 6 w 1 stop...

Page 315: ...ly 7 Slide out the upper cassette 8 Remove the five screws and detach the inside cover Figure 10 512 C Control Panel 1 Removing the Control Panel 1 Remove the inside cover 2 Remove the screw and detach the magnet plate 1 from the top of the control panel Figure 10 513 3 Free the shorting connector harness 2 shown in the figure from the edge saddle 3 Figure 10 514 9 9 1 2 3 ...

Page 316: ... four screws 6 and detach the control panel 5 Figure 10 516 2 Removing the LD PCB CPU PCB and Key Switch PCB 1 Disconnect the three connectors and remove the five screws then detach the control panel support plate 1 Figure 10 517 2 Remove the four screws and remove the two flat cables then detach the LCD PCB 2 3 Remove the four screws remove the flat cable and disconnect the four connectors then d...

Page 317: ...move the ten screws and detach the key switch PCB 6 Figure 10 520 D DC Controller PCB 1 Disconnect the power plug 2 Remove the four screws and detach the rear cover 3 Remove the three screws and detach the flywheel 4 Remove the screw 2 and disconnect the connector 3 then detach the cleaner cooling fan 1 together with its stay Figure 10 521 5 Remove the eight screws 4 and disconnect all connectors ...

Page 318: ...y 3 form the power supply mount 4 Remove the two screws 5 and disconnect all connects then detach the composite power supply Figure 10 523 F Low Voltage Power Supply PCB 1 Remove the right cover 2 Remove the two screws and disconnect all connectors then remove the power cord mount 1 Figure 10 525 Figure 10 524 3 Remove the screw 4 and disconnect all connectors then remove the low power supply PCB ...

Page 319: ...of the right cover toward the outside 2 Fit the hooks on the PCB in the cut offs shown in the figure to mount Hooks Cut offs Displace toward the outside Power supply unit Figure 10 526 1 H Fans Caution If the screws used to mount the fan are not tightened fully abnormal noise may be heard when the fan is rotating Be sure to tighten the screws fully when mounting the fan 1 Feeder Fan FM1 1 Remove t...

Page 320: ...re 10 528 7 Disengage the hook 8 of the feeder fan cover 7 with a small flat blade screwdriver and detach the cover 8 Remove the feeder fan 9 Figure 10 529 2 Fixing Assembly Heat Discharge Fan 1 2 FM2 3 1 Open the front door 2 Open the delivery assembly 3 Remove the screw 1 and disconnect the heat discharge connector cover 2 4 Disengage the hooks 3 4 and detach the fan cover 5 6 7 8 9 4 4 3 3 5 5 ...

Page 321: ... the fan be sure that the direction of the arrow 5 indicating the direction of air current marked on the fan guide and the direction of the current 6 on the fan exterior match Figure 10 533 8 7 6 8 6 7 9 FM3 FM2 1 3 4 2 5 6 3 Laser Cooling Fan FM4 1 Remove the rear cover 2 Remove the filter 1 3 Disconnect the connector 2 and disengage the hook 3 then remove the laser cooling fan 4 5 Disconnect the...

Page 322: ...its cover Figure 10 534 Caution When mounting the fan be sure that the marking arrow indicating the direction of air current and the marking on the fan will match FM6 1 Open the front cover 2 Release the feeding assembly lever and the developing assembly lever 3 Remove the screw 1 and detach the drum cartridge 2 Figure 10 535 4 Disconnect the connector 3 and remove the screw 4 then slide out the d...

Page 323: ... tie wrap to detach the fan Figure 10 537 5 Cleaner Heat Discharge Fan FM7 1 Open the front cover 2 Remove the screw 1 and disconnect the connector 2 then remove the fan together with the stay 3 Figure 10 538 3 Remove the screw 4 and detach the fan 5 Figure 10 539 Caution When mounting the fan be sure that the marking arrow indicating the direction of air current and the marking on the fan will ma...

Page 324: ... Figure 10 540 2 Remove the screw 4 and detach the fan 5 Figure 10 541 Caution When mounting the fan be sure that the marking arrow indicating the direction of air current and the marking on the fan will match 7 Reversing Guide Cooling Fan FM9 1 Open the front door and open the delivery assembly 2 Remove the screw 1 and disconnect the connector 2 then detach the fan cover 3 Figure 10 542 3 Remove ...

Page 325: ...ng the fan be sure that the marking arrow indicating the direction of air current and the marking on the fan will match 9 Reader Cooling Fan FM12 FM13 1 Remove the left cover 2 Free the harness 2 from the wire saddle 1 disconnect the connector 3 and remove the screw 4 then detach the fans FM12 FM1 Figure 10 545 Caution When mounting the fan make sure of the following The direction of air current i...

Page 326: ... the copyboard glass 2 Remove the ruse band and disconnect the connector 3 Remove the two screws and remove the stay 4 Remove the fan Figure 10 546 Removing the Three Fans at the Same Time 1 Remove the copyboard glass 2 Remove the wire saddle 1 rear front 3 Remove the ruse band 2 and disconnect the connector 3 Figure 10 547 4 Remove the two screws 4 rear front 5 Remove the stay and detach the fan ...

Page 327: ...M16 be sure that the marking on the stay 7 will match the rotation of the fan Figure 10 548 11 DC Controller PCB Cooling Fan FM17 1 Open the rear cover 2 Disconnect the connector 1 and remove the two screws 2 then detach the fan 3 Figure 10 549 Caution When mounting the fan be sure that the marking on the fan will match the direction of air current 7 Direction of rotation 3 FM17 2 1 ...

Page 328: ... Scanner Motor Cooling Fan FM18 1 Remove the rear cover 2 Remove the flywheel 3 Remove the two screws and disconnect the fan Figure 10 550 Figure 10 551 Caution When mounting the fan be sure that the direction of the fan will match the marking on the stay 4 Disconnect the connector and remove the screw then detach the fan 2 1 top vie Fan 3 2 FM18 2 1 ...

Page 329: ...EGRATION I SYSTEM INTEGRATION 11 1 A Outline 11 1 II SCSI INTERFACE BOARD 11 4 A Outline 11 4 B Specifications 11 4 C Hardware 11 6 III DISASSEMBLY ASSEMBLY 11 7 A Basic Expansion Kit 11 8 B SCSI Interface Board 11 10 C Battery Board 11 11 This chapter provides outlines of accessories that may be connected to the machine ...

Page 330: ...nd wiring diagrams this chapter deals with Nos 3 and 4 for details of Nos 1 2 and 5 see the separately available service manual No 1 2 3 4 5 Name Handset C1 Super G3 FAX Board F1 SCSI Interface Board D1 Expansion Board Base Unit C1 Printer Board Description It is a 120 V handset It is a fax board designed to support V 34 It serves to transmit image data read by the copier to an external computer I...

Page 331: ...ON 11 2 COPYRIGHT 1999 CANON INC CANON imageRUNNER 400 330 REV 0 JAN 1999 PRINTED IN JAPAN IMPRIME AU JAPON Handset C1 120 V Expansion Board Base Unit C1 Super G3 FAX Board F1 SCSI Interface Board D1 Printer Board Figure 11 101 1 ...

Page 332: ...PTER 11 SYSTEM INTEGRATION CPU CPU CPU Expansion Board Base Unit C1 Modular PCB Image processor PCB System motherboard FAX PCB SCSI PCB NCU PDL I F PCB Telephone line SCSI bus Terminator IEEE1284 Bi Centronics Printer motherboard Printer extension unit Printer PCB Network Network functions board Figure 11 101 ...

Page 333: ... Memory CPU EPROM Description Copyboard cover feeder A3 to A7 2400 to 150 dpi set in units of 1 dpi Manual 9 settings AE ABC no pre scanning Others Set on the driver side Binary Simple binary ED Gradation 16 256 gradations SCSI 2 compatible Standard 10 MB on board H8 3003 operating frequency of 16 MHz 256 k x 16 bit 85ns 4 Mbit Table 11 201 System motherboard Image processor PCB SCSI PCB Binary mu...

Page 334: ...computer to the SCSI board you must match the interface types of both Normally the interface type of the host computer is changed if this is not possible be sure to use the copier s control panel to make appropriate changes Caution Be sure that the SCSI ID No is not identical to any of the ID Nos used by the external devices connected to the system n Setting the SCSI ID 1 Select the SCSI key on th...

Page 335: ...Description Used it for connection to the system motherboard Use it to connect the host computer terminator shared Use it to prevent overcurrent to the SCSI PCB E603 will be indicated when Fu101 blows LED is On or Off The CPU on the SCSI PCB is not operating faulty PCB E601 is indicated on the control panel LED is Flashing on for 0 2 sec remains off longer The CPU on the SCSI PCB is operating but ...

Page 336: ...s given when disassembling assembling the machine s parts while keeping the following in mind 1 Disconnect the power plug before disassembly assembly work 2 Assemble the parts by reversing the steps used to disassemble them unless otherwise noted 3 Identify the screws by type length diameter and location 4 Do not operate the machine with any of its parts removed unless otherwise mentioned 5 Do not...

Page 337: ...that the Communication Memory lamp is off then turn off the main power Figure 11 301 2 Remove the rear cover and the flywheel Screw Screws Flywheel Figure 11 302 3 Remove the five screws and detach the extension case cover Figure 11 303 4 If the fax board is installed disconnect the connector shown in the figure Scares Extension case cover Screws Figure 11 304 Fax board Connector Extension unit ME...

Page 338: ...n connector Figure 11 306 Fax board SCSI board Interface board 7 Remove the three screws and detach the extension unit from the copier Figure 11 307 2 Removing the System Motherboard 1 Remove the extension unit 2 Remove the accessory boards from inside the extension unit 3 Remove the five screws and disconnect the connector then detach the system mother board from the extension unit Screws w washe...

Page 339: ...s shown before fitting the screw Screw hole in the extension kit Screw hole in the copier Match the screw holes Extension unit Figure 11 309 B SCSI Interface Board 1 Removing the SCSI Interface Board 1 Check to see that the Communication Memory lamp is off then turn off the main power 2 Remove the terminator Figure 11 310 3 If the printer board is installed remove the PCL face cover shown in the f...

Page 340: ...Figure 11 312 SCSI interface board Lever Lever C Battery Board Caution When removing or mounting the battery board take care not to touch the BD unit 1 Removing the Battery Board 1 Check to make sure that the Communication Memory lamp is off then turn off the main power 2 Remove the copyboard glass retainer right and detach the copyboard glass Figure 11 313 3 Remove the small cover from the IP cov...

Page 341: ...ure 7 Push the boss on the locking support shown in the figure and detach the board as if to pull it off the locking support Connector Scanner cable Battery board Push the claw Locking support Figure 11 317 2 Mounting the Battery Board 1 Mount the battery board securely to the locking support being careful so that it will not be over the IP cover or the metal plate 2 After installing the battery b...

Page 342: ...ls 12 4 B Supplying Toner 12 7 C Stirring the Toner 12 9 D Setting the Drum Cartridge 12 11 E Setting the Cassette 12 14 F Installing the Feeder DADF standard model only 12 16 G Making Settings 12 17 H Checking the Copy images 12 18 III RELOCATING THE MACHINE 12 27 IV INSTALLING THE CONTROL CARD V 12 29 V INSTALLING THE COPY DATA CONTROLLER A1 12 33 A Copy Data Controller A1 12 33 VI INSTALLATION ...

Page 343: ...ne B The site must be 7 5 C to 32 5 C in temperature and 5 to 85 in humidity Avoid water faucets water boilers humidifiers and areas near a refrigerator C Avoid areas near the sources of fire and areas subject to dust or ammonium gas Avoid areas exposed to direct sunshine otherwise be sure to provide curtains D The site must be well ventilated E The site must be level so that the copier s feet wil...

Page 344: ...99 PRINTED IN JAPAN IMPRIME AU JAPON Outline of Work Space The spatial requirements for maintenance work are as follows n Copier Only n Copier Finisher Paper Deck n Copier Multi Output Tray 3 170 cm min 10 cm min 180 cm min 170 cm min Copier 10 cm min 300 cm min 170 cm min 10 cm min 200 cm min ...

Page 345: ...an generate blank copies If the copier has been brought in from a cold place leave it alone for one hour or more without unpacking before starting the installation work The unpacking and installation work consists of the following A Unpacking and Removing the Fixing Materials B Supplying Toner C Stirring the Toner D Setting the Drum Cartridge E Setting the Cassette Dial label Size label F Mounting...

Page 346: ...llowing is missing n Inside the Cardboard Box Copy tray Installation Procedure Grounding cord Lower left cover rear Drum unit Screw for lower right cover DADF delivery tray unit Lower right cover rear Lower left cover front Toner User s Manual copying n Taped On the DADF Top Stepped screw Stamp Work Unpack the machine and remove the plastic sheets If you are installing a cassette pedestal unpack t...

Page 347: ...rew See the figure you will be using the screw when mounting the lower left cover front 2 After mounting the hook Figure mount the lower left cover front using the screw you removed Remove the scanner fixing screw from the outside of the left cover Slide out the cassette and remove the packing material from inside tape Open the front door Remove the screw Use the removed screw Hook Lower left cove...

Page 348: ...ing Turn the developing assembly locking lever and the feeding assembly lever in the direction of the arrow so as to release the developing assembly and the feeding assembly Caution Before pulling on the string to slide out the releasing roll check to make sure that it is not trapped by the spring shown in the figure Releasing roll rear Releasing roll front Spring String Releasing roll Take care n...

Page 349: ...t stops Shake the toner cartridge several times Set the toner cartridge to the developing assembly and push it down until the opening tab snaps off and springs to the front The opening tab snaps off as soon as the toner cartridge is locked to the developing assembly While holding the toner cartridge pull the opening tab to the front until it stops B Supplying Toner Developing assembly Grip Toner c...

Page 350: ...ng assembly Push in the black cover of the developing assembly back to its initial position Check to make sure that the toner cartridge has separated from the developing assembly Detach the toner cartridge Push in the developing assembly until it stops Turn the developing assembly locking lever in the direction of the arrow to lock the developing assembly in place Be sure to perform C Stirring the...

Page 351: ... of the following Toner has been supplied The dummy cartridge remains attached The drum has not been set The feeding assembly lever is positioned so that the feeding assembly is released the front cover is open No 1 2 Remarks Work Insert the door switch tool into the door switch assembly Turn on the main power switch Main power switch Screen contrast Cassette heater switch Door switch tool ...

Page 352: ...l 2 screen of service mode will appear b Execute Toner Stirring 1 Press FUNCTION and press INSTALL on the screen that has appeared 2 Highlight TONER S and press the OK key to start toner stirring Stirring takes 240 sec Wait unit the count down reading stops at 0 yakunuke To stop in the middle press the Stop key All keys except the Stop key remain disabled during operation 3 Press the Rest key twic...

Page 353: ...se the developing assembly lever Remove the dummy drum 1 Remove the screw shown in the diagram You will be using the screw when setting the drum unit 2 Pull the dummy drum straight to the front to detach You will not need the dummy drum Dispose of it Remove the separation static eliminator and clean it with the special brush Then put it back by inserting it until a click is felt D Setting the Drum...

Page 354: ...o hold it at its middle when taking it out of its box 2 Remove the two primary charging roller releasing rolls Do not touch the surface of the drum Keep the drum away from light as much as possible Check to make sure that the developing assembly is unlocked then insert it carefully along the rails Avoid touching the surface of the drum Dust proofing glass Primary charging roller releasing roll to ...

Page 355: ...p the dummy drum in place Enter the date and the counter reading on the label and attach it to the front cover of the drum unit 1 Lock the developing assembly in place by operating the developing assembly releasing lever 2 Lock the feeding assembly in place Screw Drum unit œ t date date Datum J E counter compteur Zahler ı l notes note Notiz Feeding assembly releasing lever Developing assembly rele...

Page 356: ...Slide out the cassette Find out the type of paper used by the user and set the cassette to A B or Inch Set the switch on each cassette Attach the label to the paper size dial Be sure to fit the boss in the cut off of the label E Setting the Cassette Caution The label comes in two types A B and Inch Be sure to use the appropriate label Switch Label Boss ...

Page 357: ...he lever of the width guide and then the length guide slide them to the appropriate size index Turn the paper size dial to suit the selected paper size Attach the cassette size label Figure to indicate the selected paper size Do not use the A3 or 11x17 size label to the cassette M which is not designed for these sizes Put paper in the cassette Point of reference ...

Page 358: ...lder and inert the stamp into the holder to mount Mount the original delivery tray 1 Mount the original delivery tray as shown in the figure using the stepped screw and M4x30 screw Do not touch the stamp face Be sure to wash off any ink from your hands F Installing the Feeder DADF standard model only Stamp Stamp holder Original delivery tray M4x30 screw Stepped screw q Copier right cover ...

Page 359: ...ings No 1 2 3 4 Remarks user mode timer setting date setting 2 and 8 at the same time See VII F in Chapter 13 Work Turn on the main power switch Press the User Mode key and use the following items Date Time Start service mode Select the appropriate item according to the use s preference from among those under COPIER OPTION USER in service mode ...

Page 360: ...5 mm Be sure to store the Service Book in the case behind the front cover Work If the machine is in service mode press the Reset key twice to end it If you are installing the machine on a 4 or 2 cassette pedestal skip the following steps 1 Mount the lower right cover 2 Slide out the top bottom cassette and secure the lower right cover with a screw Using the NA 3 Test Chart as an original make a co...

Page 361: ...CCD on the FUCNTION screen then select CCD ADJ During operation SERVICE will appear in the upper right corner of the screen Press the OK key Shading will be executed If successful the operation ends by displaying END in the status indicator Perform the adjustments that follow if the copy images are faulty 1 Shading Adjustment Display Adjust Function Option Test Counter I O INSTALL CCD DENS DPC CST...

Page 362: ...r pattern 5 DENS DZ ME to read a DZ pattern OK or NG No 1 2 3 4 5 Remarks 2 and 8 at the same time Must not be for color copiers Select the whitest of all used by the user Work Press the Reset key to end service mode While holding the feeder or the copyboard cover at about 45 make two A4 copies solid black Start service mode and select COPEIR FUNCTION and DENS in order Place a white sheet of copy ...

Page 363: ...k the trailing edge Set the PD DENS output against the V marking in the left rear of the copyboard glass Work Select PD DENS and press the Copy Start key A PD pattern will be generated 1 Place the PD DENS output on the copyboard glass as shown 2 Close the feeder or the copyboard glass 3 Select PD ME and press the OK key The scanner makes 13 scans The notation OK will be indicated to the right of P...

Page 364: ...d black the trailing edge Place the DZ DENS output against the V marking in the rear left corner of the copyboard glass Work Press the ð key at the bottom of the Service Mode screen to go to its second page Select DZ DENS and press the Copy Start key A DZ pattern will be generated 1 Place the DZ DENS output on the copyboard glass as shown 2 Close the feeder or the copyboard glass 3 Select DZ ME an...

Page 365: ...he following settings In text mode density at 5 In text photo mode density at 5 In photo mode density at 5 2 Check pick up operation from the cassettes and the multifeeder 3 Front Rear Registration No 1 Remarks Work 1 Slide out the problem cassette 2 Remove the two screws and detach the horizontal registration mount Making Checks a Generate a PG solid black output and adjust the printer settings b...

Page 366: ...osen the hex screw and move the horizontal registration plate to the rear and the to adjust Multifeeder 1 Loosen the screw and move the tray so that the registration is 2 5 1 5 mm in Direct Caution When shifting the horizontal plate try to match the inside of the L angle against a graduation of the scale rear front Horizontal registration plate Hex screw ...

Page 367: ...n the control panel 2 Start service mode and select ADJUST FEED ADJ REGIST 3 Adjust the margin Making Checks a Generate a PG solid black output and adjust the printer settings by Executing ADJUST FEED ADJ REGIST Setting 6 to PG TYPE for PG solid black b Set ADJUST ADJ XY ADJ X in service mode To decrease the margin increase the setting To increase the margin decrease the setting 4 Registration Adj...

Page 368: ...eptible to light and exposure to room lighting is enough to cause white spots or black bands on copies Take note of the following Try to finish jam removal work in 5 min If you have to remove the drum unit from the copier for servicing work wrap it in fresh copy paper and place it in a dark place Do not touch the surface of the photosensitive drum If the surface of the photosensitive drum is soile...

Page 369: ...e e g from room to room holding the machine by its grips can separate it from the pedestal Avoid the grips and be sure to lift the pedestal 2 Preparing for Relocation No 1 2 3 4 5 Remarks Put the drum unit in a separate box for transportation Work Take out the drum unit Fix the scanner in place Tape the charging assemblies and the feeding assembly levers in place to protect against vibration Tape ...

Page 370: ...or of the pedestal and release the guide plate used to connect the machine and the pedestal by shifting it to the right Holding the grips of the machine working in a group of two lift the machine upright so that it slips off the pin of the pedestal Place the machine on the floor or a desk carefully Remarks 3 Lifting the Copier Off the Pedestal Vertical path guide assembly Right door ...

Page 371: ...r releasing the developing assembly Registration roller tab Top cassette 2 Lock the developing assembly and remove the five screws then detach the inside cover 3 Free the harness of the shortage connector from the edge saddle and disconnect the shorting connector The shorting connector will not be used Figure 12 401 4 Remove the control panel and turn it over carefully 4 screws Grounding plat 1 pc...

Page 372: ...d the blue grounding wire in the tie wrap removed in the foregoing step Be sure to arrange as shown Figure 12 405 Caution When securing the control card in place be sure to position it so that a cad may be slid in and out smoothly Caution Be sure to center the connector for the printer over the opening Figure 12 406 2 Mount the control panel to the copier Of the mounting screws used tighten the fa...

Page 373: ...e that the grounding wire of the control card and the harness will not come into contact with the drive assemblies If they are in contact arrange them once again by re routing Figure 12 408 4 Place the plastic film sheet over the opening in the control panel display opening Figure 12 409 Screws Connectors Control panel Screw that comes with the unit Screw Connector Connector from which the shortin...

Page 374: ... Peel the protective sheet from the control panel label of the control card 6 Attach the control panel nameplate to the copier s control panel Figure 12 410 11 Attach the memo sheet and the transparent sheet 12 Turn on the copier s main power switch and check to make sure that the control card operates normally Control panel label ...

Page 375: ...mmercially available modem For RAM initialization For normal operation For factory adjustment For normal operation For control of Inch configuration 11x17 LTR LGL STMT For control of AB configuration A3 A4 B4 B5 For service mode For normal operation If group control is planned If group control is not planned Not used bit 1 to 3 4 5 6 1 2 3 4 5 6 Position OFF ON OFF ON OFF ON OFF ON OFF ON OFF ON O...

Page 376: ...ors JA1 JA2 JB1 JB2 on the copy data control to suit the needs of the user Figure 12 503 A Connecting the Communication Control Board A1 or the interface Board B1 Power Supply A1 needed Figure 12 504 B To not connect the Communication Control Board A1 or the Interface Board B1 does not require Power Supply A1 1 6 SW4 SW1 ON SW5 ON LED6 LED5 LED4 LED3 LED2 LED1 SW2 SW3 JB2 JB1 JA1 JA2 EPROM SRAM CP...

Page 377: ... the copy data controller Figure 12 508 1 2 Installing to the Copier Be sure to keep the following in mind when installing the Copy Data Controller A1 to the copier 1 See to it that the work complies with the regulations of the country of installation 2 Install the copier in advance 3 Disconnect the copier s power plug 4 Identify the screws by type length diameter and location 5 Prepare settings d...

Page 378: ...INTED IN JAPAN IMPRIME AU JAPON 6 Connect the 8P connector 8 to the copier s 8P connector 9 Figure 12 508 2 7 Secure the copy data controller 10 in place to the copier s rear cover with four screws 11 Figure 12 508 3 Connector for a card reader 8 9 10 11 11 Take care not to trap the connector cable ...

Page 379: ...make sure that LED3 flashes during the copying run Figure 12 511 4 If you are connecting a Communication Control board A1 or an Interface Board B1 i e requiring a Power Supply A1 go to step 5 Turn on the copier s main switch and check to make sure that LED 1 of the copy data controller turns on and LED2 flashes Make one copy to make sure that LED3 flashes during the copying run Figure 12 512 Groov...

Page 380: ...Input Card ID No Table 11 502 Figure 12 515 8 Set the method of input 8 1 Set the card ID input using the Keypad A1 Initially card input is selected 8 2 To change from card input to ID input perform the following To change from ID input t card input requires a Card Reader 1 go to 8 4 MANAGE CARD will be indicated 8 3 Press the 2 key and press the ENT key MANAGE ID will be indicated 8 4 To change t...

Page 381: ...he copy data controller as follows Table 12 503 b Press the switch SW4 of the copy data controller LED5 should turn on instantaneously in response to a press on the switch bit 1 2 3 Position ON OFF SW1 c LED5 turns on to indicate the end of data copying LED5 flashes if copying of data fails Press the switch SW4 once again and see if LED5 turns on The copier cannot deliver paper during copying oper...

Page 382: ...cursor keeps flashing during formatting The mode is set to 3 when it stops flashing Caution When a new mode of control has been set such items as unit price upper limit counter reading and ID Nos are all initialized Set them as needed 10 Set the control paper size 10 1 Change the control panel size using the DIP switch on the copy data controller and the Keypad A1 To use the current setting go to ...

Page 383: ... 48 49 50 51 52 Table 12 506 11 Check the DIP switch settings 11 1 Shift bit 3 of the DIP switch SW5 3 on the copy data controller to OFF 11 2 Press the key to indicate the DIP switch SW1 SW5 settings Figure 12 518 11 3 Check the DIP switch SW1 SW5 settings of the copy data controller See Table 3 1 If the setting is not correct go back to Setting the Board and repeat the steps If you are setting t...

Page 384: ...of the power supply unit is secured in place to the cable guide and is not trapped by the upper cover 14 If you are connecting the Control Card Printer A 1 connect it to the connector J4 of the copy data controller As necessary use a relay cable Figure 12 522 15 If no portion of a cable is showing outside the copy data controller end the installation work Attach the petty pull 8 to the lower right...

Page 385: ...ntroller A1 to the copier 1 See to it that the work complies with the regulations of the country of installation 2 Install the copier in advance 3 Disconnect the copier s power plug 4 Identify the screws by type length diameter and location 5 Prepare settings data on a computer at the service station 1 Remove the two screws 2 and remove the upper cover Figure 12 601 2 Connect the connector 3 of th...

Page 386: ...ver 5 Cut the red tie wrap 7 and move the 8P connector 8 and the 9P connector 9 to the left Figure 12 604 6 Mount the rear cover 7 Connect the 8P connector 10 of the controller and the copier s 8P connector 11 Figure 12 605 8 Secure the controller 12 to the copier s rear cover with for screws 13 that comes with the controller Figure 12 606 5 6 6 7 8 9 The 9P connector will not be used 10 11 12 13 ...

Page 387: ... the board of the controller shift bit 7 of the DIP switch SW2 7 17 to ON otherwise shift it to OFF Note 1 If IC6 16 is not mounted you need not mount it newly Note 2 If you are mounting a ROM IC6 16 for upgrading or replacement be sure to set bit 7 of the DIP switch SW2 7 17 to ON Figure 12 609 12 Se each bit of the DI switch SW3 18 on the board of the controller as shown Figure 12 610 14 LED1 LE...

Page 388: ...sion level to 14 dBm Sets the modem signal transmission level to 12 dBm Sets the modem signal transmission level to 10 dBm SW3 2 OFF OFF ON ON SW3 1 SW3 2 See right Table 12 601 13 Connect the power supply unit to the power plug and check to make sure that LED1 19 green of the board of the controller turns on Figure 12 611 14 Initialize the RAM of the controller Set the bits of the DIP switch SW2 ...

Page 389: ...t the RAM has been initialized SW2 bits SW2 1 SW2 2 SW2 3 SW2 4 SW2 5 SW2 6 SW2 7 SW2 8 Settings OFF OFF OFF ON OFF ON See step 9 OFF Table 12 603 Figure 12 613 16 Shift the bit of the DIP switch SW2 6 23 on the board of the controller to OFF Figure 12 614 LED1 LED2 LED3 2 1 LED5 LED6 LED4 IC6 SW1 SW4 SW3 6 1 BAT1 CN4 1 2 CN3 CN2 1 2 3 4 5 6 7 8 19 SW2 21 22 LED1 LED2 LED3 2 1 LED5 LED6 LED4 IC6 S...

Page 390: ...ttempt ended in failure go back to RAM initialization i e perform from step 12 to 14 and try initial settings once again Caution Be sure to check with the service station to make sure that the settings of the controller are correct 20 Try to place a call to the service station Press the push switch SW4 21 on the board of the controller LED6 27 red should turn on when a transmission ends successful...

Page 391: ...LED3 30 pink flashes each time paper is delivered Figure 12 619 23 Attach the switch settings label 31 on the upper cover of the controller The label should be filled out with switch settings Figure 12 620 24 Secure the upper cover 1 of the controller with two screws 2 When doing so check to make sure that the cable of the power supply unit is retained by the cable guide inside the controller and ...

Page 392: ...INTED IN JAPAN IMPRIME AU JAPON CHAPTER 13 MAINTENANCE AND SERVICING I PERIODICALLY REPLACED PARTS 13 1 II CONSUMABLES AND DURABLES 13 1 A Copier 13 1 B Paper Deck 13 2 III SCHEDULED SERVICING CHART 13 3 IV SCHEDULED SERVICING TABLE 13 5 A Copier 13 5 B Paper Deck 13 6 ...

Page 393: ...ltifeeder Separation pad multifeeder Transfer roller Separation static eliminator Scanning lamp Pre exposure lamp Developing cylinder Upper fixing roller Lower fixing roller Upper fixing separation claw Lower fixing separation claw Fixing cleaning belt Heat insulating bush Fixing heater main Fixing heater sub Thermistor Internal delivery roller Internal delivery sensor PS6 Q ty 2 2 2 1 1 1 1 1 1 1...

Page 394: ...D IN JAPAN IMPRIME AU JAPON No 1 2 3 Remarks Actual copies made Actual copies made Actual copies made Parts name Paper deck pick up roller Paper deck feeding roller Paper deck separation roller Q ty 2 2 1 Life copies 250 000 250 000 250 000 Parts No FB4 2033 000 FB4 2034 000 FB2 7777 000 B Paper Deck As of Dec 1998 ...

Page 395: ...de Transfer guide plate upper lower Transfer charging assembly guide rail Clean the separation feeding assembly Separation static eliminator Feeding belt Clean the fixing delivery assembly Fixing assembly inlet guide Separation claw upper lower Provide scheduled servicing according to the number of copies made Remarks Standard of 2 5 1 0 mm Use a blower brush if the dirt is excessive use alcohol D...

Page 396: ...IMPRIME AU JAPON No 9 10 11 12 13 14 15 Work Clean the copybook glass Make test copies Perform the Image Adjustment Basic Procedure Make sample copies Put the sample copies in order and clean up the area around the machine Record the final counter reading Fill out Service Book and report to the person in charge Remarks Checks ...

Page 397: ...er rail No 1 through No 3 mirrors Dust proofing glass Lens Reflecting plate Original size sensor Developing assembly roll Transfer guide Feeding belt Feeding assembly base Fixing assembly inlet guide Upper separation claw Lower separation claw Remarks Use lubricant Note During a visit Clean as necessary During a visit Clean as necessary During a visit Clean as necessary Installation every 60 000 e...

Page 398: ... JAN 1999 PRINTED IN JAPAN IMPRIME AU JAPON Unit Pick up assembly Part Pick up roller Pick up feeding roller Separation roller Feeding roller roll Remarks Installation every 250 000 every 500 000 every 750 000 Maintenance intervals every 1 000 000 Clean Replace Lubricate Adjust Inspect B Paper Deck ...

Page 399: ... AND FUNCTIONS OF ELECTRICAL PARTS 14 108 A Clutches and Solenoids 14 108 B Motors 14 110 C Fan 14 112 D Sensors 14 114 E Switches and Counters 14 116 F PCBs 14 118 G Side Paper Deck 14 120 H Variable Resisters Light Emitting Diodes and Check Pins by PCB 14 124 VII UPGRADING 14 131 A Replacing the DIMM 14 131 B Downloading 14 134 VIII SERVICE MODE 14 137 A Outline 14 137 B DISPLAY Control Display ...

Page 400: ...ecified voltage present between J1 1 and J1 2 J1 is found near the power cord mount You will find troubleshooting steps organized in tables which are modified versions of general flow charts Study the following for an idea of how to consult them EX AC power is absent n If you want to find out the cause possible faulty part see the column under Cause In the case of AC power is absent the power plug...

Page 401: ...nd J109 2 on the DC controller PCB Connect the positive probe of the meter to the terminal marked and the negative probe to the terminal marked Is the power plug connected to the power outlet Connect the power plug Checks YES NO Action NO 1 Steps Are the front door and the delivery door closed firmly Close the door or the cover NO 2 Is the specified voltage at the power outlet The problem is not o...

Page 402: ... eliminator Is the setting of density correction under adjust clean in user mode the medium value YES NO Set it to the medium value It the setting of ADJUST in service mode the value indicated on the label attached to the front door Enter the value indicated on the label Make 2 to 3 copies in non AE at copy density 5 YES NO NO NO Are there vertical lines white black YES YES YES YES Clean the separ...

Page 403: ... lint free paper Clean Clean and lubricate Fixing Delivery Assembly Item Tool solvent Work remarks Separation Inlet guide Solvent Solvent Clean Clean Optical Assembly Item Tool solvent Work remarks Lens Dust proofing glass Blower brush Blower brush Clean Clean Item Tool solvent Work remarks Developing Assembly Developing roll Alcohol Clean Item Tool solvent Work remarks Transfer Feeding Pick Up As...

Page 404: ...r A3 paper in the cassette and select the cassette 2 Select 6 in service mode TEST PG TYPE and generate a solid black copy 3 Make adjustments so that the margin is 2 5 1 5 mm Main Scanning Direction Use the horizontal registration mount See A 2 Sub Scanning Direction Use service mode ADJUST FEED ADJ REGIST see A 1 c Adjusting the Non Image Width 1 Select the cassette used for adjusting the image m...

Page 405: ... registration roller To decrease the leading edge margin decrease the setting of REGIST n After adjusting the image leading edge margin be sure to make adjustments under ADJUST ADJ XY ADJ X See the descriptions for service mode 2 5 1 5mm 2 Adjusting the Left Right Registration front a Pick Up from the Cassette Check to see if the margin on the image front is 2 5 1 5 mm for each cassette Figure 14 ...

Page 406: ... the Multifeeder Loosen the screw and move the tray so that it is 2 5 1 5 mm in Direct mode 4mm Hex screw diameter front rear Horizontal registration plate Hex screw 3 Left Right Registration for the 2nd Side of a Double Sided Overlay Copy rear front direction Check to see if the image on the 2nd side of a double sided overlay copy is as indicated Standard 2 5 mm 2 0 mm Figure 14 206 If it is not ...

Page 407: ...aper deck 1 Make a copy of the Test Sheet and check to see if the left right registration is 0 1 5 mm 2 If it is not as indicated slide out the compartment and turn the two screws to adjust the position of the latch plate of the deck open solenoid At this time refer to the scale on the latch plate Figure 14 207 rear left of the compartment Latch plate Scale Screws ...

Page 408: ...sed on priority on speed and its method and concept are as follows 1 Adjusting Priority on Speed AE Mode ADJUST AE AE TBL 1 through 9 3 at time of shipment Adjust the density correction curve text for priority on speed AE mode A higher setting makes text lighter A lower setting makes text darker Figure 14 208 Copy density White White Black Black Higher setting Lower setting Original density ...

Page 409: ...ive Cable Route the cable from 1 through 9 then go to the next item Adjusting the Mirror Position Figure 14 209 38 39mm Fit the mirror positioning tool Loosen the set screws to free the pulley Put the steel ball into the hole in the pulley Wind the cable 3 5 times inwardly and 4 5 times outwardly then fit the pulley clip Pulley clip Steel ball Set screws 2 7 1 4 2 3 6 9 5 8 ...

Page 410: ...APTER 14 TROUBLESHOOTING 2 Adjusting the Mirror Position optical length between No 1 mirror and No 2 No 3 mirror Caution Use the mirror position tool FY9 3009 040 Be sure to relocate the pins before use Figure 14 210 C C B B 3 2 1 3 2 1 A FY9 3009 040 Before Repositioning the Pins After repositioning the Pins ...

Page 411: ...n the screws on the metal fixings used to secure the cable 2 Fit the mirror positioning tools after repositioning its pins to the No 1 mirror mount and the No 2 mirror mount Figure 14 211 3 Tighten the fixing screws for the scanner cable previously loosened 4 Detach the mirror positioning tools Figure 14 212 Rear tab Front tab Metal fixing ...

Page 412: ...parent side Figure 14 213 Make the following adjustments when replacing the scanning lamp 1 Shading correction 2 FUNCTION CCD MAN ADJ 2 Auto density correction FUNCTION DENS WHITE ME PD DENS PD ME DZ DENS DZ ME For details see the description for FUCNTION in service mode VIII of Chapter 14 Transparent side Reflecting plate C Image Formation System 1 When Replacing the Drum Unit Record the date and...

Page 413: ...butted Magnetic seal Magnetic seal rear front 3 Mounting the Developing Assembly Blade The blade is adjusted to a high accuracy when it is mounted to the blade mount Avoid detaching it from its mount If you must replace the blade on its own be sure to adjust the position of the blade so that the gap between the blade and the developing cylinder is 0 21 0 03 mm when measured with a gap gauge CK 005...

Page 414: ...th of the primary charging roller solenoid SL1 indicated in the figure is 4 0 0 2 mm Figure 14 217 4 0 0 2mm D Pick Up Feeding System 1 Adjusting the Positioning the Multifeeder paper Guide Cam Make adjustments so that the paper guide plate cam is as shown when the solenoid plate is in contact with the claw of the control ring Figure 14 218 Claw Screw w hex hole Paper guide plate Paper guide plate...

Page 415: ...he side guide plate of the multifeeder against the end A open condition 2 Move the slide volume to the center direction B and fit the timing belt on the pulley Figure 14 219 Pulley Timing belt Rack plate Pulley A Slide volume 3 Mounting the Multifeeder Pick Up Roller Mount the multifeeder pick up roller 1 so that the side with a cross 2 on its collar is toward the rear Figure 14 220 2 1 ...

Page 416: ...Remove the delivery assembly 2 Place the delivery assembly upright on a flat desk 3 Push in the steel core of the paper deflecting plate 1 solenoid SL2 until it stops 4 Loosen the adjusting screw and make adjustments so that the gap between the steel core E ring of the solenoid and the solenoid frame is about 0 2 mm 5 Mount the delivery assembly Figure 14 221 0 2mm Paper deflecting plate 1 solenoi...

Page 417: ...ed at the front is silver in color When mounting the deck pick up roller 1 for the front orient it so that the marking 2 on the collar silver is toward the front and the marking 3 on the side of the roller is toward the rear Figure 14 222 Pick Up Roller for the Front The collar of the pick up roller used at the rear is gold in color When mounting the deck pick up roller 4 for the rear orient it so...

Page 418: ...bber to the pick up feeding roller shaft be sure that the marking 3 is toward the rear Figure 14 224 front 5 3 4 2 1 7 Positioning the Side Paper Deck Pick Up Roller Releasing Solenoid Take note of the position of the two fixing screws of the deck pick up roller releasing solenoid with reference to the scale on the support plate before removing the solenoid Or mark the position of the solenoid on ...

Page 419: ...uide mount otherwise be sure to set it to its initial position by referring to the scale on the fixing assembly 3 Adjusting the Lower Fixing Roller Pressure nip If you have replaced the upper fixing roller or the lower fixing roller or if fixing faults occur make the following adjustments If you are taking measurements while the fixing roller is cold leave the machine alone for 15 min after it end...

Page 420: ...turn the pressure adjusting screw 1 found at the rear and the front of the fixing assembly to make adjustments Figure 14 228 4 When Replacing the Lower Fixing Roller When replacing the lower fixing roller or the bearing of the lower roller shaft be sure to apply heat resisting grease MO 138S to the shaft to prevent adhesion of the shaft and the bearing 1 ...

Page 421: ...ction 4 3 Execute DZ density auto correction n After Replacement 1 Enter the values indicated on the label attached to the composite power supply PCB in service mode 2 Execute shading auto correction 1 3 Execute auto density correction 1 Execute shading auto correction 1 2 Execute auto density correction 1 Execute shading auto correction 2 2 Execute auto density correction Adjust the coordinate po...

Page 422: ...ent shading auto correction 2 for PCB lamp replacement ADJUST FUNCTION ADJ XY CCD CCD ADJ S PPR W PLT CCD ADJ MAN ADJ n Using CCD ADJ Start service mode 1 Press the asterisk key 2 Press 2 and 8 on the keypad at the same time 3 Press the asterisk key 4 On the screen select COPIER FUNCTION and CCD in sequence 5 Select CCD ADJ and press the OK key You need not place standard white paper n Using MAN A...

Page 423: ... before executing density correction Standard white paper density read FUNCTION DENS WHITE ME PD density auto correction FUNCTION DENS PD DENS text text photo mode FUNCTION DENS PD ME DZ density auto correction FUNCTION DENS DZ DENS photo mode FUNCTION DENS DZ ME n The following blocks are subjected to correction processing Laser characteristic correction Developing bias correction n Executing the...

Page 424: ...r moves forward and reads the white paper Figure 14 230 c Executing PD DENS 1 Select COPIER FUNCTION DENS PD DENS and press the OK key A 15 graduation patter will be generated The patches are black d Executing PD ME 1 Remove the white paper from the copyboard and place the PD DENS output on the copyboard Place the printed side down for reading the pattern Place the white side as the leading edge a...

Page 425: ...ecuting DZ DENS 1 Select COPIER FUNCTION DENS DZ DENS then press the OK key A 15 gradation pattern will be generated The patches are white e Executing DZ ME 1 Remove the PD DENS output black patches and place the DZ DENS output white patches on the copyboard glass Figure 14 232 2 Select DZ ME under DZ DENS and press the OK key The scanner makes 13 scans 3 After read operation PD auto density corre...

Page 426: ...m Execute toner stirring COPIER FUNCTION INSTALL TONER S Execute drum resistance measurement COPIER FUNCTION DPC D GAMMA A this time take notes of the measurement of D GAMMA 3 Execute copy density correction once again If the result is still NG perform the following according to the measurement of D GAMMA If 2 3 or higher replace the drum cartridge If 0 1 or lower replace the developing assembly ...

Page 427: ...idth detecting VR 2 Start service mode asterisk key 2 and 8 at the same time asterisk key 3 Select COPIER FUNCTION CST and highlight A4R Figure 14 233 4 Place A4R paper in the multifeeder and adjust the side guide to the paper width 5 Press the OK key 6 Repeat steps 3 through 5 for A6R and A4 as in A4R 7 Press the Reset key to end service mode then turn off and then on the main power switch Displa...

Page 428: ...extension and the clip as necessary Figure 14 235 b Using Service Mode 1 Start service mode 2 Press COPIER I O and select DC CON The bit number notations in the tables that follow represent the following Pinch the pin 7 5 3 7 04 DIGIT AL MULT IMET ER YOKO GAW A POW ER POW ER OP EN TER MIN AL SHU TTE R 20 kHz 10 A CO M V mA A 10A mA 0 2 4 2 REL AVG SEL ECT RAN GE MIN MAX DAT A H 4 D H mV mV LoH z r...

Page 429: ...board cover is closed 1 0 V When the cupboard cover is opened 0 0 V When paper is placed 1 5 V When paper is not placed 0 0 V Notation name Meter probe Service mode Check Normal if described Display reading Meter reading approx PS4 Registration paper sensor PS4S J108 B11 P004 bit3 While in standby open the right door and insert paper PS6 Internal delay sensor PS6S J106 2 P004 bit8 While in standby...

Page 430: ...ent 1 5 V When the flag is blocking the sensor paper absent 1 5 V When the flag is not blocking the sensor paper present 0 0 V When the flag is not blocking the sensor paper present 0 0 V When the paper is slid to the rear 1 5 V When the paper is not slid to the rear 0 0 V Notation name Meter probe Service mode Check Normal if described Display reading Meter reading approx PS11 Vertical path senso...

Page 431: ...en the pick up rollers PS19 Cassette 1 pick up sensor PS19S J108 A18 P004 bit1 While in standby slide out the cassette and insert paper between pick up rollers When paper is inserted 1 5 V When the front cover is open 1 5 V When the front cover is closed 0 0 V When paper is not inserted 0 0 V When paper is inserted 1 5 V When paper is not inserted 0 0 V Notation name Meter probe Service mode Check...

Page 432: ...k the site against the foregoing requirements 2 Checking the Originals Determine whether the problem is due to the original or the machine a The copy density lever must normally be at 5 1 b Reddish originals can produce copies with poor contrast e g red sheets slips c Diazo copies or originals with transparency tend to produce outputs easily mistaken for foggy copies Originals prepared in light pe...

Page 433: ...ng the Periodically Replaced Parts Replace any part that has reached the end of its life by referring to the Scheduled Servicing Chart and the Periodically Replaced Parts Table 8 Others In winter bringing a machine from a cold to warm room can cause condensation inside it leading to various problems a Condensation on the scanner glass mirror lens can cause the images to be lighter b Condensation o...

Page 434: ...COPYRIGHT 1999 CANON INC CANON imageRUNNER 400 330 REV 0 JAN 1999 PRINTED IN JAPAN IMPRIME AU JAPON 14 35 ...

Page 435: ...14 36 COPYRIGHT 1999 CANON INC CANON imageRUNNER 400 330 REV 0 JAN 1999 PRINTED IN JAPAN IMPRIME AU JAPON B Sample Image Faults ...

Page 436: ...er and check the surface of the developing assembly rolls for foreign mater e g toner Check the developing assembly End Replace the drum unit Step 1 2 3 4 5 6 Yes No YES YES NO NO YES NO Check Perform the Image Adjustment Basic Procedure Is the problem corrected Be sure that the pattern print is correctly placed when executing FUNCTION DENS PD ME DZ ME Make a copy in AE mode Is the text too light ...

Page 437: ...ontroller PCB Step 1 2 3 4 5 6 7 8 Yes No YES NO NO YES YES NO YES YES NO Check Perform the Image Adjustment Basic Procedure Is the problem corrected Check to make sure that the pattern print is placed correctly when executing FUNCTION DENS PD ME DZ ME Turn off the power switch and open the front door Is the image on the surface of the photosensitive drum more or less normal Is the transfer roller...

Page 438: ...ce the image processor PCB and the analog processor PCB Step 9 10 11 12 Yes No NO NO YES NO Check Is the developing assembly set correctly Are the rolls of the developing assembly in firm contact with the photosensitive drum Is there toner in the developing assembly Replace the drum unit Is the problem corrected Primary charging high voltage cord resistance 10 KΩ approx Separation high voltage cor...

Page 439: ...es No YES NO NO NO NO YES NO YES NO Check Perform the Image Adjustment Basic procedure Is the problem corrected Check to make sure that the pattern print is placed correctly when executing FUNCTION DENS PD ME DZ ME Turn off the power switch in the middle of copying operation and open the front door Is the toner image on the surface of the photosensitive drum before transfer more or less normal Are...

Page 440: ...he DC controller PCB 1 Clean the tip of the blade of the developing assembly dry wiping 2 Clean the surface of the developing cylinder 3 Check to make sure that the toner inside the developing assembly is not uneven Replace the scanning lamp Replace the drum unit Execute shading correction once gain FUNCTION CCD MAN ADJ Step 1 2 3 4 5 6 Yes No NO YES NO NO YES YES NO Check Are the developing assem...

Page 441: ...d End Replace the drum unit Step 1 2 3 4 5 6 7 8 Yes No YES YES NO NO YES NO YES YES NO Check Clean the scanning lamp reflecting plate mirror lens and dust proofing glass Is the problem corrected Perform the Image Adjustment Basic Procedure Is the problem corrected Select COPIER FUNCTION DPC D GAMMA in service mode and press the Copy Start key Is the problem corrected Is the developing cylinder in...

Page 442: ...of the blade of the developing assembly 2 Dry wipe the surface of the developing cylinder Replace the drum unit Check the photosensitive drum to make sure it is not subjected to external light Step 1 2 3 4 Yes No YES YES NO YES NO Check Clean the charging roller in user mode Is the problem corrected Clean the mirror lens and dust proofing glass Is the problem corrected Is the surface of the develo...

Page 443: ...ller Check the fixing assembly inlet for dirt Step 1 2 3 4 Yes No NO YES NO YES NO Check Generate a halftone test print in service mode Enter 5 to COPIER PG TYPE Does the output image have black lines Clean the primary charging roller in user mode Is the problem corrected Are there scratches in the peripheral direction of the photosensitive drum Wipe the black lines on the surface of the photosens...

Page 444: ...nted correctly Clean it Replace the drum unit Be sure to find out the cause of the scratches End End Change the setting of ADJUST ADJ XY ADJ S in service mode to change the position of shading measurement Step 1 2 3 4 5 6 7 8 Yes No NO YES NO YES YES YES YES YES NO Check Generate a halftone test print in service mode Enter 4 to COPIER PG TYPE Are there black lines on the output Is the transfer cha...

Page 445: ...s on the surface of the drum replace the drum unit The paper may be moist Instruct the user on the correct method of storing paper Check the transfer charging assembly for leakage Check the developing bias End Step 1 2 3 4 5 6 7 Yes No NO YES YES YES NO YES YES Check Generate a halftone test print in service mode Enter 4 to COPIER PG TYPE Are there black lines on the output Is the problem noted at...

Page 446: ...y Clean the transfer guide Clean the magnet plate Check the drum cleaner assembly for leakage of toner End Check the cleaning belt take up mechanism Clean the fixing roller Clean the fixing assembly inlet guide Replace the transfer charging roller Step 1 2 3 4 5 6 Yes No NO YES NO YES NO YES NO YES Check Turn off the main power switch while paper is moving through the feeding assembly Is the back ...

Page 447: ...n check the wiring and replace the thermistor as necessary Main about 1000 to 1400 KΩ Sub about 40 to 50 KΩ Try recommended paper If the results are good advise the user to use recommended paper End Replace the image processor PCB Step 1 2 3 4 5 6 7 8 Yes No NO YES YES NO NO NO NO YES NO Check Does the problem occur immediately after the machine is turned on in the morning Is the paper of poor fix...

Page 448: ...p feeding guide Step 1 2 3 4 5 Yes No YES NO YES YES YES NO Check Is the feeder used Is the original placed correctly Has the pick up feeding or separation roller of the cassette holder in question reached the end of its average life Execute ADJUST FEED ADJ REGIST in service mode Is the problem corrected See Note Is the problem noted only when pick up is from the lower feeding assembly 15 The copy...

Page 449: ...small amount of lubricant Check the drum drive assembly Check the ends of the drum area in contact with the developing roll for scratches and foreign matter Check the developing assembly Check the drum drive assembly Replace the drum unit Step 1 2 3 5 Yes No YES NO YES YES NO Check Is the cable on the cable pulley twisted or frayed while the scanner is moving Is there foreign matter on the mirror ...

Page 450: ...ing bias Check the scanning system Check the feeding system Step 1 2 3 4 5 6 Yes No YES YES YES NO NO YES NO Check Is the problem noted at the same location on all copies made in Direct Does the scanning lamp flicker while moving forward Is the problem noted at intervals of 94 mm Is the wiring from the scanning lamp to the composite power supply PCB and to the power supply normal Is the coating of...

Page 451: ...ck the transfer charging system Step 1 2 3 4 5 Yes No YES YES NO NO YES NO Check Is there oil or the like on the copyboard glass Is there foreign matter on the copyboard glass cross member Clean the scanning lamp reflecting plate mirror lens and dust proofing glass Is the problem corrected Is the horizontal ratio of copies made in Direct as indicated Are the connection and the continuity of the de...

Page 452: ...nit Step 1 2 3 4 5 6 7 8 9 10 11 Yes No NO NO YES NO YES NO YES YES NO NO NO YES Check Is the developing assembly locked to the photosensitive drum during copying operation Is the developing cylinder rotating during copying operation Is the image of test prints 1 through 8 of PG TYPE normal Is the transfer charging assembly fully inside the machine Is leakage noted in the transfer charging assembl...

Page 453: ...ble if normal replace the CCD unit Step 1 2 3 4 5 6 7 Yes No NO YES NO NO NO NO NO YES NO YES Check Does the scanning lamp remain on during copying operation Is there a margin on copies made normally Is the drum set correctly Is it fully pushed in Are the connection and continuity connectors and harness from J205 3 on the composite power supply PC to the primary charging assembly normal The resist...

Page 454: ...idge Action End End Replace the drum cartridge Step 1 2 Yes No YES YES NO Check Execute FUNCTION DPC D GAMAM in service mode and make a copy of the NA 3 Chart Is the copy image normal Set 1 to OPTION BODY PRIAC SW in service mode Make a copy of the NA 3 Chart Is the copy image normal 23 The copy has black or white dots after replacement of the drum ...

Page 455: ...ion Re connect the connector Replace the thermistor Re mount the thermistor Replace the heater Replace or mount the thermal switch correctly Replace the composite power supply PCB Re connect them Step 1 2 3 4 5 6 7 8 Yes No NO NO NO NO NO NO NO Check Clear the error in service mode Is the connection of the connector J426 normal Wait until the fixing assembly has cooled adequately then disconnect J...

Page 456: ... the SSR shorted Replace the relay Is the problem corrected Cause Thermistor SSR DC controller PCB Image processor PCB Action Replace the thermistor unit Replace the SSR End Replace the image processor PCB Step 1 2 3 4 5 Yes No YES YES YES NO Check Clear the error in service mode Wait until the fixing assembly has cooled sufficiently then disconnect J426 and measure the resistance of the thermisto...

Page 457: ...No YES YES NO YES YES YES NO Check Clear the error in service mode When the machine has warmed up does any of the following apply The fixing heater fails to operate E000 is indicated Wait until the fixing assembly has cooled sufficiently then disconnect J426 and measure the resistance of the thermistor Is the reading as follows J426 white harness TH1 about 0 Ω J426 black harness TH2 about 0 Ω Is t...

Page 458: ...g heater fails to turn on If E000 or E002 occurs see its respective descriptions If E004 turns on once again go to step 3 Correct the wiring Replace the SSR End Replace the image processor PCB Step 1 2 3 4 5 6 Yes No NO YES YES YES NO Check Clear the error in service mode Does the fixing heater turn on immediately after power on Does the wiring between the SSR relay and DC controller PCB have a fa...

Page 459: ...he counter Keep this in mind when replacing the cleaning belt next time see note Replace the DC controller PCB Step 1 2 Yes No YES NO YES Check Is the fixing cleaning belt taken up Was the counter reading cleared when the cleaning belt was replaced last time COPIER COUNTER MISC FIX WEB in service mode Note You can enable or disable the belt replacement message appearing on the User screen in servi...

Page 460: ...eater Main heater TH1_S 0V TH2_X TH2_Y TH2 J426 Main thermistor Sub thermistor TH1 J114 A 10 9 8 7 To door switch 0V J447 J447 FT33 FT32 RELAY_D 15 14 13 12 11 0V H2_ERR H2_D H1_D H1_ERR J405 J12 J114 B 1 2 J203 J204 1 2 VSS 24VU VSS 24VU DC controller PCB 11 12 J104 B AC DC Image processor PCB J714 B J113 B 20 19 1 2 Check for continuity Check for disconnection and bending pin On at about 0 3 to ...

Page 461: ...ace the harness Replace the DC controller PCB and the image processor PCB Step 1 2 3 4 5 6 7 Yes No NO NO NO NO NO YES YES Check Does the main motor rotate until E010 turns on Are the connectors and wiring around the main motor normal Does the voltage of J102 B12 M1LCK on the DC controller PCB change to 0 VDC while the main motor is rotating Is 24 VDC generated between J204 3 and 4 on the composit...

Page 462: ...pply PCB Replace the harness Replace the DC controller PCB and the image processor PCB Step 1 2 3 4 5 6 Yes No YES NO NO YES NO NO YES Check Is J115 on the DC controller PCB disconnected Does the voltage of J115 A7 M2D on the DC controller PCB change from about 5 to about 0 VDC while the fixing motor is rotating Does the voltage on J115 A6 M2LCK on the DC controller PCB change from about 5 to abou...

Page 463: ...nce on the counter side about 480 Ω 8 E030 The toner copy counter fails to operate 9 E032 The copy data controller counter has a fault Cause Connector Communication cable Copy data controller Image processor PCB Action Correct the connection Replace the communication cable Replace the copy data controller Replace the image processor PCB Step 1 2 3 Yes No NO NO YES NO Check Are the connectors of th...

Page 464: ...5 J101 1 2 3 4 5 J601 1 2 1 2 3 1 2 1 2 1 2 4 5 6 7 8 J204 J203 1 2 J600 38VU VSS J442 J442 J444 J443 24VU VSS 24VU VSS 24VU VSS 24VU VSS Low voltage power supply PCB Composite power supply PCB 12V 15V VSS VSS 5 1V 1 2 3 4 J111 J102 B J73 1 2 1 2 3 4 5 6 7 J42 1 2 3 4 M1LCK M1D 0V 5V 480 approx M2D DC CON P005 bit14 M2LCK DC CON P003 bit2 DC CON P005 bit0 STBY 1 in rotation 0 DC CON P003 bit0 STBY...

Page 465: ...l registration sensor flag move freely Move the horizontal registration sensor Does the reading of COPIER I O DC CON P004 bit 11 change from 1 to 0 if I O 0 while detecting the trailing edge of paper Check the wiring between the horizontal motor and the DC controller PCB Is the problem corrected Is there continuity in the FU200 on the DC controller PCB Is the horizontal registration motor operatin...

Page 466: ...er J102 A 1 2 1 2 3 4 5 J105 J101 1 2 3 4 5 J601 1 2 1 2 J204 J203 1 2 J600 38VU VSS 24VU VSS 24VU VSS Low voltage power supply PCB Composite power supply PCB 12V 15V VSS VSS 5 1V 1 2 3 4 J111 PS14S 0V SIDE_B SIDE_B SIDE_A SIDE_A 24V 24V J416 J29 J424A M J429 J52 M9 PS 10 Horizontal registration paper sensor Horizontal registration motor DC CON P004 bit11 Figure 14 403 E051 ...

Page 467: ...ite power supply PCB DC controller PCB and image processor PCB Step 1 2 3 4 5 Yes No NO YES YES NO NO YES Check Are the contacts of the primary charging roller developing assembly and transfer charging roller in contact with their respective contacts of the copier Is the reading of COPIER ADJUST HV PRI outside the indicated range Disconnect and then connect the DIMM for the DC CPU Is the problem c...

Page 468: ...CB DC driver J209 B Composite power supply PCB J209 A J103 A 1 2 1 2 J204 J203 24VU VSS 24VU VSS 1 2 3 4 J111 J714 A Image processor PCB J113 A DIMM J721 DIMM J722 J205 T502 PRIMARY DEVELOP TRANSFER 3 2 1 PSI PSO PACK PREQ 12 13 14 15 16 9 8 7 6 5 12 12 PSI PSO PACK PREQ 12 11 10 9 8 7 6 1 2 3 4 5 6 7 Check continuity Check for disconnection Figure 14 404 ...

Page 469: ...nd End Replace the BD PCB Step 1 2 3 4 5 Yes No YES NO NO YES YES NO Check Is any connector between the BD PCB image processor PCB CCD PCB or the laser diver PCB disconnected particularly between BD and IP Is the continuity of the harness between the BD PCB and the image processor PCB normal In addition check to make sure that the BD harness is not connected to the light receiving face of the BD P...

Page 470: ... J708 3 4 4 3 2 1 OV BD 5V J706 FROMCCD HSYNC 5V FROMIP HSYNC VSS J301 4 3 2 1 37 38 39 40 Check continuity Check continuity Check for disconnection CCD PCB Check wiring to make sure that wiring is not to the light receiving face J500 A16 B16 J717 A16 B16 Laser driver PCB Check for disconnection Check for disconnection Check continuity BD PCB Figure 14 405 E100 ...

Page 471: ...ler PCB and the image processor PCB has continuity then replace the DC controller PCB Replace the laser scanner PCB End Replace the image processor PCB Step 1 2 3 4 5 6 7 Yes No YES YES YES NO NO YES YES NO Check Check the wiring Is the problem corrected Operate any keys while in standby Is the rotation sound of the scanner motor heard Is the laser scanner motor driver PCB supplied with power J445...

Page 472: ...HAPTER 14 TROUBLESHOOTING J714 1 2 3 4 J701 5 1V VSS 3 4V VSS Image processor PCB J440 1 2 3 J104 A M M4 J46 Laser scanner motor 1 2 3 4 M4LCK M4D 0V 1 2 3 4 J603 3 4 J600 1 2 3 J445 VSS 38V Low voltage PCB DC controller PCB 16 15 14 5 6 7 TXD0 0V RXD1 Check continuity Check disconnection Figure 14 406 E110 ...

Page 473: ...r supply PCB Action End Correct the connection Replace the harness Replace the DC controller PCB and the composite power supply PCB Step 1 2 3 Yes No YES NO NO YES Check Turn off and then on the power Is the connection of J103 on the DC controller PCB normal Is the connection of J209 on the composite power supply normal Is there continuity on the harness between DC controller PCB and composite pow...

Page 474: ... JAN 1999 PRINTED IN JAPAN IMPRIME AU JAPON 14 75 CHAPTER 14 TROUBLESHOOTING Composite power supply PCB DC controller PCB Check continuity J103 A12 B12 A12 B12 PSI PSO PACK PREQ 12 11 10 9 8 7 6 1 2 3 4 5 6 7 Check for discontinuation J209 Figure 14 407 E191 ...

Page 475: ... PS1 if normal replace PS1 Check the wiring from DC controller PCB J112 B5 to PS1 if normal replace PS1 Check to make sure that the J113 connector is firmly connected then replace the DC controller PCB Correct the connection Check the harness for continuity if normal replace the scanner motor Replace the DC controller PCB Step 1 2 3 4 5 6 Yes No NO NO NO NO YES YES NO Check Is the scanner at the h...

Page 476: ... PS1S 5V J401 J1 PS1 M3 1 2 3 4 5 J113 B J113 A19 J714 A2 SCAN HP J113 A J714 A 1 2 3 20 19 18 SCANCLK 0V SCANCW 6 J714 B 15 When the scanner is at the home position about 5 VDC Scanner motor Scanner home position sensor DC controller PCB YAKUNUKE J112 B GARESET When the scanner is at the home position about 0 VDC Check for disconnection Image processor PCB Figure 14 408 E202 ...

Page 477: ...ressed Execute FUNCTION MISC S SCANLAMP in service mode Does the lamp turn on Are both ends of the scanning lamp blackened Is the connection of J706 on the image processor PCB normal Check the wiring between the intensity sensor and the DC controller PCB then clean the intensity sensor Is the problem corrected Is the lock on the flat cable connector J706 on the image processor PCB engaged Is there...

Page 478: ...YNC VSS 4 5 6 VSS 24VR VSS 24VU MT9 MT10 MT7 MT8 FL1 J91 J91 J90 J90 1 2 3 4 5 1 2 3 4 5 1 2 3 4 5 J301 J706 1 2 3 4 5 1 2 3 4 5 3 4 1 2 J714 A 7 8 9 J510 1 2 J708 3 4 4 3 2 1 OV BD 5V Check for disconnection BD PCB DC controller PCB Check continuity Image processor PCB Check continuity CCD PCB Intensity sensor Composite power supply PCB About 0 4 VDC About 2 8 1 1VDC OFF ON About 2 8 1 1VDC OFF O...

Page 479: ...PCB then turn on the main power Is the problem corrected 20 E243 The communication between the control panel and the image processor PCB has a fault Cause Connector Harness Control panel Image processor PCB Action End Correct the connection Replace the harness End Replace the image processor PCB Step 1 2 3 4 Yes No YES NO NO YES NO Check Turn off and then on the main power Is the problem corrected...

Page 480: ...AN 1999 PRINTED IN JAPAN IMPRIME AU JAPON 14 81 CHAPTER 14 TROUBLESHOOTING Figure 14 410 E243 J901 A15 B15 J710 A15 B15 B12 B13 B14 B15 B4 B3 B2 B1 PANEL TXD VSS PANEL RXD VSS A14 A15 A2 A1 PANEL RST 5V Control panel PCU PCB Image processor PCB main controller ...

Page 481: ...s End Replace the composite power supply PCB Step 1 2 Yes No YES NO NO NO YES NO Check Turn off and then on the main power Is the problem corrected Is the connection between the connector J103 on the DC controller PCB and the connector J209 on the composite power supply PCB good Is the continuity between J103 A8 PZC and J209 A5 good zero cross signal Is the continuity on the harness between the DC...

Page 482: ... 400 330 REV 0 JAN 1999 PRINTED IN JAPAN IMPRIME AU JAPON 14 83 CHAPTER 14 TROUBLESHOOTING Figure 14 411 E61 PZC J103 A12 B12 J209 A12 B12 Composite power supply PCB 8 DC controller PCB J714 Image processor PCB PZC A20 B20 A20 B20 10 5 J113 11 ...

Page 483: ...ect the expansion image memory J723 J724 Is the problem corrected Is the connector J706 on the image processor PCB connected poorly 24 E601 The communication between the SCSI board and the machine has a fault Cause PCB SCSI board System motherboard Action End Correct the connection End Replace the system motherboard image processor PCB Step 1 2 Yes No YES NO YES Check Turn off and then on the main...

Page 484: ...nnect the expanded image memory and turn on the power Is the problem corrected 27 E605 The image memory battery has a fault Cause Connector Battery Image processor PCB Action End Correct the connection Replace the battery Replace the image processor PCB Step 1 2 3 Yes No YES NO YES NO Check Turn off the main power and turn it on in about 1 min Is the problem corrected Is the harness between the ba...

Page 485: ... Action End Check to make sure that the image processor PCB is free of dust or foreign matter then replace the image processor PCB Step 1 Yes No YES NO Check Turn off and then on the main power supply Is the problem corrected 31 E711 IPC communication has a fault 32 E712 The communication with the feeder has a fault 33 E713 The communication with the sorter has a fault 34 E716 The communication wi...

Page 486: ...utput voltage of the composite power PCB has a fault Cause Wiring Composite power supply PCB J208 Continuity DC controller PCB Composite power supply PCB Action End If it does not turn on see The scanning lamp fails to turn on If it turns on but is dark replace it its ends may be blackened Correct the connection Connect it securely Replace the harness Replace the DC controller PCB Replace the comp...

Page 487: ... of these fans normal If a detail code is indicated is the connection of the indicated fan good Is the drive signal of the fan identified in the previous step about 22 VDC while the fan is rotating or about 12 VDC otherwise Notation FM2 FM3 FM4 FM5 FM6 FM7 FM8 FM10 FM11 FM12 FM13 FM14 FM15 FM16 FM17 FM18 I O DC CON P011 bit0 bit1 bit2 bit3 bit7 bit4 bit5 bit11 bit12 bit13 bit14 bit8 bit9 bit10 bit...

Page 488: ... the DC load and wiring of the fuse Replace the composite power supply PCB or the options print PCB Step 1 2 3 4 Yes No YES NO NO NO YES Check Turn on the main power switch Does the error indication turn on Is AC power present Turn off the main power switch and disconnect all the following connectors n Composite Power Supply PCB J203 J204 J209 n Low Voltage Power Supply PCB J600 J601 J602 J603 J60...

Page 489: ...w Voltage Power Supply PCB Connector J600 J601 J602 Pin 1 2 3 4 5 6 7 8 1 2 3 4 5 6 7 8 9 1 2 Output 38V GND 38V GND 38V GND NC NC 5 1V GND GND 15V 12V 15V GND GND 5 1V 8 0V GND Connector J603 J604 J605 J607 Pin 1 2 3 4 1 2 3 4 5 6 7 1 2 3 4 5 6 1 2 Output 5 1V GND 3 4V GND 15V 12V GND 5 1V GND 3 4V GND 15V GND 5 1V GND 3 4V GND 5 1V GND ...

Page 490: ...ESHOOTING 39 The photosensitive drum fails to rotate Cause Drum unit Drum drive assembly Action See the descriptions for E010 End Remove the drum drive assembly and correct or replace faulty parts as necessary Step 1 2 Yes No YES YES NO Check Is E010 indicated Correct the insertion of the drum unit Is the problem corrected ...

Page 491: ...cessary Replace the solenoid End End Check the harness continuity between the image processor PCB and the DC controller PCB if normal replace the DC controller PCB and the image processor PCB Step 1 2 3 4 5 6 7 8 Yes No YES YES YES YES NO NO YES YES NO Check Does the Add Paper message fail to turn off Correct the setting of the cassette Is the problem corrected Has the pick up roller reached the e...

Page 492: ...5_M0 M5_B M5_A 0V 5V 24V J1604 J1602 J1603 J1601 SL SL1 CL3 M CL M5 Cassette pick up PCB Pick up motor Vertical path clutch Pick up solenoid SL1D CL3D J108A DC controller PCB DC driver 9 8 7 6 5 4 3 2 1 DC CON P005 bit4 Check for disconnection Check continuity Fu1601 Image processor PCB RXD0 TXD1 4 8 17 13 J113 A J714 A Check continuity Figure 14 412 Pick Up Failure ...

Page 493: ...sette for foreign matter Replace the pick up PCB Correct it Replace the pick up assembly Step 1 2 3 Yes No NO NO NO YES Check Slide out the cassette and move up the holding plate of the cassette by hand Does it move smoothly Is the paper level sensor in the problem holder normal See the descriptions on how to check photointerrupers Is the lifter drive assembly normal 42 Pick up operation fails fro...

Page 494: ...tep 1 2 3 4 Yes No NO YES NO YES NO Check Is the scanner drive cable routed correctly Is the scanner rail free of dirt and does the scanner move smoothly Is the wiring connection from the connector J116 on the DC controller PCB to the scanner motor through the relay connector J28 normal Replace the scanner motor Is the problem corrected 45 The pre exposure lamp fails to turn on Cause Pre exposure ...

Page 495: ...connector CNT1 J9 then measure the resistance on the counter side Is it about 480 Ω See figure 14 401 See figure 14 402 46 The scanning lamp fails to turn on Cause Scanning lamp Scanning lamp Connector Composite power supply PCB DC controller PCB Image processor PCB Action Replace the scanning lamp Correct the mounting Correct the connection Replace the composite power supply PCB Replace the DC co...

Page 496: ...e up Is the pick up PCB mounted to the pick up unit correctly Put paper in the cassette and set the cassette in the machine Is the reading of I O DC CON P008 bit10 upper and bit11 lower 0 when there is paper upon detection 0 upper J108 A10 lower J108 A11 50 The jam message fails to turn off Cause Jam paper Paper sensor DC controller PCB Action See The lifter fails to move up Replace the sensor Rep...

Page 497: ...toner sensor TS1 mounted correctly Is the reading of I O DC CON P003 bit3 0 even after toner has been supplied 52 The fax error indicator lamp fails to turn off Cause Paper Fax Image processor PCB Fax PCB Action Supply the cassettes with paper Inform the user that the presence of a cassette without paper will cause the fax error lamp to flash Check the wiring to the telephone line Replace the imag...

Page 498: ...pping and make sure the harness shielding has not peeled 1 Without removing the DC controller PCB from the copier harness connected check to make sure that J105 1 and GND are shorted 2 Connect the connectors from the DC controller PCB one at a time and see if the meter reading changes from 0 upon each disconnection 3 If the reading changes the harness of the 5 VDC load leading to the connector tha...

Page 499: ...Check the side deck driver PCB and the IP PCB Check the wiring to the clutch if normal replace the clutch Step 1 2 3 4 5 6 Yes No NO NO YES NO NO NO YES Check Are the upper right door and the lower right door closed firmly Does the lifter move down when the compartment is slid out of the deck In addition is the lifter movement upward heard when the compartment is set Does the pick up roller rotate...

Page 500: ... the spring and lever Go to step 7 Check the wiring to the switch if normal replace the switch Replace the deck set sensor End Check the wiring to the IP PCB if normal replace the IP PCB Step 1 2 3 4 5 6 7 Yes No NO NO NO YES YES NO YES NO Check Is the deck mounted correctly Is the lifter cable routed correctly Push down the pick up roller releasing lever by hand Does it move down Does the deck li...

Page 501: ...ts sensor xx01 Pre registration sensor xx31 Internal delivery sensor xx02 Vertical path 1 sensor xx32 Bin 1 delivery sensor xx03 Vertical path 2 sensor xx33 Bin 2 delivery sensor xx04 Cassette 1 pick up sensor xx34 Bin 3 delivery sensor xx05 Cassette 2 pick up sensor xx35 Bin 3 inlet sensor xx06 Cassette 3 pick up sensor xx36 Fixing assembly outlet sensor xx07 Cassette 4 pick up sensor xx37 Revers...

Page 502: ...RIME AU JAPON 14 103 CHAPTER 14 TROUBLESHOOTING The machine is divided into the following blocks in terms of identifying jam locations 1 Pick up assembly 2 Separation feeding assembly 3 Fixing delivery assembly Reversing feeding assembly 4 Duplexing feeding assembly 2 3 1 4 Figure 14 501 ...

Page 503: ...t corrected replace the deformed worn roller Advise the user to use recommended paper Check the pick up roller for wear and deformation Step 1 2 3 4 5 6 7 8 9 10 11 12 13 14 Yes No NO NO YES YES NO YES YES NO YES NO NO NO NO YES NO Check Was the source of paper a cassette Is the cassette set in the machine correctly Is the dial set correctly Try a different cassette Is the problem corrected Is the...

Page 504: ...med Is the upper lower fixing roller deformed or scratched Is the paper guide soiled with toner Does the sensor lever move smoothly Is the operation of the delivery detection sensor normal See the instructions on how to check photointerrupers Does the delivery sensor lever move smoothly Is the operation of the delivery sensor normal See the instructions on how to check photointerrupers Does the de...

Page 505: ...rive Clean the reversal feeding roller Check the drive assembly Replace PS6 PS8 and PS9 as necessary Check the duplexing feeding drive assembly Check each guide plate for foreign matter and deformation Step 1 2 3 4 Yes No NO YES NO NO NO YES Check Is the paper deflecting plate delivery flapper of the delivery assembly operating Is the operation of the reversal feeder motor roller normal Is the ope...

Page 506: ...ck up assembly Check the registration roller The paper may be moist Instruct the user on the correct method of storing paper Advise the user to use recommended paper Clean it with solvent Replace the fixing roller Check the lower roller pressure if the result is not good replace the fixing assembly Step 1 2 3 4 5 Yes No YES YES NO YES YES NO Check Turn off the power while paper is moving through t...

Page 507: ... 108COPYRIGHT 1999 CANON INC CANON imageRUNNER 400 330 REV 0 JAN 1999 PRINTED IN JAPAN IMPRIME AU JAPON VI ARRANGEMENT AND FUNCTIONS OF ELECTRICAL PARTS A Clutches and Solenoids SL5 SL6 SL4 SL1 CL3 CL2 SL3 CL4 CL1 SL2 Figure 14 601 ...

Page 508: ... Drives the registration roller Drives the multifeeder pick up mechanism Drives the vertical path roller Drives the developing cylinder Moves down the pick up roller Drives the delivery flapper Releases the multifeeder holding plate Cleans the primary charging roller Drives the fixing cleaning belt Drives the fixing assembly inlet guide Notation CL1 CL2 CL3 CL4 SL1 SL2 SL3 SL4 SL5 SL6 C L S L ...

Page 509: ...CHAPTER 14 TROUBLESHOOTING 14 110COPYRIGHT 1999 CANON INC CANON imageRUNNER 400 330 REV 0 JAN 1999 PRINTED IN JAPAN IMPRIME AU JAPON B Motors M1 M2 M3 M4 M5 M9 M7 M8 M10 M6 Figure 14 602 ...

Page 510: ... 111 CHAPTER 14 TROUBLESHOOTING Motor Symbol Part Motor Function Main motor Fixing motor Scanner motor Laser scanner motor Pick up motor Lower feeder motor Reversal delivery motor Delivery motor Horizontal registration sensor shift motor Duplexing reversal motor Notation M1 M2 M3 M4 M5 M6 M7 M8 M9 M10 M ...

Page 511: ...LESHOOTING 14 112COPYRIGHT 1999 CANON INC CANON imageRUNNER 400 330 REV 0 JAN 1999 PRINTED IN JAPAN IMPRIME AU JAPON C Fan FM4 FM14 FM15 FM16 FM1 FM12 FM13 FM6 FM5 FM2 FM3 FM9 FM10 FM11 FM8 FM7 FM17 FM18 Figure 14 603 ...

Page 512: ...1 Laser scanner motor cooling fan 2 Cleaner cooling fan System cooling fan Reversal guide cooling fan Low voltage power supply cooling fan 1 Low voltage power supply cooling fan 2 Reader cooling fan 1 Leader cooling fan 2 Drum cartridge cooling fan 1 Drum cartridge cooling fan 2 Drum cartridge cooling fan 3 DC controller PCB cooling fan Scanner motor cooling fan Notation FM1 FM2 FM3 FM4 FM5 FM6 FM...

Page 513: ...ING 14 114COPYRIGHT 1999 CANON INC CANON imageRUNNER 400 330 REV 0 JAN 1999 PRINTED IN JAPAN IMPRIME AU JAPON D Sensors PS1 PS2 PS13 PS6 PS7 PS8 PS10 PS18 PS19 PS14 TS1 SD1 SD2 SD3 SD4 PS12 PS3 PS4 PS11 PS9 PS40 Figure 14 604 ...

Page 514: ...detection External delivery assembly paper detection Re pick up assembly paper detection Re pick up assembly paper detection Horizontal registration paper detection Vertical path paper detection Right door open closed detection Left door open closed detection Waste toner detection Cassette 1 retry paper detection Cassette 2 retry paper detection Fixing assembly outlet paper detection Toner level d...

Page 515: ...LESHOOTING 14 116COPYRIGHT 1999 CANON INC CANON imageRUNNER 400 330 REV 0 JAN 1999 PRINTED IN JAPAN IMPRIME AU JAPON E Switches and Counters SW1 SW3 SW2 CB1 RL1 SSR1 FL1 H1 H2 THSW1 TH1 TH2 CNT1 VZ1 LCD1 Figure 14 605 ...

Page 516: ...fluorescent lamp Heater Thermistor Thermal switch Circuit breaker Name Main power supply switch Front door switch Cassette heater switch Total copy counter 1 Pre registration guide varistor Solid state relay Scanning lamp Fixing main heater Fixing sub heater Fixing heater main thermistor Fixing heater sub thermistor end Fixing heater thermal switch Circuit breaker Notation SW1 SW2 SW3 CNT1 VZ1 SSR...

Page 517: ...R 14 TROUBLESHOOTING 14 118COPYRIGHT 1999 CANON INC CANON imageRUNNER 400 330 REV 0 JAN 1999 PRINTED IN JAPAN IMPRIME AU JAPON F PCBs 18 21 20 19 22 17 16 12 10 11 23 3 13 14 1 2 5 4 15 6 7 8 9 Figure 14 606 ...

Page 518: ...ection Laser dive Laser scanner motor drive CCD drive analog image processing Laser beam detection Photosensitive drum residual charge removal Machine internal humidity detection Scanning lamp intensity detection Fax image memory retention Notation Composite power supply PCB DC controller PCB Image processor PCB Accessories power supply Pick up unit PCB Low voltage power supply PCB Noise filter Co...

Page 519: ...RIGHT 1999 CANON INC CANON imageRUNNER 400 330 REV 0 JAN 1999 PRINTED IN JAPAN IMPRIME AU JAPON G Side Paper Deck 1 Sensors and Switches SW102 SW101 PS101 PS105 PS106 PS104 PS102 PS103 PS107 SW100 PS109 PS108 Figure 14 607a side paper deck ...

Page 520: ...limit detection Deck paper supply position detection Deck set detection Deck pick up guide open detection Deck vertical path paper detection Deck pick up paper detection Deck paper detection Deck lifter position detection Deck open switch Deck open detecting switch Deck lifter upper limit detecting switch Notation PS102 PS103 PS104 PS105 PS106 PS107 PS108 PS110 SW100 SW102 SW103 Table 14 601a side...

Page 521: ...UBLESHOOTING 14 122COPYRIGHT 1999 CANON INC CANON imageRUNNER 400 330 REV 0 JAN 1999 PRINTED IN JAPAN IMPRIME AU JAPON 2 Motors Solenoids and PCBs M101 SL102 M102 SL101 CL101 2 1 CL102 Figure 14 607b side paper deck ...

Page 522: ...OUBLESHOOTING Table 14 601b side paper deck Symbol Part Motor Clutch Solenoid PCB Function Deck main motor Deck lifter motor Deck vertical path clutch Deck pick up clutch Deck pick up roller releasing solenoid Deck open solenoid Side deck driver PCB Open switch PCB Notation M101 M102 CL101 CL102 SL101 SL102 1 2 M C L S L ...

Page 523: ...odes LED and check pins used in the machine those needed in the field are discussed Caution 1 Some LEDs emit dim light when they are off because of leakage current This is a normal condition and must be kept in mind 2 VRs that may be used in the field VRs that must not be used in the field Caution Those VRs and check pins not listed in the tables are for factory use only requiring special tools an...

Page 524: ...J722 J721 J717 J701 J704 J705 SW701 J706 J709 J718 J711 J712 J714 J713 3 ON 2 OFF 1 SW702 Area within the small cover Figure 14 608 J721 Flash ROM slot for the IP CPU IP DIMM use the bottom slot for a 4 MB DIMM and the top slot for a 1 MB DIMM J722 Flash ROM slot for the DC CPU DCC DIMM 1 MB DIMM K723 J724 Slot for expansion memory 32 MB each however be sure to use J723 first as when installing on...

Page 525: ...EL SZ setting 0 1 2 3 The setting will affect the following items Pattern for default enlargement reduction Size detection by the feeder If the setting under FEEDER OPTION SIZE SW in service mode is 1 AB Inch detection will be made regardless of the country of installation n Arrangement of the Original Sensor The arrangement of original sensors may be changed If the feeder is used these switch set...

Page 526: ...find out the state of the composite power supply PCB is indicated by flashing at different intervals For details see Table 13 601 VR200 Turn it to adjust the lamp intensity used when shading auto correction FUNCTION CCD MAN ADJ is executed in service mode The result is good if LED201 turns on Its adjustment range is equal to 3 rotations If LED201 does not turn on after a single rotation try rotati...

Page 527: ...as been detected in the 24 VU or 24 VR output An over current condition has been detected because of wire trapping or the like n The control panel indicates E803 An error has occurred in communication between the DC controller PCB and the composite power supply PCB not updating the communication data for 8 sec or more Note that this error may not flash turn on LED100 on the DC controller PCB The o...

Page 528: ...UBLESHOOTING 3 Composite Power Supply CPB J209 J208 J206 J204 J220 J205 J203 J201 J210 Figure 14 610 Label Enter the values indicated on the label in service mode when replacing the composite power supply CPB OFST DC AGS GAIN AGS OFST OFST1 AC FL OFST xx xxx xxx xxx xxx Table 14 611 Label on the Composite Power Supply PCB ...

Page 529: ... 130COPYRIGHT 1999 CANON INC CANON imageRUNNER 400 330 REV 0 JAN 1999 PRINTED IN JAPAN IMPRIME AU JAPON 4 Deck Driver side paper deck Figure 14 611 J106 J103 J105 J107 J101 J102 J109 2 1 13 6 1 1 3 7 1 J108 8 1 1 3 10 1 J104 12 1 1 ...

Page 530: ...cessor PCB By updating the DIMM contents through downloading from a computer A Replacing the DIMM The DIMM flash ROM used in the machine comes in two types both types are mounted on the image processor PCB Figure 14 701 shows a view in which the IP small cover has been removed DIMM for the IP CPU 4 MB bottom of 2 layer slot 1 MB top of 2 layer slot DC CPU DIMM 1 MB Figure 14 701 DIMM slot for IP C...

Page 531: ...ME AU JAPON 1 Removing the DIMM 1 Turn off the main power switch and disconnect the power cord 2 Remove the copyboard glass then remove the screw and detach the small cover from the IP cover Figure 14 702 M4 4bis Small cover 3 Open the slot claw and pull off the DIMM as if to lift it Figure 14 703 Push Push IP DIMM 1MByte ...

Page 532: ...01 2 Insert the DIMM into the slot at an angle At this time check to be sure that the DIMM is fully inserted into the slot 3 Shift down the DIMM until the claw of the slot clicks into position At this time shift the DIMM with care Forcing it in can damage the DIMM or the claw on the slot Figure 14 704 IP DIMM 1 MB Cut off 4 Mount the IP small cover M4x4 screw 1 pc then mount the copyboard cover Co...

Page 533: ...ff 1 Turn off the machine s main power switch then disconnect the power plug and disconnect the modular cable telephone 2 Open the front door and open the connector cover for downloading Figure 14 705 COPY LOAD Connector cover for downloading Downloading switch Connector cover opened 3 Connect the machine to the PC with a bi Centronics cable Make sure that the PC is off Connect the 25 pin connecto...

Page 534: ...ain Menu in response to the start up message of the downloading tool 2 Select Next under the Download Upload End To Main Menu Manage Data Download Upload Next Next End Tool 3 Click the model and PCB for downloading IP DIMM for the IP CPU DC CON DIMM for the DC CPU 4 Start upgrading the flash ROM following the instructions on the PC screen 5 When downloading is done operate as follows to turn off t...

Page 535: ...d disconnect the power plug 2 Disconnect the bi Centronics cable from the PC and the machine 3 Slide the download switch to COPY Figure 14 707 4 Close the connector cover and close the front door 5 If the machine is equipped with fax functions connect the modular cable 6 Turn on the main power switch 7 Start service mode and check the ROM version COPIER DISPLAY VERSION COPY LOAD Downloading switch...

Page 536: ...control panel 2 Press 2 and 8 on the keypad at the same time 3 Press the asterisk key on the control panel The display changes to the screen shown in Figure 14 801 indicating the connected accessories FEEDER SORTER FAX Cause 1 2 3 4 5 6 7 Step DISPLAY I O DISPLAY ADJUST FUNCTION OPTION TEST COUNTER Check Display Mode I O Display Mode Adjustment Mode Function Mode Setting Mode PG Test Mode Counter ...

Page 537: ... up in either of the following two ways Service Label The label is found on the left side of the back of the front cover Figure 14 802 Each machine is adjusted at the factory and the adjustment values are recorded in the label List Print The command generates a back up output of ADJUST OPTION and COUNTER COPIER FUNCTION MISC P P PRINT When Replacing the Image Processor PCB Enter the values indicat...

Page 538: ...DC DE NO DC DE OFST DENS DENS ADJ HV PRI P DC P NO DC P AC P NO AC Boby No Factory 1 Date 2 COPIER ADJUST Service Date HV PRI AGS GAIN AGS OFST OFST1 DC OFST1 AC OFST2 AC P AC2 P AC3 HV TR TR N1 TR N2 TR OFST TR SPP FEED ADJ REGIST LOOP CST LOOP MF ADJ REFE RVS FD1 RVS FD2 RVS DUP CST ADJ MF A4R MF A6R MF A4 Factory FB4 3277 1 2 Figure 14 802 Service Label OFST DC AGS GAIN AGS OFST OFST1 AC FL OFS...

Page 539: ...4 An initial item is selected when the highlighted notation is pressed b Level 1 Level 2 Screen COPIER FEEDER SORTER FAX Initial items However FEEDER SORTER and FAX appear only when they are installed Figure 14 805 To select a Level 1 item press an item at the top of the screen To select a Level 2 item press a highlighted item VERSION USER ACC STS ANALOG CST STS JAM ERR ALARM 1 HV STS Level 1 item...

Page 540: ...age VERSION 1 3 READY DC CON IP PANEL ANAPRO POWER Level 1 items Level 2 item Number of pages e g 1 3 Display Adjust Function Option Test Counter I O Status READY Ready for servicing copying JAM Paper jam SERVICE Service operation WAITING Initial rotation etc DOOR Door open COPYING Copying ERROR Service error FL OFST FL OFST LAMP 1 1 READY xxxxx yyyyy aaaaa bbbbb A press on an item highlights the ...

Page 541: ...ce mode or software counter readings 6 Copy Start Key Use it to make copies without ending service mode after making adjustments 7 Previous Page Key Use it to return to the previous page 8 Next Page Key Use it to move to the next page 9 Key USe it to switch between and 10 OK Key Use it to store an input value Initial screen Level 1 2 screen Level 3 screen Level 3 screen Level 3 screen User screen ...

Page 542: ...RIME AU JAPON 14 143 CHAPTER 14 TROUBLESHOOTING B DISPLAY Control Display Mode Figure 14 809 shows the DISPLAY mode Level 2 screen and its items Figure 14 809 DISPLAY Level 2 Screen VERSION USER ACC STS ANALOG CST STS JAM ERR HV STS ALARM 1 Display Adjust Function Option Test Counter I O ...

Page 543: ... connection of the paper deck Indicates the connection of the control card Indicates the connection of various boards accessories Indicates the total size of the RAM recognized by the machine Indicates the machine internal temperature environment sensor Indicates the machine internal humidity environment sensor Indicates the absolute humidity Indicates the drum ambient temperature drum ambient tem...

Page 544: ... PS PCL board ROM version of the LIPS board not used ROM version of the SCSI board ROM version of the saddle stitcher controller PCB USR Indicates the items related to the User screen and the user Level 3 LANGUAGE COUTER Remarks Description Notation LANGUAGE AA BB CC DD Indicates the selected language AA country code not used in the machine BB language code CC site code See Table 14 803 1 DD Paper...

Page 545: ...Printer 5 SCSI board 6 G3FAX board 7 G3FAX expansion board Description Feeder connection Sorter connection Paper deck connection if the paper deck is required or not Control card connection if a control card is required Accessory board connection Indicates the number of the board recognized by the copier Indicates the size of the RAM recognized by the machine If standard 32 MB with 1 addition 64 M...

Page 546: ... places Description Indicates the width mm of paper in the cassette 1 and paper size Indicates the width mm of paper in the cassette 1 and paper size Indicates the width mm of paper in the cassette 1 and paper size Indicates the width mm of paper in the cassette 1 and paper size Indicates the width mm of paper in the cassette 1 and paper size Indicates the width mm of paper in the cassette 1 and p...

Page 547: ...for feeder 2 for sorter Jam code First 2 digits FF type of jam Table 14 804 Last 2 digits ff sensor detecting the jam Table 14 805 Pick up position Table 14 805 1 Pick up holder software counter reading Paper size Figure 14 810 OK JAM 1 7 READY AA BBBB CCCC DDDD E FFFF G HHHHHH IIIII AA BBBB CCCC DDDD E FFFF G HHHHHH IIIII AA BBBB CCCC DDDD E FFFF G HHHHHH IIIII AA BBBB CCCC DDDD E FFFF G HHHHHH I...

Page 548: ...y sensor Bin 1 delivery sensor Bin 2 delivery sensor Bin 3 delivery sensor Bin 3 inlet sensor Fixing assembly outlet sensor Bin 1 delivery sensor via reversal delivery Bin 2 delivery sensor via reversal delivery Bin 3 delivery sensor via reversal delivery Bin 3 inlet sensor via reversal delivery Duplexing assembly inlet sensor Re pick up sensor Table 14 804 Table 14 805 G Pick Up Position Code 1 2...

Page 549: ...ting sensor MS1 RF switch MS2 Upper cover switch Jam type Original out Pick up delay Registration delay Sensor S1 S7 S7 S3 S7 Code 0001 0002 0003 Description After the pick up motor M1 has turned on the sensor S7 does not detect the leading edge of an original and in addition the sensor S1 does not detect an original After the pick up motor M1 has turned on the sensor S7 does not detect the leadin...

Page 550: ...al to be delivered is moved back to the copyboard glass together with the original being picked up causing the sensor S8 to fail to detect the preceding original 50 mm after the belt motor starts to rotate counterclockwise When reversing an original the sensor S8 detects an original When reversing an original the sensor S3 does not detect the leading edge of the reversed original in 100 mm or 300 ...

Page 551: ...2 0093 Description When delivering an original in lower separation pick up mode the original on the pick up side is not stopped e g the original being picked up is longer than the original being delivered The DADF is opened while the copier is at reset because of the absence of copy paper The upper cover is opened while the copier is at rest because of the absence of copy paper The re circulating ...

Page 552: ...rrence Time of occurrence Time of recovery Error code Exxx Detail code E01 E004 E805 has detail code Location 0 for copier 2 for feeder 2 for sorter finisher Figure 14 811 OK ERR 1 3 READY AA BBBB CCCC DDDD EEEE FFFF G AA BBBB CCCC DDDD EEEE FFFF G AA BBBB CCCC DDDD EEEE FFFF G AA BBBB CCCC DDDD EEEE FFFF G AA BBBB CCCC DDDD EEEE FFFF G AA BBBB CCCC DDDD EEEE FFFF G AA BBBB CCCC DDDD EEEE FFFF G A...

Page 553: ...ms for the sorter and the feeder Level 3 DF SORTER Remarks Description Indicates the most recent alarm for the feeder I no alarm indicates 00 For the DADF alarms see the following pages Indicates the most recent alarm for the finisher saddle finisher SORTER aa bb cc dd aa stapler alarm for the finisher bb stapler alarm of the saddle finisher cc stack alarm dd tray alarm ...

Page 554: ...999 PRINTED IN JAPAN IMPRIME AU JAPON 14 155 CHAPTER 14 TROUBLESHOOTING n DADF Alarms DISPLAY S1 Original tray paper sensor S3 Registration paper sensor S7 Pick up sensor S14 Re circulating sensor S7 S3 S1 S14 M4 Re circulating lever Paper stopper Figure 14 811 1 ...

Page 555: ...t original Reference Normally as many as 50 sheets of A5 STMT A4 B5 or LTR may be placed or 25 sheets of A3 B4 279x432 mm 11 x17 or LGL The re circulating lever has fallen to the original tray while an original is being processed The size of the original which has been picked up is not of a default size 1 The original which has been picked up is of a size not supported by reduce image composition ...

Page 556: ...4 TROUBLESHOOTING HV STS Indicates the measurements of voltage and current Level 3 PRIMARY BIAS TR V Remarks Unit µA about 200 µA Unit V Unit V Description Current applied to the primary charging roller Developing bias Dc value ATVC detection voltage If the level of TR V is 30 to 100 transfer is assumed to be normal ...

Page 557: ... IN JAPAN IMPRIME AU JAPON C I O Operation Check Mode Figure 14 812 shows the Level 2 screen and its items Figure 14 812 I O Level 2 Screen DC CON IP FEEDER IP DC CON FEEDER SORTER Display Adjust Function Option Test Counter I O I O DC CON P001 to P027 IP P001 to P011 FEEDER P001 to P010 SORTER P001 to P024 ...

Page 558: ...rsal motor B lower feeder motor A lower feeder motor A lower feeder motor B lower feeder motor B 3 bin motor A 3 bin motor A 3 bin motor B 3 bin motor B pick up motor 12A pick up motor 12A pick up motor 12B pick up motor 12B horizontal registration motor phase A horizontal registration motor phase A horizontal registration motor phase B horizontal registration motor phase B delivery motor phase A ...

Page 559: ...12 bit13 bit14 bit15 Signal M1LCK M4LK M2LK TS1S PS14S PS13S PS2S PS12S FDOOR_PD 24V PS18S PS19S PS11S PS4S PS7S 3BEX2 3BEX3 PS6S PS40S PS9S PS10S 3BMHPS 3BINLT PS8S Display main motor clock detection laser scanner motor clock detection fixing motor lock detection toner sensor waste toner sensor left door open closed sensor copyboard cover open closed sensor right door open closed sensor front doo...

Page 560: ... multifeeder pick up clutch multifeeder solenoid pick up 12 solenoid drive primary charging roller solenoid delivery flapper solenoid 3 bin delivery flapper solenoid 3 bin flapper solenoid 3 bin shift motor drive fixing motor drive cleaning belt solenoid scanner motor step switch signal 0 scanner motor step switch signal 1 scanner motor step switch signal 2 scanner motor step switch signal 3 scann...

Page 561: ...RPD1 2RPD0 2RPD1 Display multifeeder sensor 3 bin ID cassette 1 size detection bit 0 cassette 1 size detection bit 1 cassette 1 size detection bit 2 cassette 1 size detection bit 3 cassette 1 size detection bit 4 cassette 2 size detection bit 0 cassette 2 size detection bit 1 cassette 2 size detection bit 2 cassette 2 size detection bit 3 cassette 2 size detection bit 4 cassette 1 paper sensor cas...

Page 562: ... 00 transfer mode 01 transfer mode 02 transfer mode 03 transfer mode 04 relay shut off drive feeding fan fixing heat discharge fan 1 full speed fixing heat discharge fan 2 fixing heat discharge fan 1 half speed fixing heat discharge fan 2 reader cooling fan 1 reader cooling fan 2 scanner motor cooling fan laser driver cooling fan laser scanner motor cooling fan full speed cleaner heat discharge fa...

Page 563: ...n 3 drum cartridge cooling fan 1 drum cartridge cooling fan 2 half speed drum cartridge cooling fan 3 fan rotation detection fixing heat discharge fan 1 fan rotation detection 2 fixing heat discharge fan 2 fan rotation detection 3 laser scanner motor cooling fan fan rotation detection 4 laser diver cooling fan fan rotation detection 5 cleaner heat discharge fan fan rotation detection 6 system cool...

Page 564: ...ling fan 1 fan rotation detection 13 low voltage power supply cooling fan 2 fan rotation detection 14 reader cooling fan 1 fan rotation detection 15 reader cooling fan 2 fan rotation detection 16 scanner motor cooling fan main heater SSR short circuit detection sub heater SSR short circuit detection sub thermistor error detection sub thermistor phase detection counter 1 open circuit detection coun...

Page 565: ...Indicates the connection 0 FAX board not connected of the AX board to the 1 FAX board connected fax motherboard Indicates the connection 0 PDL I F not connected of the PDL I F board to 1 PDL I F board connected the FAX motherboard not used not used not used control panel reset 0 reset disabled 1 reset enabled control panel back light 0 OFF 1 ON not used DC controller PCB LED201 0 OFF 1 ON laser bi...

Page 566: ...bit7 bit0 bit1 bit2 bit3 bit4 bit5 bit6 bit7 bit0 bit1 bit2 bit3 bit4 bit5 bit6 bit7 bit0 bit1 bit2 bit3 bit4 bit5 bit6 bit7 Display stopper plate solenoid SL1 drive paper deflecting plate solenoid SL3 drive stamp solenoid SL4 drive belt motor M3 rotation direction signal PCB signal PCB signal PCB signal PCB signal reversal sensor S8 delivery sensor S8 pick up sensor S7 not used PCB signal PCB sig...

Page 567: ...2 bit3 bit4 bit5 bit6 bit7 bit0 bit1 bit2 bit3 bit4 bit5 bit6 bit7 bit0 bit1 bit2 bit3 bit4 bit5 bit6 bit7 Display PCB signal PCB signal PCB signal PCB signal PCB signal PCB signal not used not used PCB signal PCB signal belt motor M3 rotation speed signal belt motor M3 dive signal feeder motor M2 rotation speed signal PCB signal pick up motor M1 rotation speed signal pick up motor M1 drive signal...

Page 568: ...when 1 ON bit bit0 bit1 bit2 bit3 bit4 bit5 bit6 bit7 bit0 bit1 bit2 bit3 bit4 bit5 bit6 bit7 Display not used not used not used not used not used not used LED1 on DADF controller PCB LED2 on DADF controller PCB DSW1 8 on DADF controller PCB DSW1 7 on DADF controller PCB DSW1 6 on DADF controller PCB DSW1 5 on DADF controller PCB DSW1 4 on DADF controller PCB DSW1 3 on DADF controller PCB DSW1 2 o...
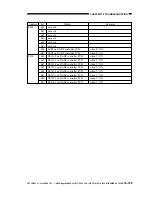
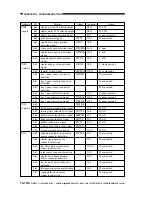
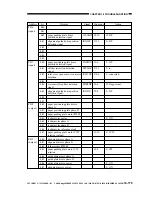
Page 569: ...sent detection signal inlet paper detection signal shutter open detection signal swing guide open detecting switch signal tray upper limit detecting switch signal tray safety switch signal front door open detecting switch signal feeder motor phase A output feeder motor phase B output feeder motor phase A output feeder motor phase B output alignment motor phase A output alignment motor phase B outp...

Page 570: ... lifter motor clock sensor shutter open sensor connector detection stapler shift motor current switch output feeder motor current switch output stack detection start signal output height sensor input staple cartridge detection input height sensor clock input shutter closed detection signal tray home position detection signal LED2 ON signal output delivery motor clock signal front door open detecti...

Page 571: ...ing signal swing guide open detection signal stapler home position detecting signal alignment plate home position signal stapler edge position detection signal thermal switch signal tray 1 paper sensor connector detection tray 2 paper sensors connector detection tray 3 paper sensor connector detection tray 1 paper detection signal tray 2 paper detection signal tray 3 paper detection signal buffer ...

Page 572: ...001A P002A P003A Action Note See Table 14 806 Table 14 806 Table 14 806 bit Signal Display 24 V power output WW1 bit 1 2 input SW1 bit 3 4 input SW2 3 input Connector Note When 110 analog or higher the 24 V power supply is normal Reading 0 to 72 73 to 104 105 to 190 190 to 255 SW1 bit 2 4 SW3 ON ON OFF OFF SW1 bit 1 3 SW2 ON OFF ON OFF Figure 14 806 ...

Page 573: ...L1 FLPSL2 RLNIPSL LUNGETOP DELV Display stitcher motor rear CW rotation signal stitcher motor rear CCW signal stitcher motor front CW rotation stitcher motor front CCW signal folder motor CW rotation signal folder motor reversal drive signal flapper drive signal 1 flapper drive signal 2 crescent roller contact solenoid drive signal solenoid timer full suction output paper positioning plate motor p...

Page 574: ...ent guide home position detection signal paper positioning plate home position detection signal stitcher retraction detection signal inlet cover open sensor connector detection crescent roller phase detection signal alignment guide home position detection signal paper positioning plate motor phase A paper positioning plate phase B paper pushing plate motor PWM feeder motor power feeder motor phase...

Page 575: ...paper sensor detection signal stitching home position detection signal 2 stitching home position signal 1 paper positioning plate detection signal tray power detection signal vertical path paper detection signal alignment plate home position connector detection paper pushing plate home position connector detection delivery door open sensor small neck detection signal front door open sensor connect...

Page 576: ...ed 128 or higher connected 128 or higher connected bit bit0 bit1 bit2 bit3 bit4 bit5 bit6 bit7 bit0 bit1 bit2 bit3 bit4 bit5 bit6 bit7 Signal HKEMP2 HKEMP1 TRYPAR Display DIPSW1 Bit 8 DIPSW1 Bit 7 DIPSW1 Bit 6 DIPSW1 Bit 5 DIPSW1 Bit 4 DIPSW1 Bit 3 DIPSW1 Bit 2 DIPSW1 Bit 1 stitcher rear staple detected stitcher front staple detection tray paper detection signal inlet cover open sensor connector d...

Page 577: ... S2D S12D S13D S11D S4D S5D S3D S6D S7D S8D S18D S15D S17D S16D S1D M5D1 M5D2 S9D S14D Display stack tray home position detection inlet paper detection stack tray lower limit detection stack tray upper limit detection stack tray paper detection copier finisher connection detection stack processing tray paper detection returning roller home position detection front aligning plate home position dete...

Page 578: ...bit3 bit4 bit5 bit6 bit7 bit0 bit1 bit2 bit3 bit4 bit5 bit7 bit0 bit1 bit2 bit3 bit4 bit5 bit6 bit7 bit0 bit1 bit2 bit3 bit4 bit5 bit6 bit7 Signal M6DA M6DB M6DA M6DB M5D1 M5D2 Display front alignment motor enable signal rear alignment motor enable signal stapler motor rotation 2 stapler motor CCW rotation 2 stapler motor rotation 1 stapler motor CCW rotation 1 stack tray lift motor rotation 2 sta...

Page 579: ... if 0 ON if 0 ON if 0 ON if 0 ON bit bit0 bit1 bit2 bit3 bit4 bit5 bit6 bit7 bit0 bit1 bit2 bit3 bit4 bit5 bit6 bit7 Signal Display delivery motor current switching stack processing motor current switching 1 stack processing motor current switching 2 front alignment motor current stitching rear alignment motor current switching LED1 LED2 LED3 mode setting switch 0 mode setting switch 1 mode settin...

Page 580: ...N IMPRIME AU JAPON 14 181 CHAPTER 14 TROUBLESHOOTING D ADJUST Adjustment Mode Figure 14 813 shows the Level 2 screen and its items LAMP AE ADJ XY CCD LASER DEVELOP DENS HV PRI HV TR FEED ADJ CST ADJ Display Adjust Function Option Test Counter I O Figure 14 813 ADJSUT Level 2 Screen ...

Page 581: ...adjustment image area primary charging DC output sheet to sheet primary charging DC output primary charging AC output 1 during image exposure sheet to sheet primary charging DC output APVC gain APVC offset primary charging DC offset primary charging AC offset 1 primary charging AC offset 2 primary charging AC output 2 during image exposure primary charging AC output 3 during image exposure transfe...

Page 582: ...ng lamp offset Adjusts the duty ratio used after activation of the scanning lamp Adjusts the duty ratio used before activation of the scanning lamp AE Adjusting for AE Mode Level 3 AE TBL Remarks The machine s AE is priority on speed only Settings 1 to 9 Default 3 Description Adjusts the text density when AE mode with priority on speed is executed It adjusts the AE density correction curve for pri...

Page 583: ...ange 0 to 400 Unit 1 mm for each 12 1 about 0 083 mm Range 50 to 80 Description Adjusts the image read start position X direction A higher setting shifts the read start position in the direction of scannerforward movement Adjusts the CCD read start position Y direction A higher setting shifts the read start position toward the front Adjusts the position of collecting data for shading correction fr...

Page 584: ...l 3 PVE OFST LA OFF Remarks Range 200 to 200 1 mm for each 23 Enter the setting recorded on the service label when replacing the composite power supply To enter a negative value press the key after entering the value Range 0 to 255 Description Adjusts the offset from the laser center Adjusts the position of the laser beam A higher setting shifts the image toward the rear in main scanning direction...

Page 585: ...ing bias DC component 0 to 127 applied to the distance between sheets during feeding Adjusts the developing bias DC component offset 98 to 158 If the image is too light decrease the setting If the image is too dark increase the setting DENS Fine Adjusting Copy Density Auto Correction Level 3 DENS ADJ Remarks Range 1 to 9 3 Copy density auto correction crefers to the five items under FUNCTION DENS ...

Page 586: ...set 98 to 158 If the image is too light increase the setting If the image is too dark decrease the setting Primary charging AC offset 98 to 158 Primary charging AC offset 2 98 to 158 Image area primary charging AC component 2 0 to 255 Image area primary charging AC component 3 0 to 255 HV TR Adjusting the Transfer Charging Roller High Voltage Output Level 3 TR N1 TR N2 TR OFST TR SPP Remarks Unit ...

Page 587: ...e horizontal registration 7500 to 8500 Use it if the image on the paper picked up from the lower feeding assembly is displaced in the main scanning direction If displaced to the rear decrease the setting If displaced to the front increase the setting Adjusts the point of reversal for bin 1 Adjusts the point of reversal for bin 2 3 Adjusts the point of reversal for double sided sheets FEED ADJ ADJU...

Page 588: ...IME AU JAPON 14 189 CHAPTER 14 TROUBLESHOOTING E FUNCTION Operation Check Mode Figure 14 814 shows the FUNCTION mode Level 2 screen and its items INSTALL CCD DENS DPC CST FIXING PANEL CLEAR MISC R MISC P Display Adjust Function Option Test Counter I O Figure 14 814 FUCNTION Level 2 Screen ...

Page 589: ...ue storage A4R multifeeder paper width basic value storage A6R multifeeder paper width basic value storage A4 nip width creation mode LCD dot check control panel LED activation check control panel LED deactivation check control panel key press check analog panel coordinate position adjustment E000 series error initialization DC controller PCB RAM initialization image processor PCB RAM initializati...

Page 590: ...emove the drum cartridge lock the developing assembly and then execute this mode n Starting the Operation Select TONER S to highlight then press the OK key n During Operation The count down will be indicated to the right of TONER S from 240 to 0 about 4 min All keys other than the Stop key remain disabled INSTALL FUNCTION Adjusting the Feeding System CCD CCD Shading Related Auto Adjustment Level 3...

Page 591: ...nt SERVICE will be indicated in the upper right corner of the screen n Operation 1 Place five or more sheets of standard white paper on the cupboard glass 2 Select MAN ADJ to highlight then press the OK key 3 Check that the machine starts auto adjustment mode and the screen indicates the following AD CLANP VOL 4 When a beep is heard while VOL is indicated press the OK key on the screen If no beep ...

Page 592: ...y auto correction n Operation 1 Place about five sheets of white paper whitest used by the user on the copyboard and select WHITE ME to highlight then press the OK key 2 The scanning lamp makes a single scan and the operation ends Generates a print pattern for density auto adjustment in text or text photo mode Text and text photo mode uses binary processing in a PD method requiring the execution o...

Page 593: ...e it so that its printed side faces down Place it so that the whiter lighter side of the 15 gradations is toward the vertical size plate Place it with reference to the V marking in the rear left of the copyboard glass 2 Select PD ME to highlight then press the OK key The scanning lamp turns on and off 13 times to make scans OK is shown to indicate that the execution ended successfully if NG perfor...

Page 594: ...atches is generated Keep the pattern for the execution of DZ ME Executes density auto adjustment for photo mode by reading the DZ DENS output 1 Place the DZ DENS output on the copyboard as follows Place it so that its printed side faces down Place it so that the whiter lighter side of the 15 gradations is toward the vertical size plate Place it with reference to the V marking in the rear left of t...

Page 595: ...o OPTION BODY AGS NON 2 Select D GAMMA to highlight and press the Copy Start key A solid black copy is generated and the screen will indicate a number n Uses Use the mode only under the following conditions do not rely on this mode unnecessarily To isolate the cause if copy density auto adjustment ends in NG To obtain an idea of the wear of the drum To make adjustments if images show faults after ...

Page 596: ...stored for MF A4R 3 Likewise repeat steps 1 and 2 for A6R and A4 FIXING Fixing Assembly Related Level 3 NIP CHK Remarks Standard b 5 5 0 3 mm a c 0 5 mm or less See II E in Chapter 14 Description Fixing Nip Auto Measurement n Operation 1 Make an A4 solid black copy by feeding the output make a solid black copy Set the output in the multifeeder In other words feed the same solid black copy through ...

Page 597: ...ss LED OFF Control Panel LED Check End n Operation 1 Select the item to highlight so that LED CHK operation will stop Key Input Check Start indicates key number and name Selecting KEY CHK once again will end the input check mode Analog Touch Panel Coordinate Position Adjustment Use it to match the point of a press on the analog touch panel and the LCD coordinates Execute this mode after replacing ...

Page 598: ...M on the image processor PCB Initializes the back up data of the control panel preference mode mode storage Initializes the back up data of the FAX control panel telephone directory program memory However data for one touch dialing speed dialing and caller name is not initialized Initializes back up data for common settings auto cassette change manual feed size input Initializes back up data for s...

Page 599: ...ce mode Be sure to execute this mode before replacing the image processor PCB n Operation 1 Select the item to highlight and press the OK key A total of three pages will be delivered n Source of Paper If a source is selected on the Basic screen that source will be used If auto paper selection is enabled the topmost cassette will be used Generates a key input report for copier operation analysis Se...

Page 600: ...99 PRINTED IN JAPAN IMPRIME AU JAPON 14 201 CHAPTER 14 TROUBLESHOOTING F OPTION Settings Mode Figure 14 875 shows the Level 2 screen and its items for OPTION mode Figure 14 875 OPTION Level 2 Screen BODY USER CST ACC Display Adjust Function Option Test Counter I O ...

Page 601: ...operation enable disable clearing of print images in memory at time of power on main power 0 do not clear 1 clear set target control temperature to suit each fixing assembly 0 120 230 V model or 100 V system support model 1 100 V model enhanced fixing mode 0 normal mode in 100 V area 1 normal mode in 120 230 V area 2 enhanced fixing mode copy upper limit change 1 to 999 999 sleep function ON OFF 0...

Page 602: ...pply PCB or scanner unit is faulty Switches between B and Inch configuration and the result will affect the following Enlargement reduction pattern Feeder size detection However if 1 is set FEEDER OPTION SIZE SW AB Inch detection will be made To change original detection for copyboard cover mode the size sensors must be rearranged and the DIP SW701 on the image processor PCB must be set accordingl...

Page 603: ...m cartridge is mounted and about 2000 copies are made Use it 1 0 in the following cases If a new drum cartridge has been installed and the copier has been turned on If COPIER FUNCTION D GAMMA has been executed in service mode If the setting has been changed for this item Enables or disables a mechanism to prevent flickering of the fluorescent lamp caused by a site environmental factor Select this ...

Page 604: ... increases the control temperature for fixing regardless of cassette selection to improve fixing n If set to 2 the following will take place Increased Control Temperature at standby 190 C 195 C during operation 195 C 200 C Increased Initial Multiple Rotation Period 2 5 sec 20 sec Increased initial Rotation Start Temperature 100 V model 170 C 195 C 120 230 V model 190 C 195 C n Thick Paper Mode Pic...

Page 605: ...les Description Changes the upper limit for the number of copies Any number may be set Enables or disables the sleep function Use it to enable or disable the shift to sleep state Enables or disables a warning on the Basic screen when the fixing cleaning belt starts to run out timing 145 000th copy in terms of a4 A warning will be indicated before starting service mode Switches copy delivery betwee...

Page 606: ...ndication of the paper name for the U size cassette 0 If the cassette paper size dial is set to U2 through U8 the LCD will indicate U2 through U8 1 If the cassette paper size dial is set to U2 through U8 the LCD will indicate the following U2 FOLIO FOLIO U3 A FLS FLS U4 G LTR LTR U5 D LTRR LTRR U6 G LGL LGL U7 K LGL LGL U8 K LGLR LGLR Selects the notation for the U1 size cassette See Table 14 808 ...

Page 607: ...3 24 25 26 27 28 29 30 31 32 33 34 35 36 37 38 39 40 Notation LGL K LGL K LGLR FLSC A FLS OFI E OFI B OFI A LTR A LTRR G LTR G LTR A LGL G LGL FOLI A OFI ALL Paper LEGAL KOREAN GOVERNMENT KOREAN GOVERNMENT R FOOLSCAP AUSTRALIAN FOOLSCAP OFICIO ECUADORIAN OFFICIO BOLIVIAN OFFICIO ARGENTINE LETTER ARGENTINE LETTER R GOVERNMENT LETTER GOVERNMENT LETTER R ARGENTINE LEGAL GOVERNMENT LEGAL FOLIO ARGENTI...

Page 608: ...0 330 REV 0 JAN 1999 PRINTED IN JAPAN IMPRIME AU JAPON 14 209 CHAPTER 14 TROUBLESHOOTING G PG test Print PG Display Adjust Function Option Test Counter I O Figure 14 816 Level 2 PG Level 3 TYPE TXPH Outline test print output test print mode switch ...

Page 609: ...osed by resetting 0 will automatically be set to return to normal copying mode Selecting the Source of Paper When a paper type is selected on the Initial screen paper will be picked up from the selected holder If auto selection no source is selected is enabled the topmost holder will be used 0 represents normal copying mode image from the CCD Selects the output mode for the test print selected by ...

Page 610: ...orrection Use it to check gradation fogging white lines and uneven density between left and right If the gradation is poor suspect a fault in the laser system If fogging is noted suspect a fault in the photosensitive drum developing system or laser If white lines bands are noted suspect a fault in the developing system or dirt on the transfer charging roller If white lines are noted suspect shadin...

Page 611: ...nes and uneven intervals If transfer faults vertical white spots are noted suspect dirt on the transfer charging roller or dirt on the separation static eliminator If black lines re noted suspect scratches on the drum or dirt on the primary charging roller 6 Solid Black Test Print Use it to check for white spots and white lines If white spots are noted suspect dirt on the transfer charging roller ...

Page 612: ...0 JAN 1999 PRINTED IN JAPAN IMPRIME AU JAPON 14 213 CHAPTER 14 TROUBLESHOOTING 7 Vertical Straight Line Test Print 8 Horizontal Straight Line Test Print Use it to check straight lines If the lines are not straight suspect a fault in beam detection No 7 No 6 ...

Page 613: ...imes the machine has operated To clear the counter reading 1 Press the item to highlight 2 Press the Clear key on the control panel The counter will be cleared to return to 00000000 In text the large and small sizes are defined as follows large size 300 mm long or more or non default size e g B4 or larger small size less than 300 mm long e g smaller than A4 TOTAL PICK UP FEEDER JAM SCANNER JAM PIC...

Page 614: ...fax mode scan counter for SCSI scan cassette 1 pick up total copy counter large size cassette 1 pick up counter small size cassette 1 pick up counter cassette 2 pick up total counter large size cassette 2 pick up counter small size cassette 2 pick up counter cassette 3 pick up total counter large size cassette 3 pick up counter small size cassette 3 pick up counter cassette 4 pick up total counter...

Page 615: ...WEB FIN STPL SDL STPL Outline feeder pick up total counter large size original feeder pick up total counter small size original feeder pick up total counter total jam count print jam count feeder original jam count sorter original jam count fixing cleaning belt counter finisher stapling count 1 point stapling 1 count 2 point stapling 2 counts saddle finisher stapling count 1 point stapling 1 count...

Page 616: ...T CLN SIZE SW SCAN SEL Outline feeder original size display top pick up original stop position adjustment bottom pick up original stop position adjustment sheet to sheet distance for top pick up adjustment sheet to sheet distance for bottom adjustment DADF sensor auto sensitivity adjustment initialization DADF top pick up separation belt cleaning mode DADF bottom pick up separation belt cleaning m...

Page 617: ...tting If the original is to the right of the V marking decrease the setting Selects sheet to sheet distance for top pick up 1 Check to make sure that 0 is set to COPIER OPTION FACE DOWN 2 Select the item and place two originals on the original tray 3 Press the OK key The original will be fed and will be stopped on the copyboard glass 4 Adjust the distance between sheets If the distance is small in...

Page 618: ...re the same as those made using the DIP switch on the DADF controller PCB 1 Remove the DADF controller cover and find out the location of LED 1 2 2 Select the item and press the OK key 3 Check that the machine executes the mode and stops automatically Executes separation belt cleaning mode for DADF top pick up n Operation 1 Select UBLT CLN to highlight 2 Moisten the center of paper with solvent an...
Page 619: ...scription Enables or disables AB Inch mix document size detection 0 disables detection 1 enable detection Enables or disables the original size detection for non default size 0 disables detection normal copying mode 1 enables detection priority on paper mode OPTION FEEDER Level 3 SIZE SW SCAN SEL REf Factory setting 0 Factory setting 0 ...

Page 620: ...HAPTER 14 TROUBLESHOOTING J SORTER finisher saddle stitcher 1 1 READY BLNK SW OK 1 1 0 1 Display Adjust Function Option Test Counter I O Figure 14 819 SOTER Items Level 1 OPTION Level 3 BLNK SW Outline folding position side margin set for saddle stitcher Note Under SORTR only the following mode is used OPTION ...

Page 621: ...NON INC CANON imageRUNNER 400 330 REV 0 JAN 1999 PRINTED IN JAPAN IMPRIME AU JAPON Description Sets the margin W on both sides of the line of folding when the saddle stitcher is used 0 normal width 5 mm 1 large width 10 mm OPTION Level 3 BLNK SW REf W ...

Page 622: ... panel Copier DADF A1 Cassette Feeding Unit R1 S1 Multi Output Tray D1 Finisher C1 Saddle Finisher C2 Finisher E1 Paper Deck B1 SCSI Interface Board D1 Printer Board Error code E000 E001 E002 E003 E004 E005 E010 E014 E030 E032 E051 E064 E100 E110 E191 E202 E220 E240 E241 E243 E261 E300 E301 E315 E604 E605 E674 E710 E711 E712 E713 E717 E803 E805 E400 E401 E402 E403 E404 E411 E716 E901 E540 E500 E50...

Page 623: ...ff and then on the main power 2 Error codes other than the above may be reset by turning off and then on the main power n Detail Code Some error codes offer detail codes which may be checked in service mode COPIER DISPLAY ERR 3rd block from the right OK Display I O Adjust Function Option Test Counter ERR 1 3 READY AA BBBB CCCC DDDD EEEE FFFF G HH AA BBBB CCCC DDDD EEEE FFFF G HH AA BBBB CCCC DDDD ...

Page 624: ...or PCB has a fault The fixing temperature does not reach a specific value The thermistor TH1 TH2 is not mounted properly has poor contact or has an open circuit The fixing heater has an open circuit or has a crack The fixing heater drive circuit has a fault The DC controller PCB has a fault The image processor PCB has a fault The fixing temperature has dropped abnormally The thermistor TH1 TH2 is ...
Page 625: ...ler has an error The DC controller PCB has a fault The image processor PCB has a fault The horizontal registration home position detection mechanism has a fault The horizontal registration sensor PS10 has a fault The horizontal registration motor M9 has a fault The DC controller PCB has a fault Description The fixing heater remains on The fixing temperature has increased abnormally The heater rela...

Page 626: ...er PCB has a fault The communication on the image processor PCB has a fault The communication between the DC CPU and the IP CPU has an error Description The difference between the output prescribed by the high voltage control signal and the high voltage output actually generated is more than a specific value Either the primary charging roller transfer charging roller or developing bias has an outp...

Page 627: ...lt The expansion memory is not mounted properly The image memory battery has a fault The battery has a fault The image memory battery is an accessory to the FAX board The fax unit has a fault The chip has a fault The fax unit has poor connection Description A communication error is detected between the CPU on the control panel and the image processor PCB The intervals of the zero cross signal devi...

Page 628: ...fault The accessory IPC chip has a fault The communication with the feeder has a fault The sorter IC has an error The communication with the pedestal has a fault The communication with the copy data controller has a fault Description An error has occurred in the communication between the printer board and the IP CPU The power on signal from the printer board does not reach the image processor PCB ...

Page 629: ...FM7 System cooling fan FM8 Low voltage power supply cooling fan 1 FM10 Low voltage power supply cooling fan 2 FM11 Reader cooling fan 1 FM12 Reader cooling fan 2 FM13 Drum cartridge cooling fan 1 Drum cartridge cooling fan 2 Drum cartridge cooling fan 3 DC controller PCB cooling fan Scanner motor cooling fan Description The output voltage of the composite power supply PCB 24 VU 24 VR has an error ...

Page 630: ...eder motor M5 does not rotate The feeder motor clock sensor S13 has a fault The original tray paper sensor S1 has a fault The registration sensor S3 has a fault Description The communication is monitored at all times and this error is identified when the communication is interrupted for 5 sec or more A flag is attached to the shaft of the pick up motor M1 and the rotation of the motor is detected ...

Page 631: ...ply has a fault The pedestal motor M20 has a fault The pedestal controller PCB has a fault Description The communication IC Q101 on the pedestal controller PCB is out of order The pedestal motor does not rotate at a specific speed within 10 sec after it has turned on The pedestal motor speed deviates D Multi Output Tray D1 Code E540 Cause The shift tray home position sensor fails Description The h...
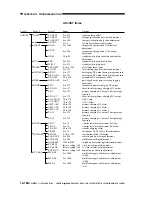
Page 632: ...communication between the height sensor and the finisher controller is not possible Or the communication data has an error The communication between the sensor and the finisher controller PCB is not possible for a specific period or more The disconnection of the sensor connector is detected at time of power on The sensor adjustment made by a DIP switch has an error The check sum has an error at po...
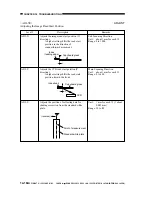
Page 633: ... even when the stapler motor has been driven for 0 5 sec The stapler does not leave the home position even when the stapler motor has been driven for 0 5 sec The stapler does not leave the stapler shift home position even when the stapler shift motor has been driven for 4 sec The stapler shift home position cannot be detected even when the stapler motor has been driven for 4 sec The swing guide cl...

Page 634: ...en for 15 sec The tray upper limit detecting switch turned on while the tray is moving upward The clock sensor 1 2 does not generate clock pulses for 200 msec or more even when the tray lifter motor has been driven The shutter closed detecting switch does not turn on even when the feeder motor has been driven in reverse for 1 sec or more The shutter open sensor does not turn on even when the feede...

Page 635: ...ore The guide home position sensor does not turn off even when the guide motor has been driven for 1 sec or more The alignment plate home position sensor does not turn on even when the alignment motor has been driven for 0 5 sec or more The alignment plate home position sensor does not turn off even when the alignment motor has been driven for 1 sec or more The stitching home position switch does ...

Page 636: ...or does not turn on even when the paper pushing plate motor has been driven for 1 0 sec or more During a shift to the paper pushing plate leading edge position the paper pushing plate home position sensor does not turn on when the paper pushing plate motor has been driven for 1 0 sec or more During a shift from the paper position plate leading edge position to home position the paper pushing plate...

Page 637: ...s detect that the doors are open Inlet door sensor PI9S Front door open sensor PI2S Delivery door open sensor PI3S The front door open detecting switch detects that the front door is open for 1 sec or more from the start of copying or from the start of the copier s initial multiple rotation while the following three cover photointerrupers detect that the doors are closed Inlet door sensor PI9S Fro...

Page 638: ...r controller PCB is faulty Description The communication between the copier and the finisher has been interrupted for 5 sec or more The delivery clock sensor S1 signals are not detected when the delivery motor M1 has been driven for a specific period of time or more equivalent of 70 mm 80 pulses The stack delivery lever does not reach the stack lever home position sensor S8 when the stack processi...

Page 639: ...e aligning plate home position sensor when the front alignment motor M3 has been driven for a specific period of time The aligning plate doe not leave the aligning plate home position sensor S6 after the front alignment motor M3 has been driven for a specific period of time The returning roller does not reach the home position even when the stack processing motor M2 has been driven long enough to ...

Page 640: ...or PS107 has a fault The deck main motor M101 has a fault The side deck driver PCB has a fault The DC controller has a fault Description The deck lifter position sensor PS104 does not detect the lifter within 60 sec after the deck lifter up signal has been generated The deck paper supply position sensor PS107 is 0 when the deck lifter position sensor PS104 and the deck level sensor position PS108 ...

Page 641: ...n an initial check is made for communication When a check is made for communication initialization When a check is made for communication initialization When a check is made for communication initialization If no response comes from the SCSI board within a specific time when the machine sends a command to the SCSI board If no response comes from the machine to the SCSI board within a specific time...

Page 642: ... 330 REV 0 JAN 1999 PRINTED IN JAPAN IMPRIME AU JAPON A GENERAL TIMING CHART A 1 B SIGNAL NAME ABBREVIATION LIST A 3 C GENERAL CIRCUIT DIAGRAM A 7 D SIDE PAPER DECK GENERAL CIRCUIT DIAGRAM A 13 E SPECIAL TOOLS A 15 F SOLVENTS AND OILS A 17 APPENDIX ...

Page 643: ...emperature control Main motor Fixing heater Primary charging roller bias DC component Transfer charging roller Separation static eliminator Developing bias DC component Developing bias AC component Transfer guide bias Primary charging roller bias AC component Scanning lamp Scanner motor Scanner HP sensor Laser exposure Laser scanner motor Shading measurement Developing clutch Pick up motor Cassett...

Page 644: ...ery Duplexing reversal motor Double speed rotation Reversal double speed rotation COPY Main motor Fixing heater Primary charging roller bias DC component Transfer charging roller Separation static eliminator Developing bias DC component Developing bias AC component Transfer guide bias Primary charging roller bias AC component Scanning lamp Scanner motor Scanner HP sensor Laser exposure Laser scann...

Page 645: ...TCH DRIVE command DEVELOPING CLUTCH DRIVE command COUNTER DRIVE 1 command COUNTER DRIVE 2 command COUNTER DRIVE 3 command CASSETTE 1 SIZE DETECTION signal 0 CASSETTE 1 SIZE DETECTION signal 1 CASSETTE 1 SIZE DETECTION signal 2 CASSETTE 1 SIZE DETECTION signal 3 CASSETTE 1 SIZE DETECTION signal 4 CASSETTE 2 SIZE DETECTION signal 0 CASSETTE 2 SIZE DETECTION signal 1 CASSETTE 2 SIZE DETECTION signal ...

Page 646: ... signal ENVIRONMENT SENSOR TEMPERATURE signal ENVIRONMENT SENSOR HUMIDITY signal SEPARATION STATIC ELININATOR ON command LOWER CASSETTE PAPER DETECTION signal MAIN MOTOR DRIVE command MAIN MOTOR LOCK signal LASER SCANNER MOTOR DRIVE command LASER SCANNER MOTOR LOCK signal MULTIFEEDER PAPER WIDTH signal PRE CONDITIONING EXPOSURE LAMP LIT signal FLUORESCENT LAMP PRE THEMISTOR signal FLUORESCENT LAMP...

Page 647: ...DRIVE signal MULTI FEED ROLLER SOLENID DRIVE signal PRIMALY CHARGING ROLLER CLEANING SOLENOID DRIVE signal FIXING CLEANING BELT DRIVE SOLENOID DRIVE signal FIXING ASSEMBLY GUIDE DOWN SOLENOID DRIVE signal FIXING ASSEMBLY GUIDE UP SOLENOID DRIVE signal MAIN THEMISTOR DRIVE command SUB THEMISTOR SUB THEMISTOR TONER ENPTY signal UPPER CASSETTE PAPER DETECTION signal CASSETTE VERTICAL PATH PAPER DETEC...

Page 648: ...APPENDIX A 6 COPYRIGHT 1999 CANON INC CANON imageRUNNER 400 330 REV 0 JAN 1999 PRINTED IN JAPAN IMPRIME AU JAPON ...

Page 649: ... 2 J497 J498 F18 8 6 F19 FT33 FT32 1 1 2 3 5 4 3 2 1 15 14 13 12 11 12 11 0V H2 ERR H2 D H1 D H1 ERR 0V RELAY D 2 J497 J498 1 1 2 3 1 J496 2 3 1 J496 2 3 J141 J114 B J104 B 1 2 3 4 J143 1 2 J144 J442 J442 J444 J443 J443 SPC J59 VSS 24VU VSS 24VU VSS 24VU VSS 24VR VSS 24VU VSS 24VU FINISHER DADF VSS VSS 24V 24V VSS VSS 24V 24V J62 4 J62 3 J62 2 J62 1 VSS J64 4 J64 3 J64 2 J64 1 MT3 MT1 MT2 FA20 FA2...

Page 650: ...J44 J8 J430 J430 J431 J409 J427 J427 J409 J431 J408 J408 J441B J441B J402B J402B J9 J9 J10 J11 J11 J10 SL M2 ET4 ET3 FM1 SL5 J42 M J2 J441A J441A J402A J402A J2 J31 J31 J406 J406 A14 B14 J115 N C J414 J414 J415 J415 J410 J22 J22 J21 J26 J410 J405 J405 J12 TH2 16 N C N C PS8 TH1 J426 J426 J438 J438 J14 J73 PS40 J472 J472 J471 J471 J470 J470 J107 PS13 J106 B15 A15 J102 J424B J424B J424A J416 J416 J2...

Page 651: ...ANSFER 1 2 3 4 12 11 4 3 9 8 7 6 5 4 3 2 1 0V 24V 0V ASSRXD ASSTXD ASSCNTP 5V 0V M FM16 FM15 FM13 FM12 FM14 J447 J447 M4 J46 J24 J114 J436 J436 J56 J56 J58 J58 J60 J60 J67 J67 J55 J55 J411 J411 J36 J15 J15 J413J413 J420J420 J36 SL SL SL4 SL6 FT31 FT33 FT32 FT30 J412 RL J54 J54 J601 J600 J105 J116 J101 J119 J28 J28 B13 A13 15 J104 J113 J109 8 B20 A20 M3 1 2 3 4 5 1 2 3 4 5 2 1 1 2 3 4 5 J118 J458 J...

Page 652: ...GT2 GND B1 B2 B3 B4 B5 B6 B7 B8 B9 B10 B11 B12 B13 B14 B15 B1 B2 B3 B4 B5 B6 B7 B8 B9 B10 B11 B12 B13 B14 B155V 5V BKLTON LP VSS YD VSS WF VSS LCD ENBL VSS PANEL TXD VSS PANEL RXD VSS B20 B19 B18 B17 B16 B15 B14 B13 B12 B11 B10 B9 B8 B7 B6 B5 B4 B3 B2 B1 B20 B19 B18 B17 B16 B15 B14 B13 B12 B11 B10 B9 B8 B7 B6 B5 B4 B3 B2 B1SELIN AUXOUT4 AUXOUT3 AUXOUT2 FAULT INIT VSS VSS VSS VSS VSS VSS VSS VSS VS...

Page 653: ...11 12 1 2 3 4 5 6 7 5 4 7 6 J66 J66 3 2 1 1 2 3 4 2 3 1 J59 J59 4 MT11 A1A2 A3 A4 J90A A5 A6 A7 B1B2 B3 B4 J90B J90 B5 C1C2 C3 C4 J90C B6 B7 B8 S CLK GND TX END DOUT RX LOAD S DIN EN FG 6 7 8 9 10 11 12 GND 5V GND 24V ET9 MT12 A1A2 A3 A4 J91A A5 A6 A7 B1B2 B3 B4 J91B J91 B5 C1C2 C3 C4 J91C B6 B7 B8 S CLK GND TX END DOUT RX LOAD S DIN EN FG ET9 GND 38V GND 24V J57 4 J57 3 J57 2 J57 1 VSS VSS 3 4V 5...

Page 654: ...7 VSS 3 4V VSS 5 1V VSS 12V 15V VSS 3 4V VSS 5 1V VSS 15V 1 2 3 4 5 1V VSS VSS 15V VSS ADCLK 1 2 3 4 5 6 7 8 9 10 11 12 13 14 15 16 17 18 19 20 21 22 23 24 25 26 27 28 29 30 31 32 33 34 35 36 37 38 39 40 1 2 3 4 5 6 7 8 9 10 11 12 13 14 15 16 17 18 19 20 21 22 23 24 25 26 27 28 29 30 31 32 33 34 35 36 37 38 39 40VSS EVEN7 EVEN6 EVEN5 EVEN4 VSS EVEN3 EVEN2 EVEN1 EVEN0 VSS ODD7 ODD6 ODD5 ODD4 VSS OD...

Page 655: ...1 2 3 1 3 NC 3 MID 3 MID 2 1 2 1 2 1 6 5 4 3 2 1 NC 6 5 8 7 C3 C4 C1 C2 4 4 5 6 1 2 1 2 3 7 9 1 3 5 6 8 10 2 4 7 9 1 3 5 6 8 10 2 4 7 9 1 3 5 6 8 10 2 4 7 9 1 3 5 6 8 10 2 4 7 9 1 3 5 6 8 10 2 4 4 5 6 7 1 2 3 1 3 2 4 5 6 1 2 3 10 11 12 7 8 4 5 6 1 2 3 7 8 9 4 5 6 1 2 3 10 11 12 13 14 7 8 9 4 5 6 1 2 3 10 11 12 13 7 8 9 1 10 9 4 3 2 5 4 3 2 1 8 7 6 10 11 12 13 14 9 5 4 3 2 NC NC 1 8 7 6 4 2 1 3 1 2...

Page 656: ...A 14 COPYRIGHT 1999 CANON INC CANON imageRUNNER 400 330 REV 0 JAN 1999 PRINTED IN JAPAN IMPRIME AU JAPON ...

Page 657: ...4 5 Remarks For making electrical checks e g when adjusting laser intensity together with the Laser Power Checker For adjusting the position of No 1 No 2 mirror For adjusting images and making checks For shading correction 20 sheets pack Tool name Digital Multimeter Door Switch Actuator Mirror Positioning Tool front rear NA 3 Test Sheet Standard White Paper Rank A A B A B Tool No FY9 2002 000 TKN ...

Page 658: ...i e serving as an attachment to a meter For making electrical checks i e serving as an attachment to a meter Tool name Pulley Clip Tester Extension Pin Tester Extension Pin L shaped tip Rank C A A Tool No FY9 3037 000 FY9 3038 000 FY9 3039 000 View Rank A Each service person is expected to carry one B Each group of five or so service persons is expected to carry one C Each workshop is expected to ...

Page 659: ...bricating oil Lubricating oil Uses Cleaning e g glass plastic rubber external covers Cleaning e g metal removing oil or toner Lubricating e g fixing drive assembly Lubricating e g scanner rail spring clutch Lubricating e g pickup assembly feeding roller bushing FS2 1005 000 Lubricating e g friction parts Composition Fluorine family hydro carbon Alcohol Surface activating agent Water Fluorine famil...

Page 660: ...0996S9 9 1 PRINTED IN JAPAN IMPRIME AU JAPON This publication is printed on 70 reprocessed paper ...

Reviews: