CHAPTER 14 TROUBLESHOOTING
14-26
COPYRIGHT © 1999 CANON INC. CANON imageRUNNER 400/330 REV.0 JAN. 1999 PRINTED IN JAPAN (IMPRIME AU JAPON)
2) Select <
PD-ME
> under <PD-DENSE>; then, press the OK key.
The scanner makes 13 scans.
3) After reading operation, PD auto density correction ends when OK is indicated to the right of
<
PD-ME
>. If NG, check the following:
Is the original placed correctly?
Is the original the PD-DENS output? (The patches are black.)
After checking the above, execute PD-DENS once again. If still NG, go to the next page.
d. Executing DZ-DENS
1) Select COPIER>FUNCTION>DENS>
DZ-DENS
; then, press the OK key.
A 15-gradation pattern will be generated. (The patches are white.)
e. Executing DZ-ME
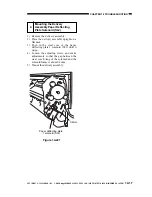
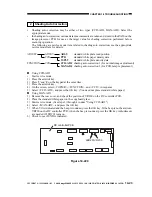
1) Remove the PD-DENS output (black patches), and place the DZ-DENS output (white patches)
on the copyboard glass.
Figure 14-232
2) Select <
DZ-ME
> under DZ-DENS, and press the OK key.
The scanner makes 13 scans.
3) After read operation, PD auto density correction ends when OK is indicated to the right of
<
DZ-ME
>. If NG, check the following:
Is the read original placed correctly?
Is the read original the DZ-DESN output? (The patches are white.)
After checking the above, execute DZ-DENS once again. If still NG, go to the next page.
In practice, place the
printed side down.
DZ-DENS output

