COPYRIGHT © 1999 CANON INC. CANON imageRUNNER 400/330 REV.0 JAN. 1999 PRINTED IN JAPAN (IMPRIME AU JAPON)
9-27
CHAPTER 9 FIXING SYSTEM
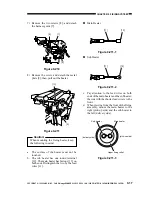
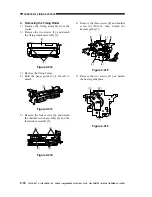
3. Attaching the Fixing Cleaning Belt
The fixing cleaning belt service part
consists of a feed shaft, take-up shaft, and belt.
Attach the cleaning belt by reversing the
steps used to detach it with the following in
mind:
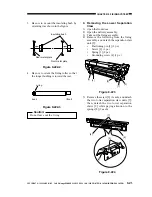
a. Wind the cleaning belt around the take-up
shaft five to ten times.
At this time, check that the area coming
into contact with the roller is impregnated
with oil.
Figure 9-236-1
Caution:
Check the fixing belt to see that it is not
slack or wrinkled and it is not wound
askew.
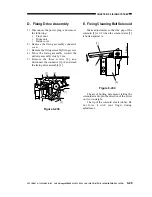
b. After attaching the fixing belt, insert a
small flat-blade screwdriver into the
fixing belt drive shaft, and turn it
counterclockwise until the slack is
removed.
Figure 9-236-2
Caution:
Do not loosen the screw on the cleaning
belt adjusting plate; otherwise, you
would need to adjust the adjusting plate.


