CHAPTER 10 EXTERNALS/AUXILIARY MECHANISMS
10-24
COPYRIGHT © 1999 CANON INC. CANON imageRUNNER 400/330 REV.0 JAN. 1999 PRINTED IN JAPAN (IMPRIME AU JAPON)
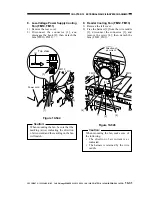
E. Composite Power Supply
PCB
1) Disconnect the power plug; then, remove
the rear cover and the flywheel.
2) Remove the two screws, and detach the
connector mount [1].
3) Disconnect the connector [2], and remove
the relay 3 form the power supply mount.
4) Remove the two screws [5], and
disconnect all connects; then, detach the
composite power supply.
Figure 10-523
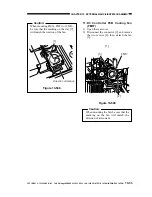
F. Low-Voltage Power Supply
PCB
1) Remove the right cover.
2) Remove the two screws, and disconnect
all connectors; then, remove the power
cord mount [1].
Figure 10-525
Figure 10-524
3) Remove the screw [4], and disconnect all
connectors; then, remove the low-power
supply PCB [3].
[5]
[1]
[2]
[3]
[4]
[1]
[2]
[3]
[4]
Caution:
When mounting the low-voltage power
supply, be sure that the insert at its
bottom is properly fitted to the copier's
bottom plate.


