COPYRIGHT © 1999 CANON INC. CANON imageRUNNER 400/330 REV.0 JAN. 1999 PRINTED IN JAPAN (IMPRIME AU JAPON)
12-33
CHAPTER 12 INSTALLATION
V. INSTALLING THE
COPY DATA
CONTROLLER-A1
1
Setting the Board
A. Copy Data Controller-A1
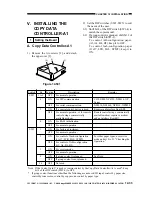
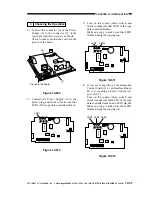
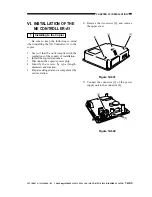
1) Remove the two screws [2], and detach
the upper over [1].
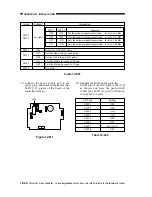
2) Set the DIP switches (SW1, SW5) to suit
the needs of the user.
2-1) Shift bit 4 of the DIP switch (SW1-4) to
match the copier model.
2-2) If group control is planned, shift bit 2 of
the DIP switch (SW5-2).
To control AB-configuration paper,
(A3, A4, B4, B5), keep it to OFF.
To control Inch-configuration paper
(11x17, LTR, LGL, STMT), keep it to
ON.
Figure 12-501
Switch
SW1
SW5
Description
For normal operation.
For IPC communication.
For serial communication.
If a central control device is used.
For normal operation, or for remote
control using a commercially
available modem.
For RAM initialization.
For normal operation.
For factory adjustment.
For normal operation.
For control of Inch-configuration
(11x17, LTR, LGL, STMT).
For control of AB-configuration
(A3, A4, B4, B5).
For service mode.
For normal operation.
If group control is planned.
If group control is not planned.
Not used.
bit
1 to 3
4
5
6
1
2
3
4
5, 6
Position
OFF
ON
OFF
ON
OFF
ON
OFF
ON
OFF
ON
OFF
ON
OFF
ON
OFF
OFF
Remarks
CL700/800, NP6750, NP6016, GP
Series
NP6030, NP6060, NP8530, NP9800
Requires an Interface Board-B1.
Remote control using a commercially
available modem requires a modem
and an Interface Board-B1.
For other paper types, use service
mode under 10) of 5. "Checking the
Operation."
See Note.
Note: If the Control Card V is used or remote control by the Copy Data Controller-A1 is used*, keep
bit 4 of the DIP switch (SW5-4) to OFF.
* If group control functions other than the following are not used: ID input, control by paper size,
control by toner color, control by copy mode, control by paper type.
[2]
[1]
[2]

